Selector Lever Cable And Bracket - Column Shift
Selector Lever Cable and Bracket - Column Shift
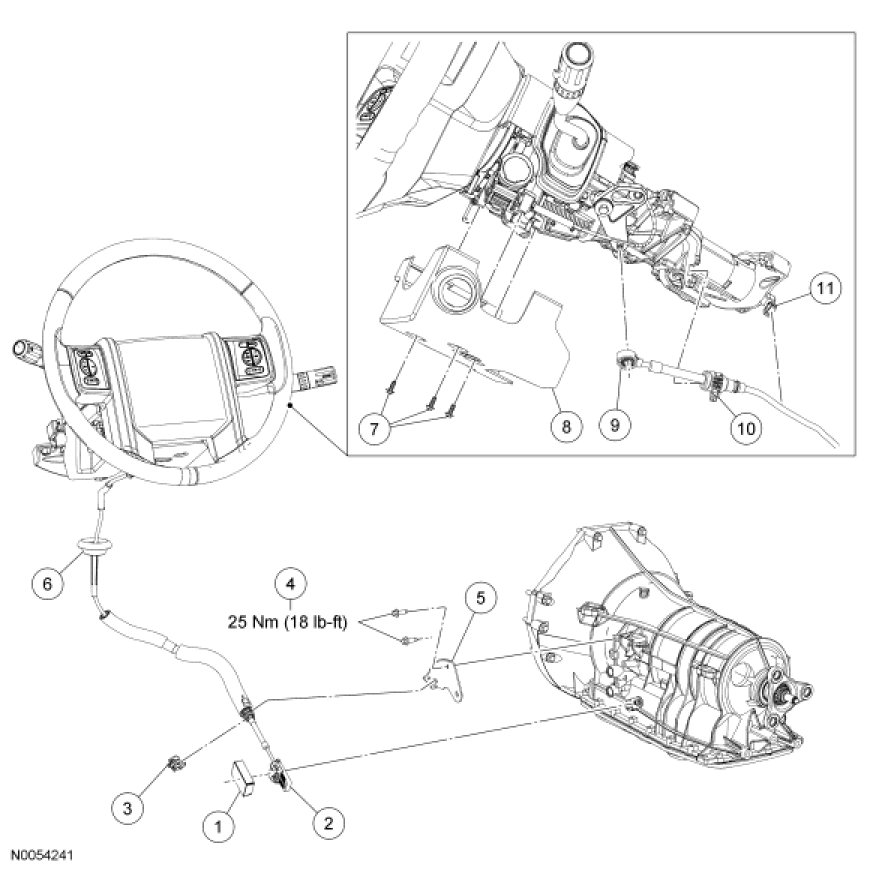
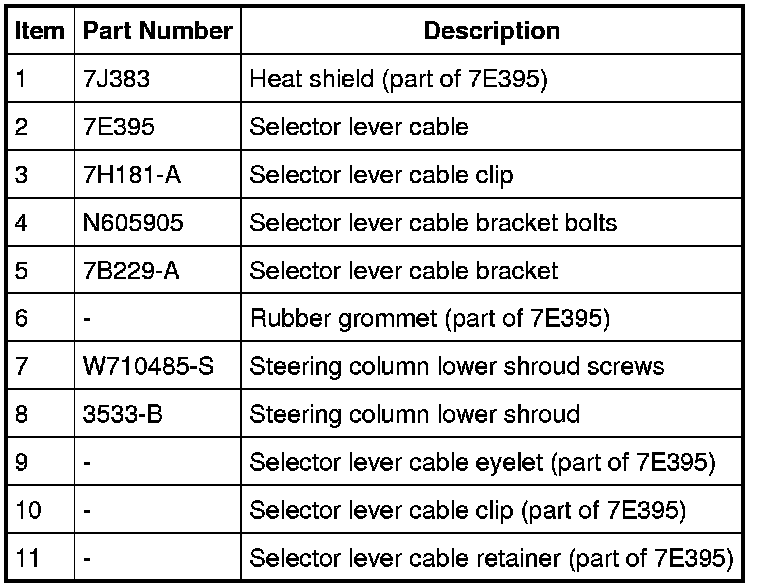
Removal
1. With the vehicle in NEUTRAL, position it on a hoist.
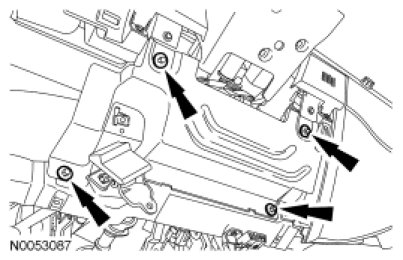
2. Remove the instrument panel lower finish panel.
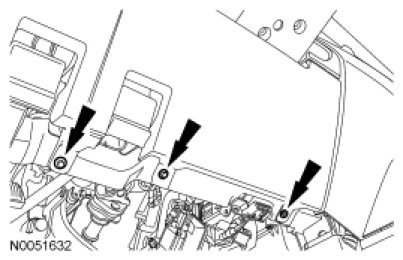
3. Remove the hood release cable lever.
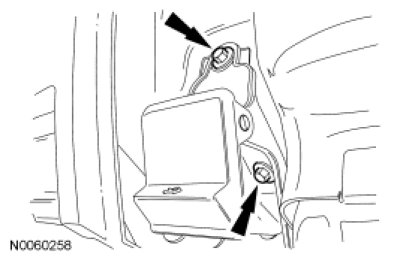
4. Remove the instrument panel lower reinforcement panel.
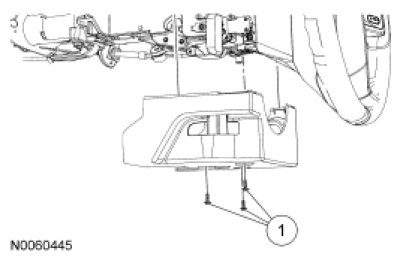
5. Remove the steering column lower shroud.
1. Remove the screws and the lower shroud.
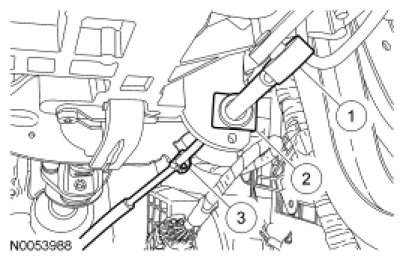
6. NOTICE: To prevent selector lever cable damage, do not apply force to the selector lever cable assembly between the steering column selector lever arm and the steering column bracket.
Disconnect the selector lever cable from the steering column.
1. Disconnect the selector lever cable from the selector lever arm ball stud.
2. Carefully lift the locking tab and disconnect the selector lever cable from the steering column bracket.
3. Disconnect the selector lever cable retainer.
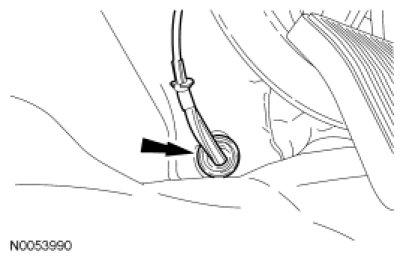
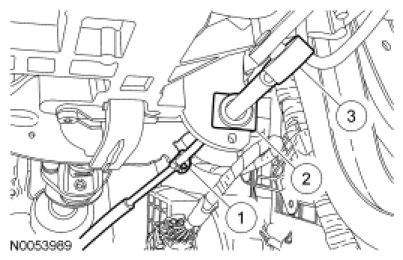
7. Push the rubber grommet and selector lever cable down through the dash panel.
8. If equipped, remove the heat shield.

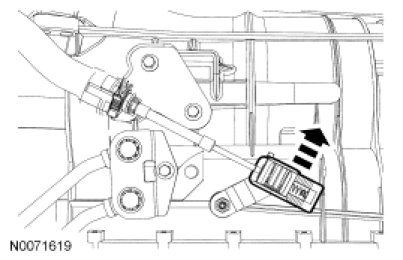
9. NOTICE: To prevent selector lever cable damage, do not apply force to the selector lever cable between the manual control lever and the selector lever cable bracket.
Move the locking tab up and disconnect the selector lever cable from the manual control lever ball stud.
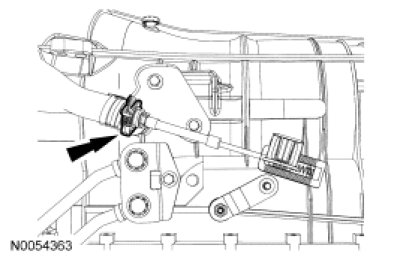
10. Remove the selector lever cable clip to release the selector lever cable from the selector lever cable bracket.
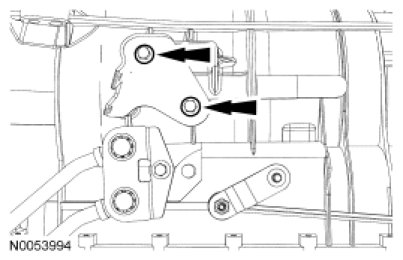
11. Remove the bolts and the selector lever cable bracket from the transmission.
Installation
1. Install the selector lever cable bracket and bolts onto the transmission.
- Tighten to 25 Nm (18 lb-ft).
2. NOTICE: To prevent selector lever cable damage, do not apply force to the selector lever cable between the manual control lever and the selector lever cable bracket.
NOTE: When installing the selector lever cable, make sure that the selector lever cable locking tabs are locked in place. Press the selector lever cable into the selector lever cable bracket and listen for the selector lever cable to click into place. Pull back on the selector lever cable to make sure that the selector lever is locked into the selector lever cable bracket.
Install the selector lever cable into the selector lever cable bracket.
3. NOTE: When installing the selector lever cable end, make sure that the selector lever cable end is correctly installed onto the manual control lever ball stud. Pull back on the selector lever cable to make sure that the selector cable end is correctly installed onto the manual control lever ball stud.
NOTE: Apply pressure to the selector lever cable end while connecting it to the manual control lever to make sure the selector lever has not moved out of the DRIVE position.
Connect the selector lever cable to the manual control lever ball stud.
- Listen for the audible click.
- Pull back on the selector lever cable to make sure that the selector lever cable is correctly installed.

4. Lock the selector lever cable lock tab.

5. NOTE: Install a new heat shield if it is loose on the cable.
If equipped, install the heat shield.
6. Push the selector lever cable and rubber grommet up through the dash panel.
7. NOTICE: To prevent cable damage, do not apply force to the selector lever cable assembly between the steering column selector lever arm and the steering column bracket.
Connect the selector lever cable onto the steering column.
1. Connect the selector lever cable retainer.
2. Connect the selector lever cable onto the steering column bracket.
- Listen for the audible click.
- Pull back on the selector lever cable to make sure that it is correctly installed.
3. Connect the selector lever cable onto the selector lever arm ball stud.
- Listen for the audible click.
- Pull back on the selector lever cable to make sure that it is correctly installed.
8. Install the steering column lower shroud.
1. Install the screws and the lower shroud.
9. Install the instrument panel lower reinforcement panel.
- Tighten to 9 Nm (80 lb-in).
10. Install the hood release cable lever.
- Tighten to 9 Nm (80 lb-in).
11. Install the instrument panel lower finish panel.
12. Adjust the selector lever cable. For additional information, refer to Selector Lever Cable Adjustment Adjustments.