Glow Plug Harness
Glow Plug Harness
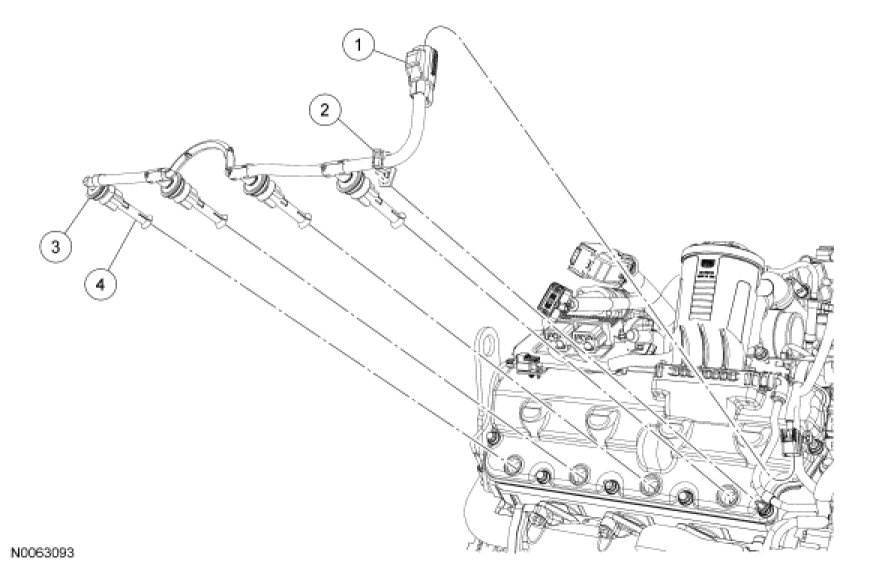
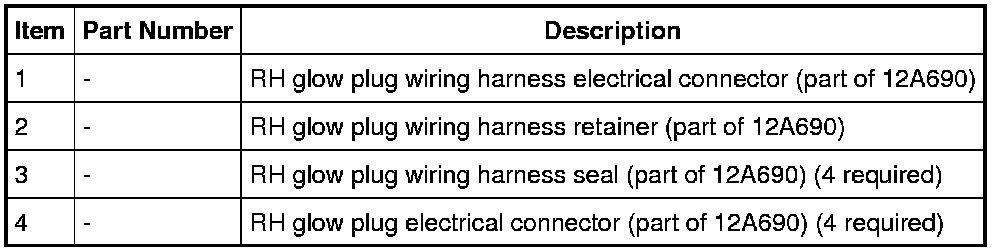
RH Glow Plug Wiring Harness
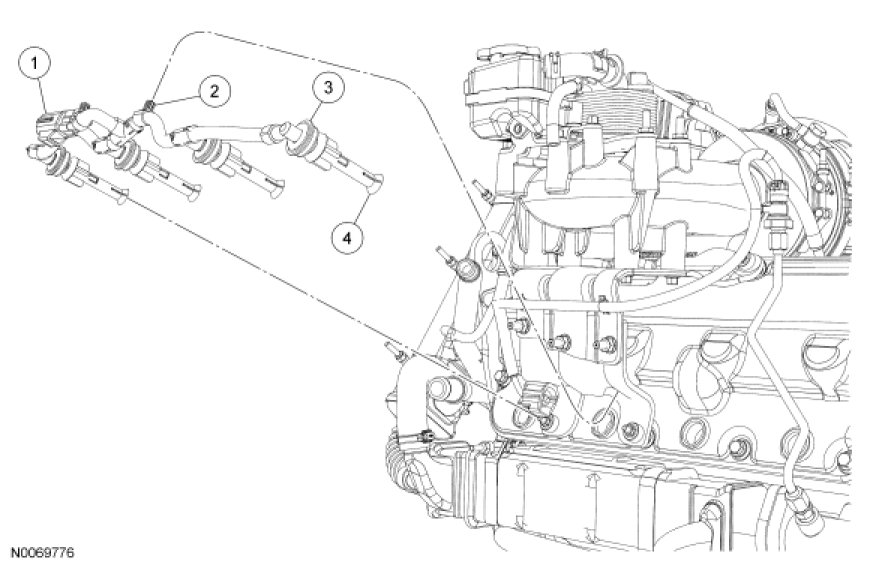
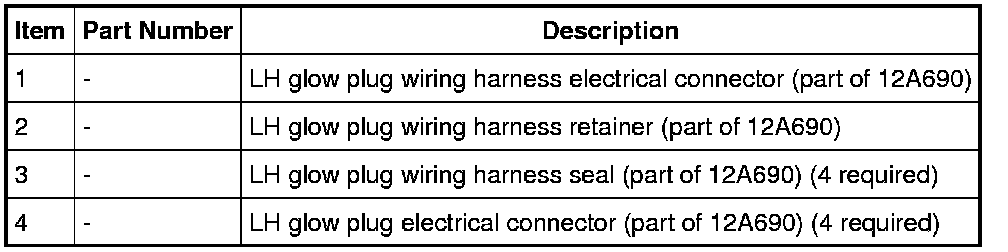
LH Glow Plug Wiring Harness
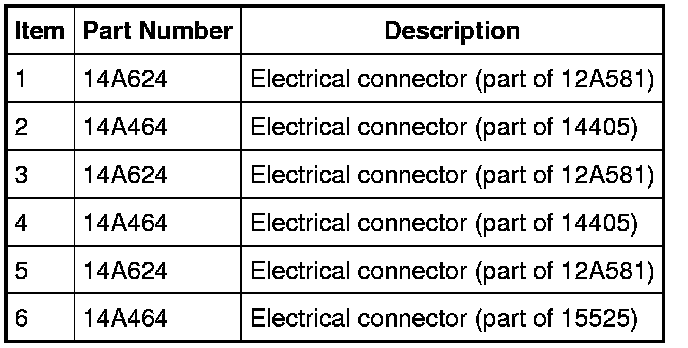
LH Frame Rail Electrical Connectors

Removal
Both sides
1. NOTICE: Make sure the ignition switch is in the OFF position prior to working on the glow plug system or the vehicle may be damaged.
Turn the ignition switch to the OFF position.
RH side
2. Remove the Air Cleaner (ACL).
3. Remove the RH fender splash shield.
LH side
4. Remove the LH fender splash shield.
5. Disconnect the 3 wiring harness in-line electrical connectors at the LH frame rail, detach the electrical connectors from the bracket and position the wiring harnesses aside.
Both sides
6. Detach the glow plug wiring harness retainers.
7. NOTICE: Do not disconnect the glow plug electrical connector before dislodging the seal from the valve cover or the wiring harness may be damaged.
NOTE: Use a tool such as a body bone or trim fork to dislodge the seal. Do not use a screwdriver.
Using an appropriate tool, dislodge the glow plug wiring harness seals from the valve cover.
8. Disconnect the glow plug electrical connectors by pulling on the glow plug wiring harness tee above the seal.
Installation
Both sides
1. Connect the glow plug electrical connectors and press the seals on the valve cover.
2. Attach the glow plug wiring harness retainer.
LH side
3. Connect the 3 wiring harness in-line electrical connectors at the LH frame rail and attach the electrical connectors to the bracket.
4. Install the LH fender splash shield.
RH side
5. Install the RH fender splash shield.
6. Install the ACL.