Installation
5R44E and 5R55E
Transmission
All vehicles
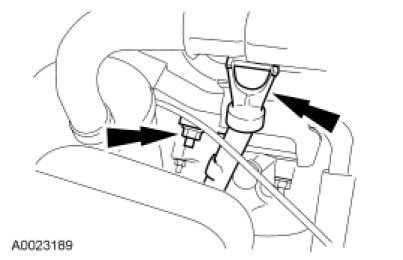
1. Install the vent tube assembly.
2. WARNING: Secure the assembly to the jack. Avoid any obstructions while lowering and raising the jack. Contact with obstructions may cause the assembly to fall off the jack, which may result in serious personal injury.
Raise and position the transmission.
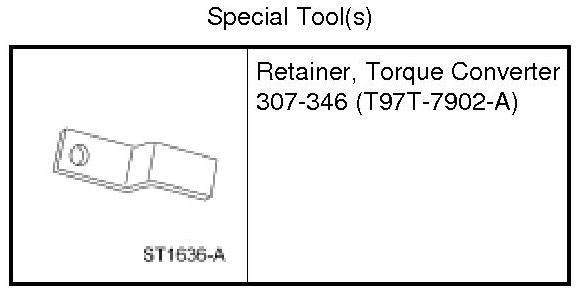
3. Remove the Torque Converter Retainer.

4.0L SOHC engine
4. NOTE: Align the flexplate to the converter marks made at removal.
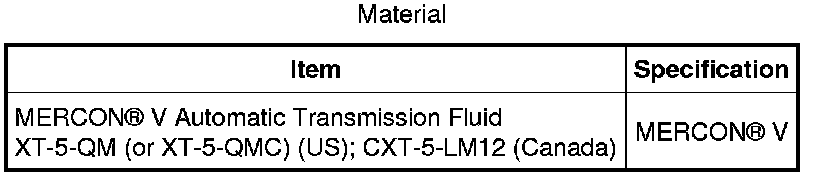
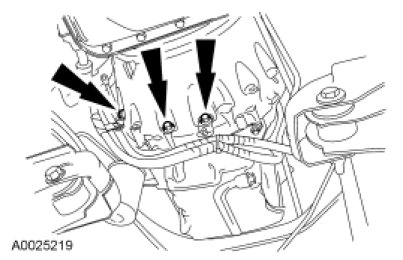
Install the converter-to-engine screws.
1. Install 2 M10 x 40 mm (1.574 in) screws.
2. Install 4 M10 x 50 mm (1.968 in) screws.
3. Install 2 M10 x 75 mm (2.952 in) screws.
- Tighten to 55 Nm (41 lb-ft).
2.3L engine
5. NOTE: Align the flexplate to the converter marks made at removal.
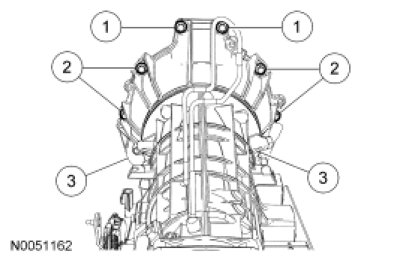
Install the converter housing-to-engine screws.
1. Install 1 M10 x 40 mm (1.574 in) screw.
2. Install 4 M10 x 50 mm (1.968 in) screws.
3. Install 2 M10 x 75 mm (2.952 in) screws.
- Tighten to 55 Nm (41 lb-ft).
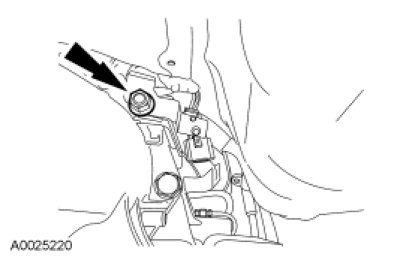
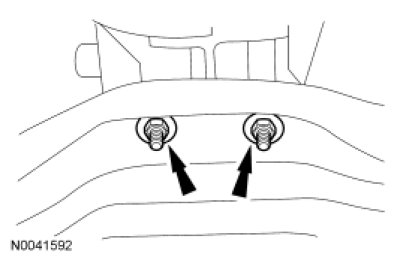
6. Install the upper transmission fluid filler tube and bracket screw.
1. Install the upper filler tube.
2. Install the M10 x 50 mm (1.968 in) screw.
- Tighten to 55 Nm (41 lb-ft).

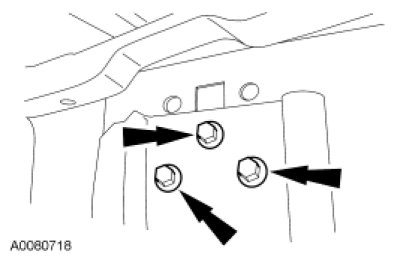
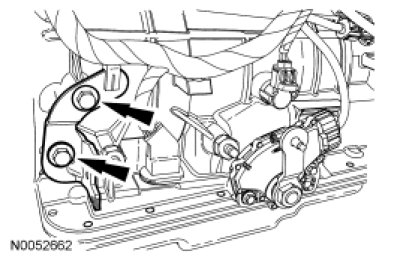
7. Install the lower converter housing-to-engine screws.
- Tighten to 55 Nm (41 lb-ft).
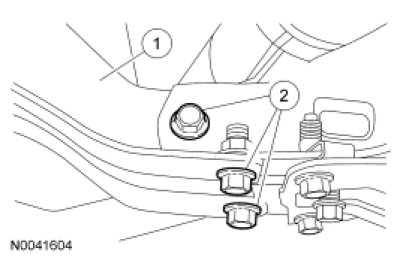
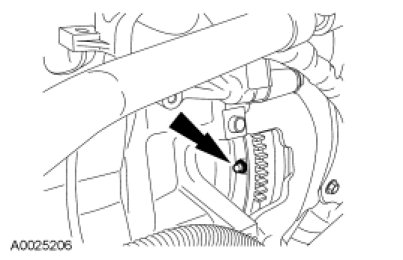
8. Install the Heated Oxygen Sensor (HO2S) connector bracket.
- Tighten to 20 Nm (177 lb-in).
9. Install the rear engine cover plate.
- Tighten to 10 Nm (89 lb-in).
Four-Wheel Drive (4WD) vehicles
10. Install the transfer case.
All vehicles
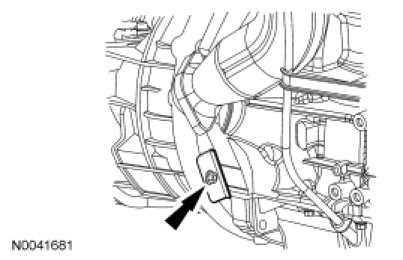
11. Install the transmission insulator.
1. Install the exhaust bracket.
2. Install the bolts.
- Tighten to 90 Nm (66 lb-ft).
Rear Wheel Drive (RWD) vehicles
12. Install the crossmember.
- Position the crossmember.
- Install the 6 bolts (3 each side).
- Tighten to 99 Nm (73 lb-ft).
4WD vehicles
13. Install the crossmember.
1. Position the crossmember.
2. Install the 6 crossmember bolts (3 each side).
- Tighten to 99 Nm (73 lb-ft).
All vehicles
14. Install the transmission insulator into the crossmember and tighten the nuts.
- Tighten to 90 Nm (66 lb-ft).
15. If equipped, install the rear vibration damper.
- Tighten to 30 Nm (22 lb-ft).
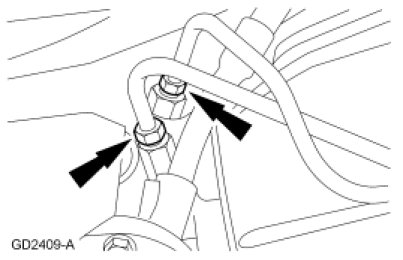
16. NOTICE: Care should be taken not to bend or damage the transmission fluid cooler tubes.
NOTE: Prior to installing the cooler lines to the case, inspect the O-ring seals. If damaged, new O-ring seals must be installed.
Hold the case fitting and install the transmission fluid cooler tubes.
- Tighten to 28 Nm (21 lb-ft).
4.0L SOHC engines
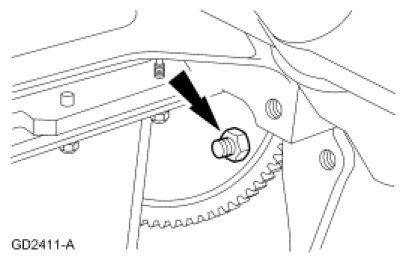
17. Install 4 new torque converter nuts.
- Rotate the crankshaft as needed to gain access to all the nuts.
- Tighten to 35 Nm (26 lb-ft).
2.3L vehicles
18. NOTICE: When installing the torque converter nuts, the crankshaft must be rotated only in the clockwise direction, otherwise engine damage may occur. The crankshaft, the crankshaft sprocket and the pulley are fitted together by friction between the flange faces on each part. For that reason, the crankshaft sprocket may also be moved when the crankshaft pulley is turned in the counterclockwise direction.
Install 4 new torque converter nuts.
- Rotate the crankshaft as needed to gain access to all the nuts.
- Tighten to 35 Nm (26 lb-ft).
All vehicles
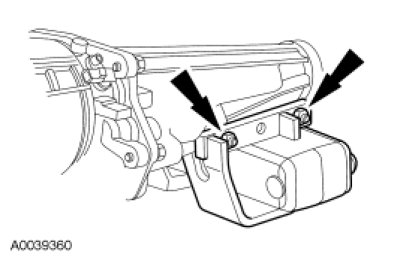
19. Install the starter motor.
4.0L SOHC engine
20. Install the exhaust Y-pipe.
2.3L engine
21. Install the exhaust down pipe.
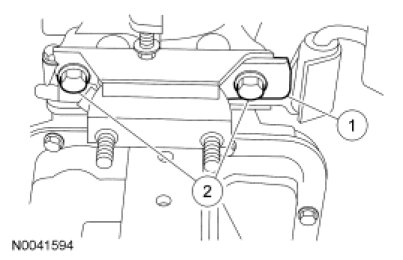
22. Install the selector lever bracket and bolts.
- Tighten to 40 Nm (30 lb-ft).
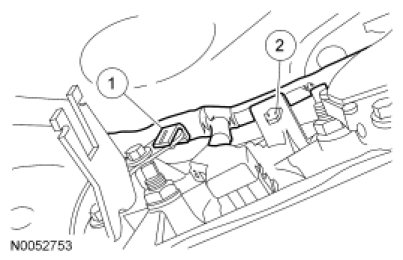
23. Position the transmission wiring harness in place.
1. Clip harness to the selector lever cable bracket.
2. Clip harness retainer to the case.
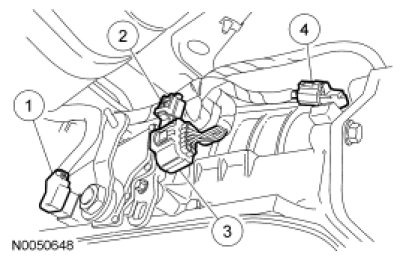
24. Connect the transmission wiring harness.
1. Connect the transmission connector.
2. Connect the intermediate shaft speed sensor.
3. Connect the Transmission Range (TR) sensor connector.
4. Connect the Output Shaft Speed (OSS) sensor.
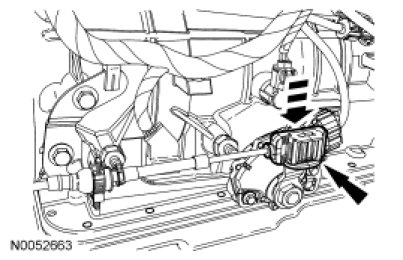
25. Move the manual lever into the NEUTRAL position.
1. Move the manual lever all the way counterclockwise.
2. Move the manual lever 3 detents clockwise.
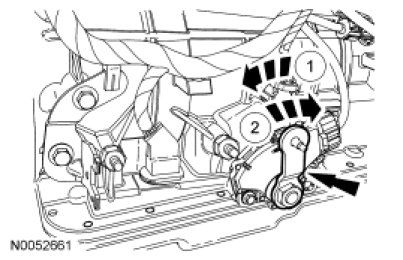
26. Install the selector lever into the bracket and install the clip.

27. Connect the selector lever cable onto the manual control lever and lock the end down.
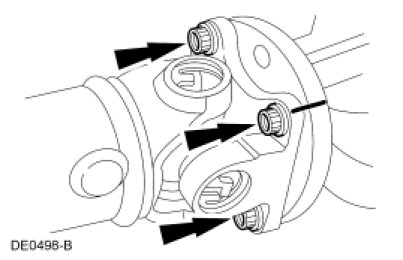
28. NOTE: Align the driveshaft yoke and the axle shaft marks made at removal to maintain driveline balance.
Align and install the rear driveshaft.

29. Install the driveshaft bolts.
- Tighten to 103 Nm (76 lb-ft).
30. Use the following guidelines for installing the in-line transmission fluid filter:
- If the transmission was overhauled and the vehicle was equipped with an in-line transmission fluid filter, install a new in-line transmission fluid filter.
- If the transmission was overhauled and the vehicle was not equipped with an in-line transmission fluid filter, install a new in-line transmission fluid filter kit.
- If the transmission is being installed for a non-internal repair, do not install an in-line transmission filter or filter kit.
- If installing a new or a Ford-authorized remanufactured transmission, install the in-line transmission fluid filter that is supplied.
Prior to lowering the vehicle, install a new in-line transmission filter or a filter kit. For additional information, refer to Transmission Filter - In Line Transmission Filter - In Line.
4.0L SOHC vehicles
31. Install the transmission fluid fill tube and indicator as an assembly.
- Tighten to 28 Nm (21 lb-ft).
All vehicles
32. NOTE: When the battery has been disconnected and reconnected, some abnormal drive symptoms can occur while the vehicle relearns its adaptive strategy. The customer must be notified that they may experience slightly different upshifts (either soft or firm) and that this is a temporary condition. The vehicle will eventually return to normal operating condition.
Connect the battery ground cable.
33. Fill the transmission with transmission fluid to the specified level.
34. Check the transmission for correct operation.
35. Verify that the selector lever cable is correctly adjusted.