Removal
5R44E and 5R55E
Transmission
NOTE: If the transmission is to be removed for a period of time, support the engine with a safety stand and a wood block.
All vehicles
1. With the vehicle in NEUTRAL, position it on a hoist.
2. NOTE: When the battery has been disconnected and reconnected, some abnormal drive symptoms can occur while the vehicle relearns its adaptive strategy. The customer needs to be notified that they may experience slightly different upshifts (either soft or firm) and this is a temporary condition that will eventually return to normal operating condition.
Disconnect the battery ground cable.
4.0L SOHC vehicles
3. Remove the transmission fluid level indicator tube bolt and remove the tube and indicator.
All vehicles
4. If transmission disassembly is required, drain the transmission fluid. For additional information, refer to Fluid Pan, Gasket and Filter Fluid Pan, Gasket and Filter.
Four-Wheel Drive (4WD) vehicles
5. Remove the transfer case.
All vehicles
6. To maintain initial driveshaft balance, mark the driveshaft yoke and axle flange so they can be installed in their original alignment.

7. Remove the 4 rear driveshaft bolts.
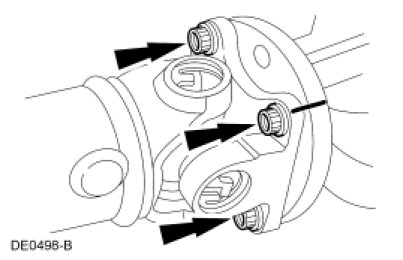
8. NOTE: Do not use a hammer.
Remove the rear driveshaft from the flange using a pry bar.

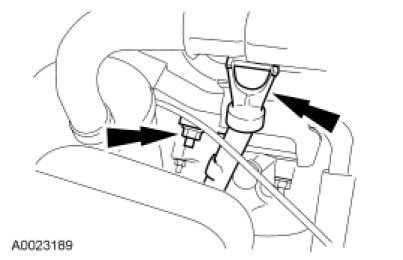
9. Remove the starter motor.
2.3L engine
10. NOTICE: When removing the torque converter nuts, the crankshaft must be rotated only in the clockwise direction, otherwise engine damage may occur. The crankshaft, crankshaft sprocket and the pulley are fitted together by friction between the flange faces on each part. For that reason, the crankshaft sprocket may also be moved when the crankshaft pulley is turned in the counterclockwise direction.
NOTE: It may be necessary to gain access to the flexplate nuts through the wheel well.
NOTE: Mark the torque converter and the flexplate for correct alignment at reinstallation.
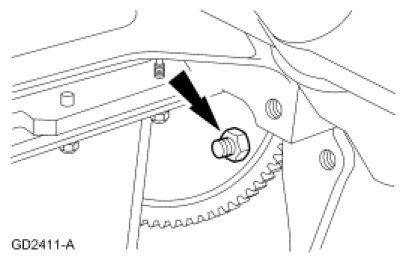
Remove and discard the 4 torque converter nuts.
- Rotate the flexplate to access all the nuts.
4.0L SOHC engines
11. NOTE: Mark the torque converter and the flexplate for correct alignment at reinstallation.
Remove and discard the 4 torque converter nuts.
- Rotate the flexplate to access all the nuts.
All vehicles
12. Remove the selector lever cable from the manual control lever.
13. Remove the selector lever cable clip, and remove the cable from the bracket.

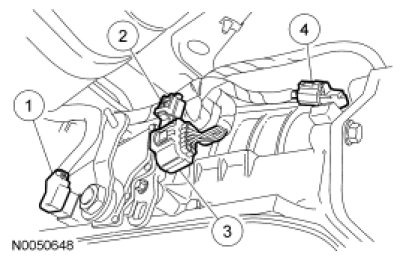
14. Disconnect the transmission wiring harness from the case.
1. Remove the wiring harness from the selector lever cable bracket.
2. Remove the selector lever cable retainer from the case.
15. Remove the selector lever bracket from the transmission.
16. Disconnect the transmission wiring harness.
1. Disconnect the transmission connector.
2. Disconnect the intermediate shaft speed sensor.
3. Disconnect the Transmission Range (TR) sensor connector.
4. Disconnect the Output Shaft Speed (OSS) sensor.
4.0L SOHC engine
17. Remove the exhaust Y-pipe.
2.3L engine
18. Remove the exhaust down pipe.
19. Remove the rear engine cover plate.
All vehicles
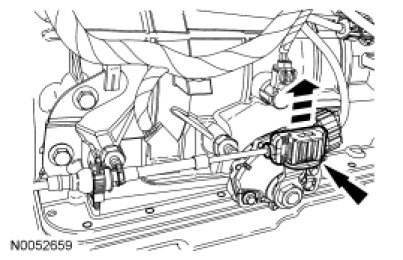
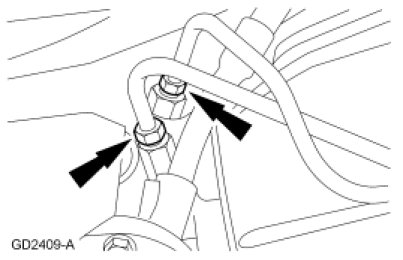
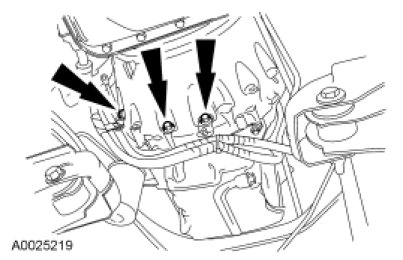
20. NOTICE: Care should be taken not to bend or damage the transmission fluid cooler tubes.
Hold the case fitting and remove the transmission fluid cooler tubes.
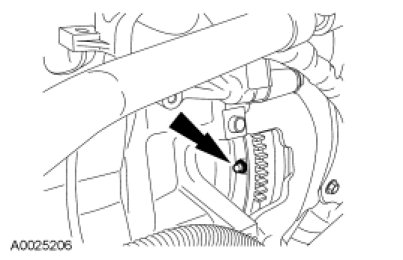
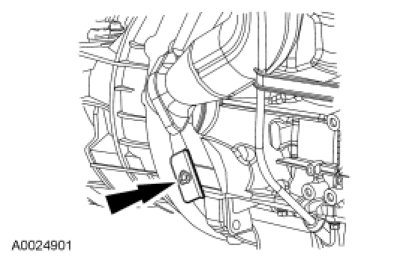
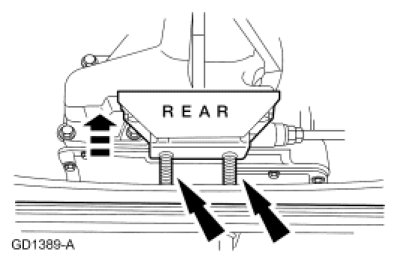
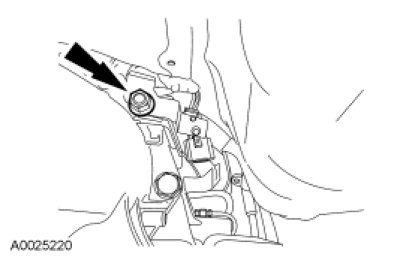
21. Remove the transmission insulator nuts.
22. NOTICE: Do not allow the transmission to hang freely or damage may occur.
Position the High-Lift Transmission Jack under the transmission. Raise and support the transmission.
Four-Wheel Drive (4WD) vehicles
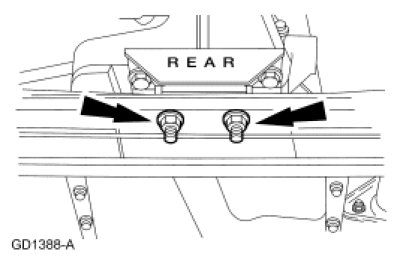
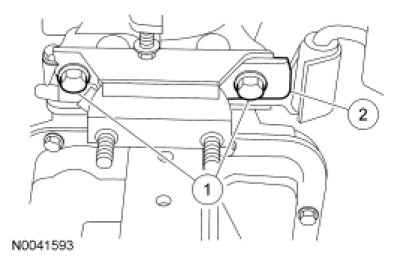
23. Remove the crossmember.
1. Remove the 6 bolts (3 each side).
2. Remove the crossmember.
Rear Wheel Drive (RWD) vehicles
24. Remove the crossmember.
- Remove the 6 bolts (3 each side).
- Remove the crossmember.
All vehicles
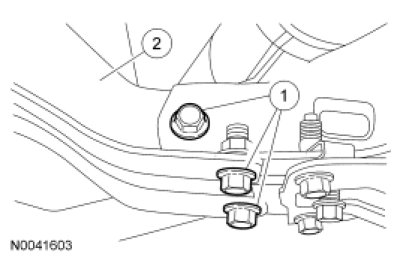
25. Remove the transmission insulator.
1. Remove the screws.
2. Remove the transmission insulator.
26. If equipped, remove the rear vibration damper.
2.3L engine
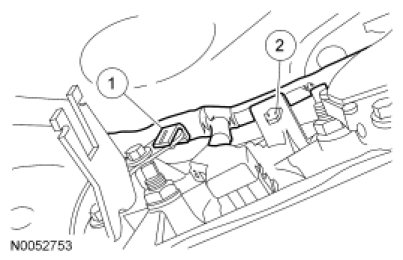
27. Remove the transmission upper fill tube.
1. Remove the screw.
2. Disconnect the transmission upper fill tube.
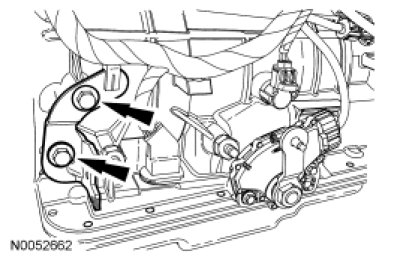
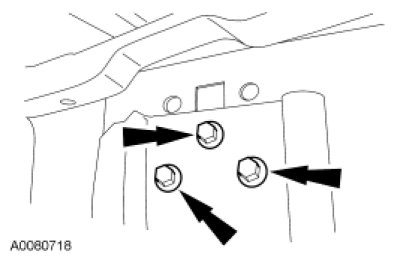
28. NOTE: Lower the High-Lift Transmission Jack to gain access to screws.
Remove the screws.
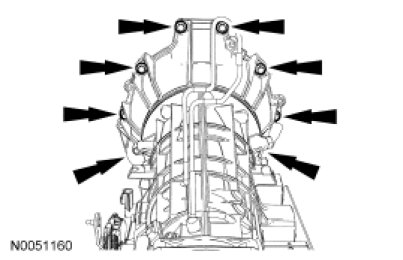
29. Remove the lower screws.
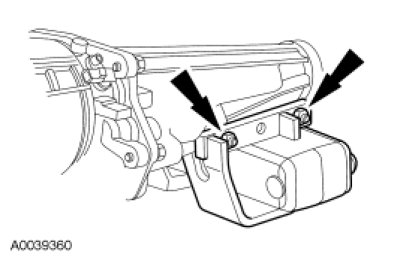
30. Remove the Heated Oxygen Sensor (HO2S) connector bracket from the transmission.
4.0L SOHC engine
31. NOTE: Lower the High-Lift Transmission Jack to gain access to screws.
Remove the screws.
All vehicles
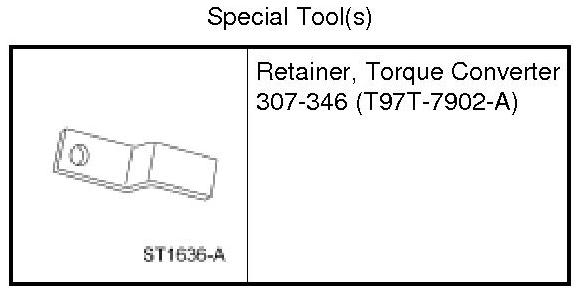
32. WARNING: Secure the torque converter in the transmission during removal or installation. The torque converter is heavy and may result in injury if it falls out of the transmission. Failure to follow this instruction may result in serious personal injury.
Install the Torque Converter Retainer before lowering the transmission from the vehicle.

33. WARNING: Secure the assembly to the jack. Avoid any obstructions while lowering and raising the jack. Contact with obstructions may cause the assembly to fall off the jack, which may result in serious personal injury.
Lower the transmission.
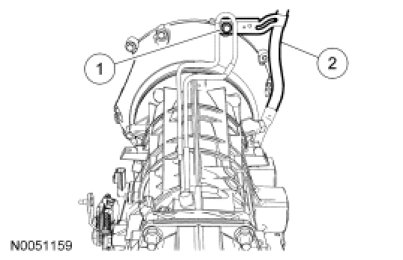
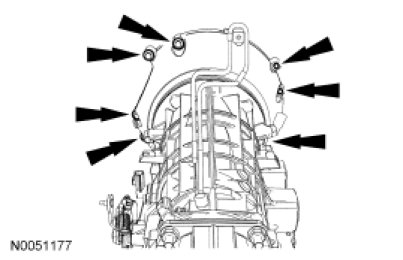
34. Remove the vent tube assembly.
35. If the transmission is being overhauled or if installing a new or remanufactured transmission, carry out Transmission Fluid Cooler Backflushing and Cleaning. For additional information, refer to Transmission Fluid Cooler Backflushing and Cleaning Transmission Fluid Cooler Backflushing and Cleaning.