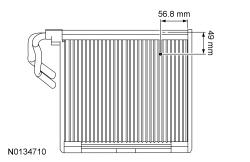
Evaporator Core: Service and Repair
Evaporator Core
Removal and Installation
1. Remove the heater core and evaporator core housing. For additional information, refer to Heater Core And Evaporator Core Housing .
2. Remove the heater core and evaporator core housing dash panel seal.
3. Remove the 2 heater core and evaporator core tube bracket screws.
4. Remove the 3 air inlet duct screws and position the air inlet duct aside.
5. Remove the 2 RH temperature blend door actuator screws.
6. Disconnect the evaporator temperature sensor electrical connector and detach the connector from the evaporator core cover.
7. Remove the 5 evaporator core cover screws and position the evaporator core cover aside.
8. Remove the evaporator core.
9. Detach the evaporator temperature sensor from the evaporator core.
10. NOTICE: When installing the evaporator temperature sensor, it is imperative that it be installed in the location shown in the illustration or vehicle damage may occur. If the sensor was removed from a different location, reinstall it in the location shown.
To install, reverse the removal procedure.