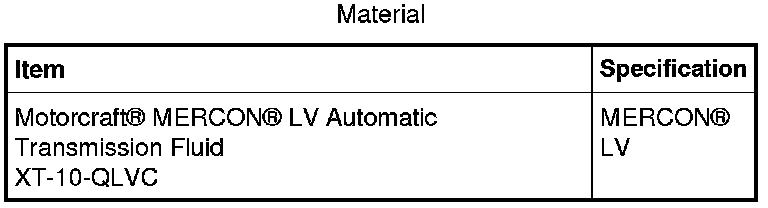
Automatic Transmission Dipstick - Dipstick Tube: Service and Repair
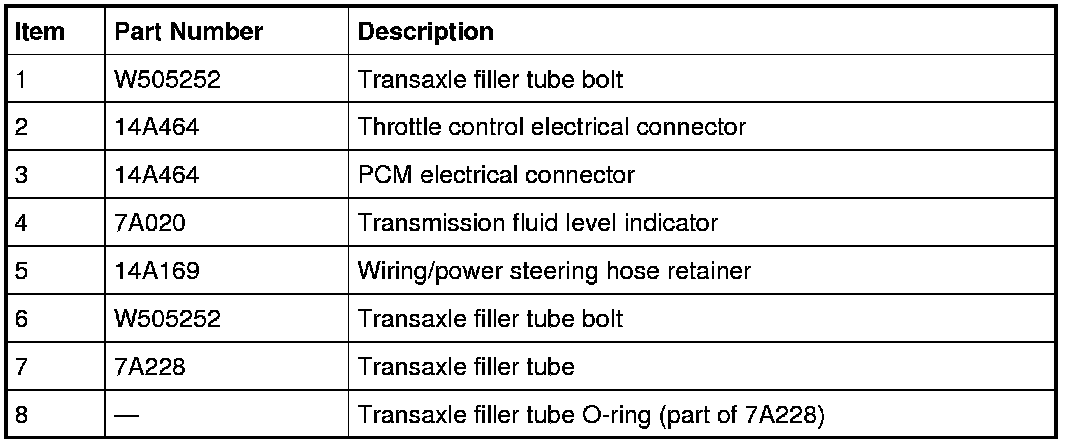
Transaxle Filler Tube
Transaxle Filler Tube
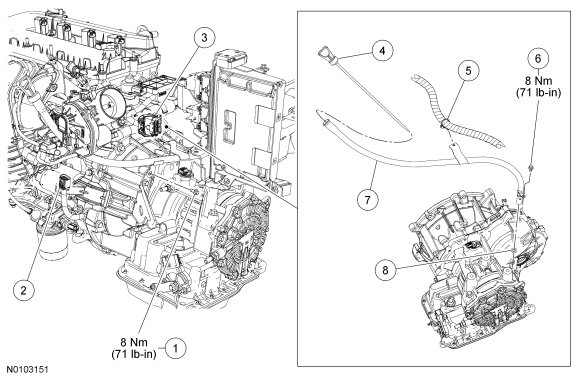
Removal
1. Remove the Air Cleaner (ACL) and outlet pipe assembly.
2. Remove the transmission fluid level indicator.

3. Remove the transaxle filler tube bolt.

4. Disconnect the throttle control electrical connector.

5. Disconnect the bottom PCM electrical connector.

6. Remove the power steering hose retainers and the wiring harness retainer from the transaxle filler tube.

7. Remove the transaxle filler tube bolt, rotate the transaxle filler tube from under the throttle body and remove the transaxle filler tube.

Installation
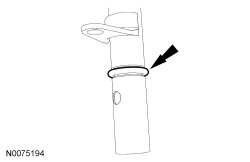
1. Inspect the transaxle filler tube O-ring for damage before installing the transaxle filler tube. If the transaxle filler tube O-ring is damaged, install a new transaxle filler tube O-ring. Lubricate the transaxle filler tube O-ring with clean transmission fluid.
2. Install the transaxle filler tube and transaxle filler tube bolt.
- Tighten to 8 Nm (71 lb-in).
3. Install the power steering hose retainers and the wiring harness retainer on the transaxle filler tube.
4. Connect the bottom PCM electrical connector.
5. Connect the throttle control electrical connector.
6. Install the transaxle filler tube bolt.
- Tighten to 8 Nm (71 lb-in).
7. Install the transmission fluid level indicator.
8. Install the ACL (Air Cleaner) and outlet pipe assembly.