Primary A/C System
Evaporator/Heater Core Case:
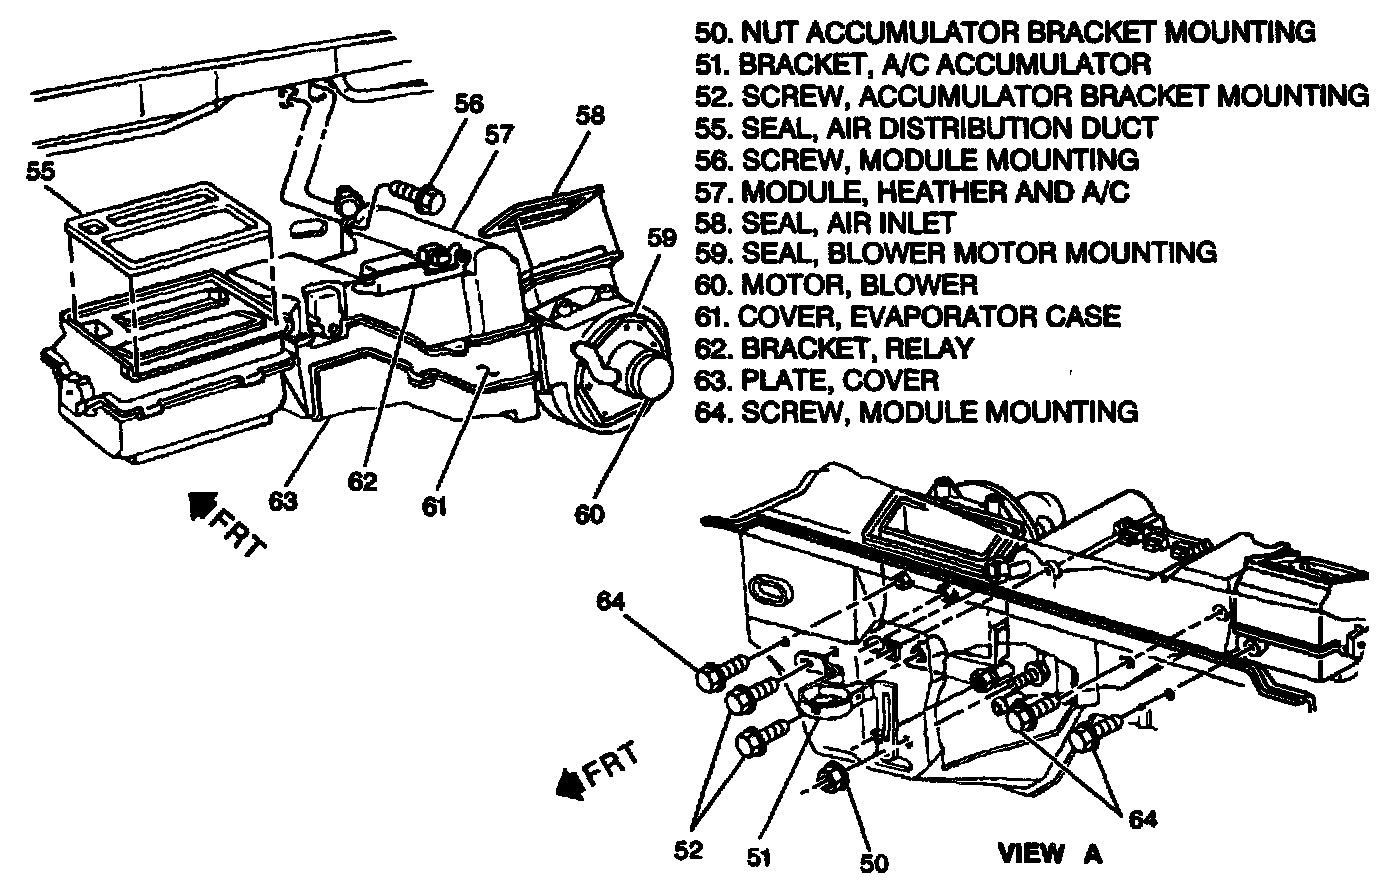
Remove or Disconnect
1. Negative battery cable.
2. Instrument panel compartment.
3. Front screw from right door sill plate.
4. Right hinge pillar trim panel.
5. Electrical connectors from PCM, as necessary.
6. PCM and mounting bracket (diesel engines only).
7. Electrical connectors from blower motor (60), as necessary.
8. Bolt from right lower I/P support.
9. Blower motor cover.
10. Blower motor cooling tube.
11. Blower motor flange screws (59).
12. Blower motor (60).
- Pull the blower motor forward carefully to avoid distorting the blower fan.
- May be necessary to pry back right side of instrument panel.
Inspect
- Blower motor terminals for distortion. Clean corrosion from the terminals or replace the blower motor (60) as necessary.
- Flange of the blower motor (60) for damage or distortion that could cause an air leak. Repair as necessary.
- Blower fan for damage and distortion.
Install or Connect
1. Blower motor (60).
- Guide the blower motor and blower fan into position, being careful not to catch the blower fan on protruding parts.
2. Blower motor flange screws (59).
3. Blower motor cooling tube.
4. Blower motor cover.
5. Bolt to right lower I/P support.
6. Electrical connectors to blower motor (16), as necessary.
7. Mounting bracket and ECM.
8. Electrical connectors to ECM, as necessary.
9. Right hinge pillar trim panel.
10. Front screw into front door sill plate.
11. Instrument panel compartment.
12. Negative battery cable.
- Check circuit operation.