Oil Pan: Service and Repair
Oil Pan Replacement
Tools Required
* EN 46109 Guide Pin Set
* J 39505 Torque Wrench Adapter
Removal Procedure
1. Disconnect the battery negative cable.
2. Raise and support the vehicle.
3. Drain the engine oil and remove the oil filter.
4. Remove the exhaust flexible pipe.
5. Remove the air conditioning (A/C) compressor.
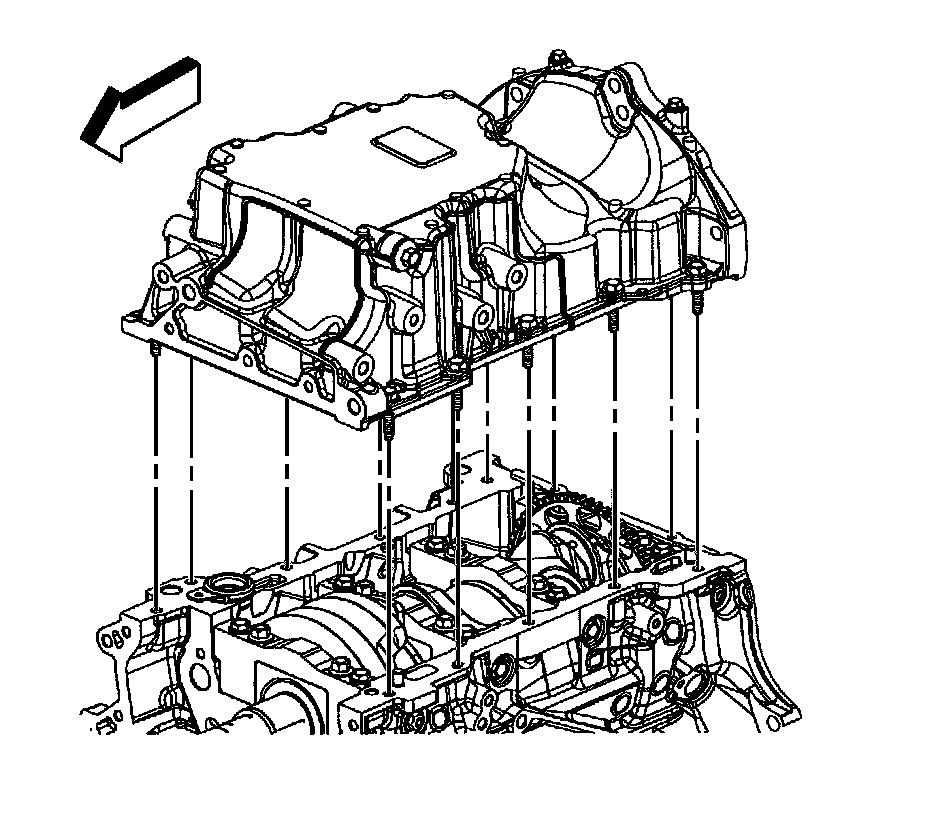
6. Remove the oil pan bolts.
7. Remove the oil pan.
8. Clean the oil pan and the engine block gasket surface.
Installation Procedure
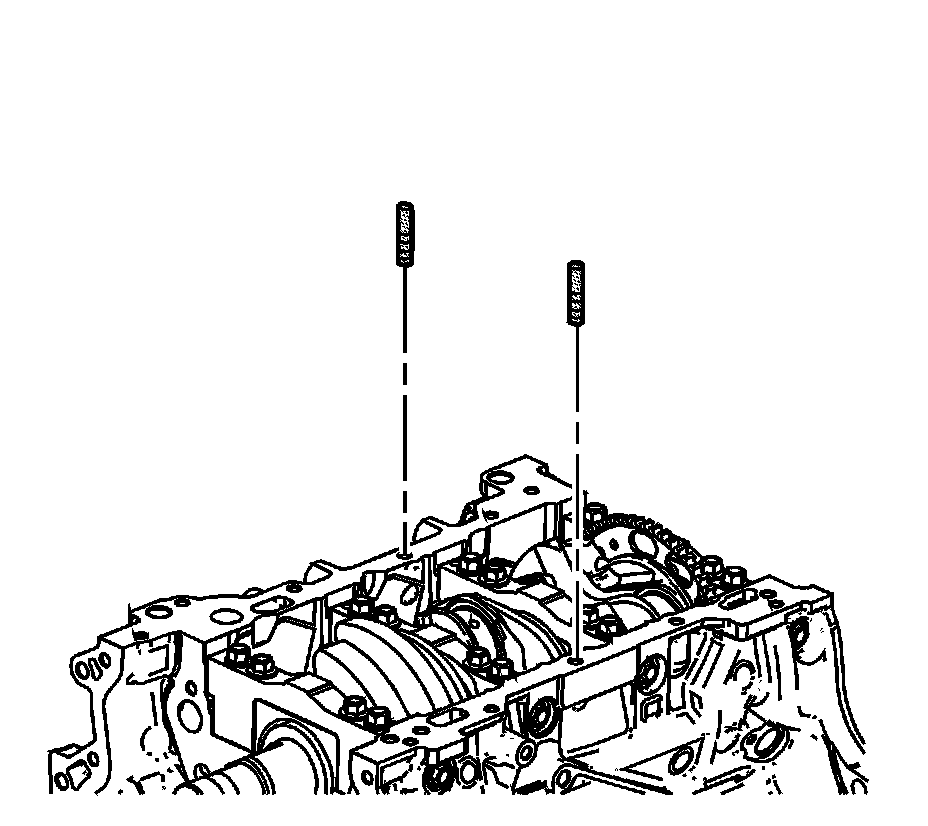
1. Install the 8 mm (0.315 in) guides from the EN 46109 into the center oil pan rail bolt hole on each side of the engine block.
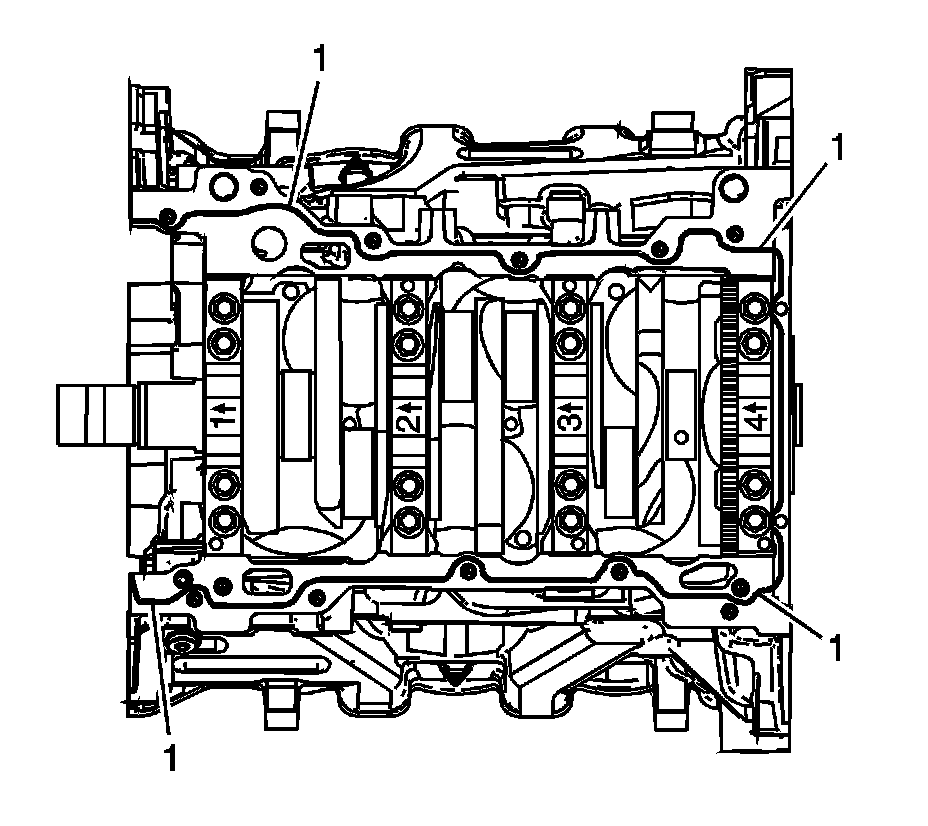
2. Place a 3 mm (0.118 in) bead (1) of RTV sealant, GM P/N 12378521 (Canadian P/N 88901148) or equivalent, on the block pan rail and the crankshaft rear oil seal housing.
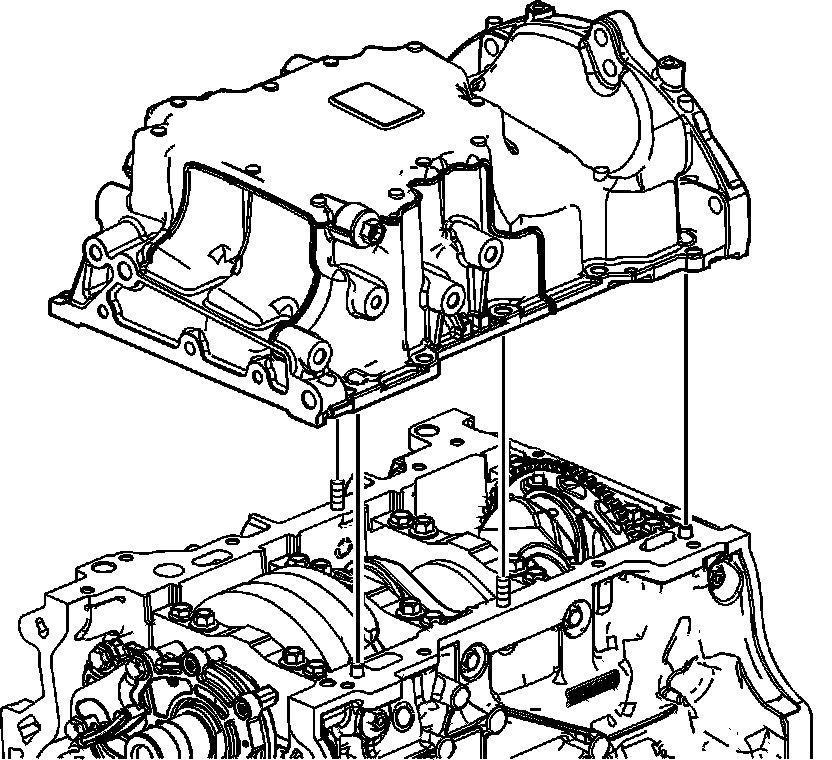
3. Position the oil pan onto the block.
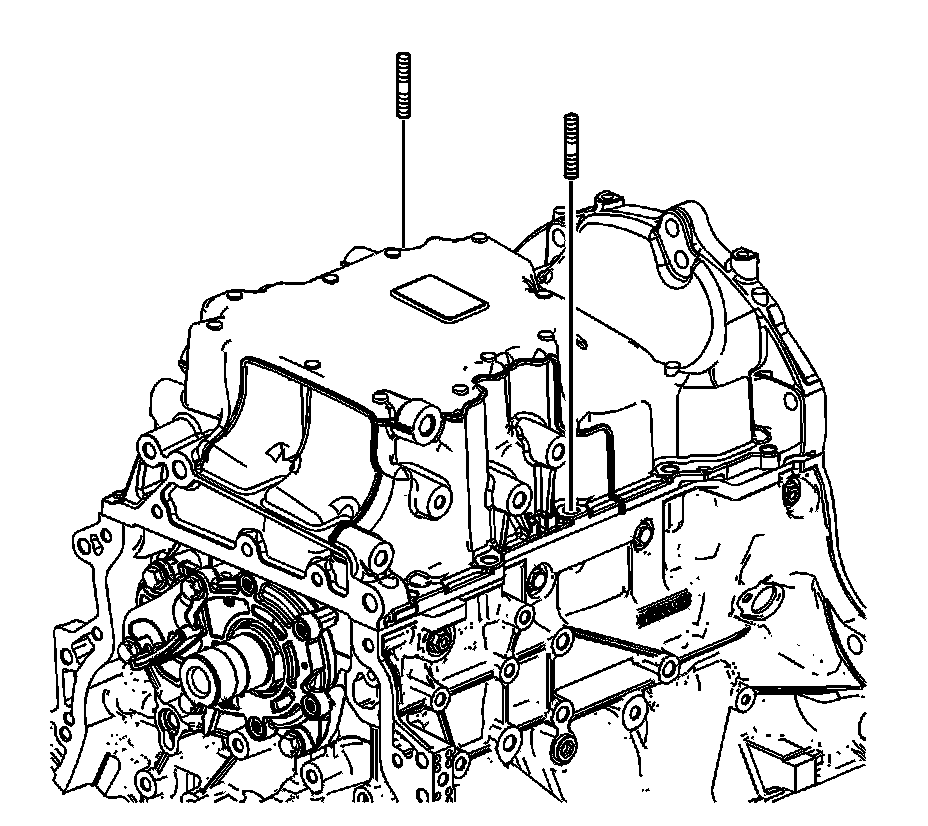
4. Remove the EN 46109 8 mm (0.315 in) guides from the engine block.

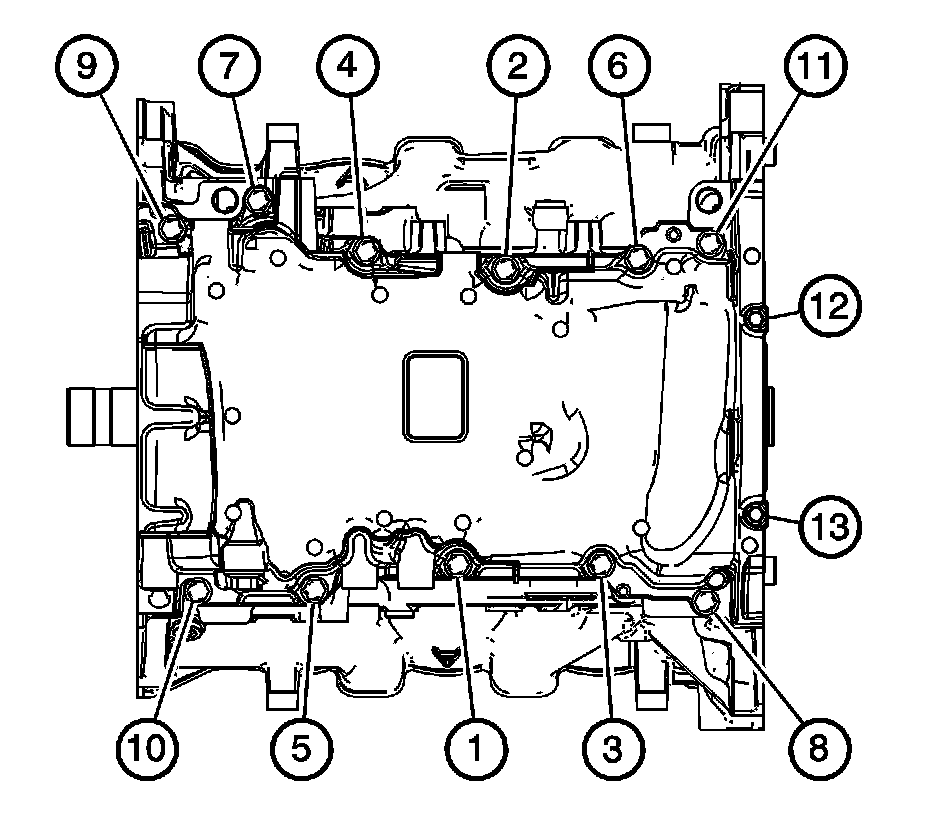
5. Loosely install the oil pan bolts.
Notice: Refer to Fastener Notice.
6. Tighten the oil pan bolts in sequence shown.
1. Tighten the 8 mm bolts (1-11) to 23 N.m (17 lb ft).
2. Tighten the 6 mm bolts (12, 13) to 10 N.m (89 lb in).
7. Install the air conditioning (A/C) compressor.
8. Install the exhaust flexible pipe.
9. Lower the vehicle.
10. Refill the engine oil.
11. Connect the battery negative cable.