Discharge Hose Replacement
Discharge Hose Replacement
Tools Required
J 39400-A Halogen Leak Detector
Removal Procedure
1. Recover the refrigerant. Refer to Refrigerant Recovery and Recharging.
2. Raise and support the vehicle. Refer to Vehicle Lifting.
3. Remove the right front wheel house liner.
4. Remove the right front engine splash shield.
5. Remove right headlamp assembly.
6. Remove the Fascia Grille.
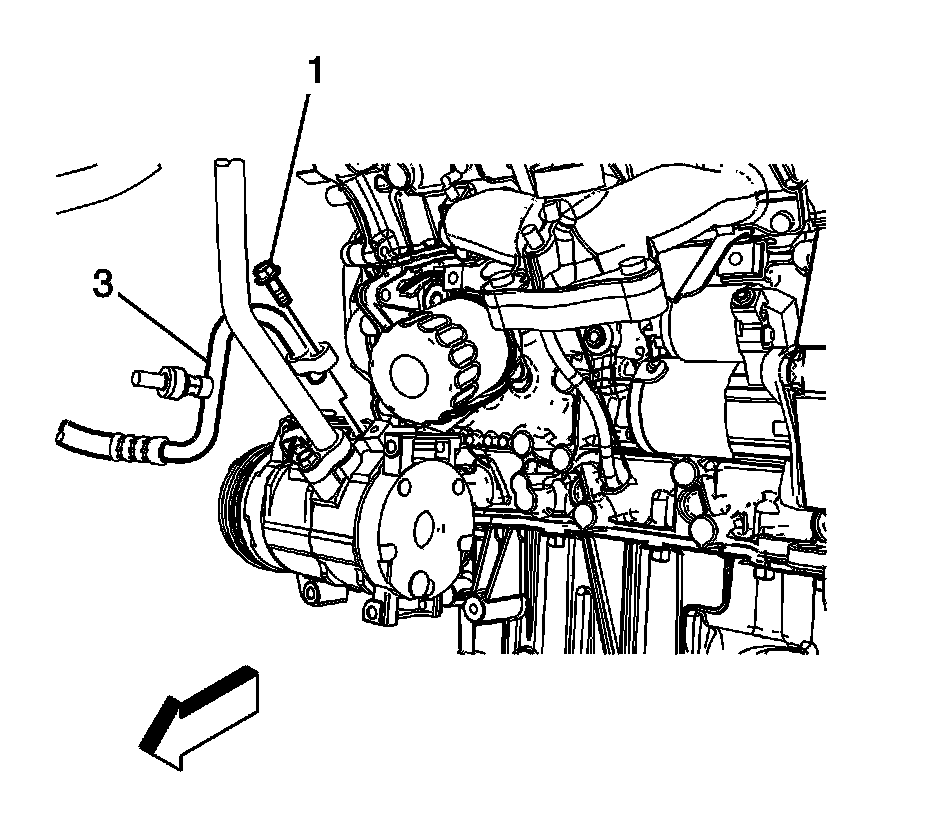
7. Remove the electrical connector from the A/C pressure switch.
8. Remove the discharge line bolt from the A/C compressor (1).
9. Disconnect the discharge line from the A/C compressor (3).
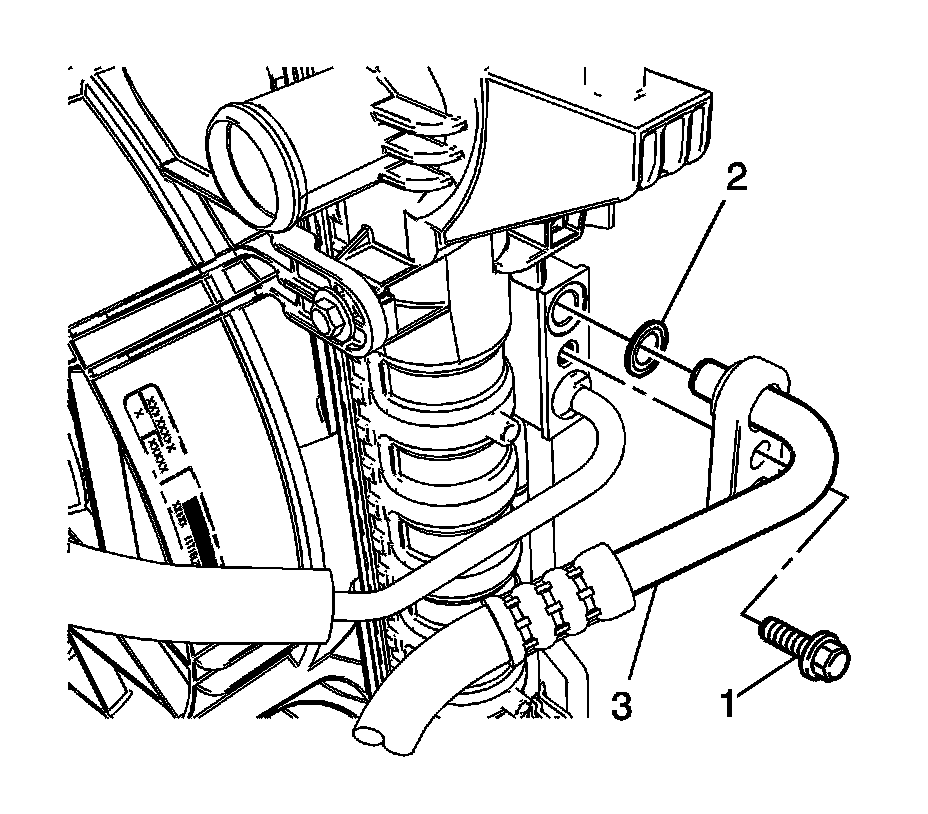
10. Remove the discharge line to condenser bolt (1).
11. Disconnect the discharge line from the condenser (3).
12. Remove the discharge line.
13. Remove the A/C pressure switch.
14. Remove and discard the discharge line O-rings (2).
Installation Procedure
1. Install new O-rings to the discharge line (2).
2. Connect the discharge line to the condenser (3).
Notice: Refer to Fastener Notice.
3. Install the discharge line to condenser bolt (1).
Tighten the bolt to 9 N.m (80 lb in).
4. Connect the discharge line to the A/C compressor (3).
5. Install the discharge line bolt to the A/C compressor (1).
Tighten the bolt to 9 N.m (80 lb in).
6. Install the A/C pressure switch and connect the electrical connector.
7. Install the right front engine splash shield.
8. Install the right front wheel house liner.
9. Install the right headlamp assembly.
10. Install the Fascia Grille.
11. Lower the vehicle.
12. Evacuate and recharge the refrigerant system. Refer to Refrigerant Recovery and Recharging.
13. Leak test the fittings of the component using J 39400-A.