Disassembly
WARNING:- Never use an air hose or dry brush to clean brake assemblies.
- Use an OSHA-approved vacuum cleaner to avoid breathing brake dust.
- Contaminated brake discs or pads reduce stopping ability.
CAUTION:
- Do not spill brake fluid on the car; it may damage the paint; if brake fluid does contact the paint, wash it off immediately with water.
- To prevent spills, cover the hose joints with rags or shop towels.
- Clean all parts in brake fluid and air dry; blow out all passages with compressed air.
1. Remove the caliper shield.

2. Remove the lock pin and clevis pin. Remove the cable clip, and disconnect the cable from the arm.
3. Remove the banjo bolt and two sealing washers.

4. Remove the two caliper mounting bolts and caliper body from the bracket.

5. Remove the pins and pin boots from the caliper bracket.
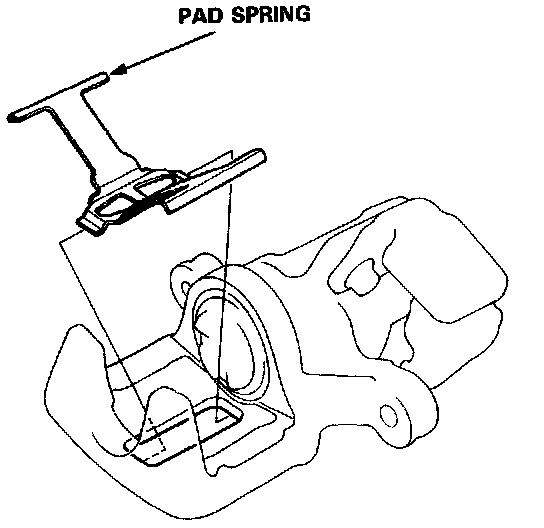
6. Remove the pad spring from the caliper body.

7. Remove the piston by rotating the piston counterclockwise with the tool, and remove the piston boot.
CAUTION: Avoid damaging the piston.

8. Remove the piston seal.
CAUTION: Take care not to damage the cylinder bore.

9. Install the special tool between the caliper body and spring cover.
CAUTION: Be careful not to damage the inside of the caliper cylinder during caliper disassembly.
10. Position the locknuts as shown, then turn the shaft until the plate just contacts the caliper body.
NOTE: Do not compress the spring under the spring cover.

11. Turn the shaft clockwise 1/4 - 1/2 turn to compress adjusting spring B in the caliper body.
CAUTION: To prevent damage to the inner components, do not turn the shaft more than 1/2 turn.
12. Lower the locknuts fully, and tighten them securely.
NOTE: Keep the locknuts in this position until you reinstall the circlip.

13. Remove the circlip with snap ring pliers.
Removing Adjusting Bolt:

14. Hold the plate with your fingers, and turn the shaft counterclockwise. Remove the special tool from the caliper.

15. Remove the adjusting bolt.
16. Remove the spring cover, adjusting spring B. spacer, bearing A, and cup from the adjusting bolt.

17. Remove the sleeve piston, and remove the pin from the cam in the caliper body.

18. Remove the return spring.
19. Remove the parking lever and cam as an assembly from the caliper body.
CAUTION: Do not loosen the parking nut with the cam installed in the caliper body. If the lever and shaft must be separated, hold the lever in a vise, and loosen the parking nut.
20. Remove the cam boot.