Condenser HVAC: Service and Repair
Condenser Replacement1. Recover the refrigerant with a recovery/recycling/charging station.
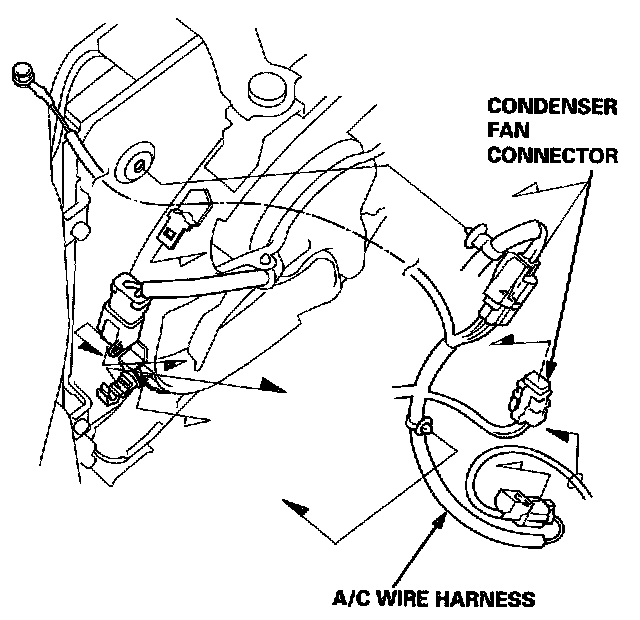
2. Disconnect the condenser fan connector from the A/C wire harness, then remove the A/C wire harness from the condenser fan shroud.
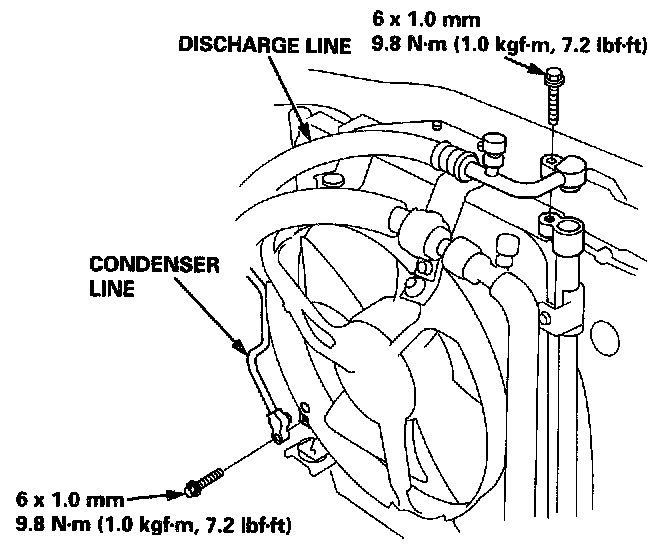
3. Remove the bolts, then disconnect the discharge and condenser lines from the condenser.
NOTE: Plug or cap the lines immediately after disconnecting them to avoid moisture and dust contamination.
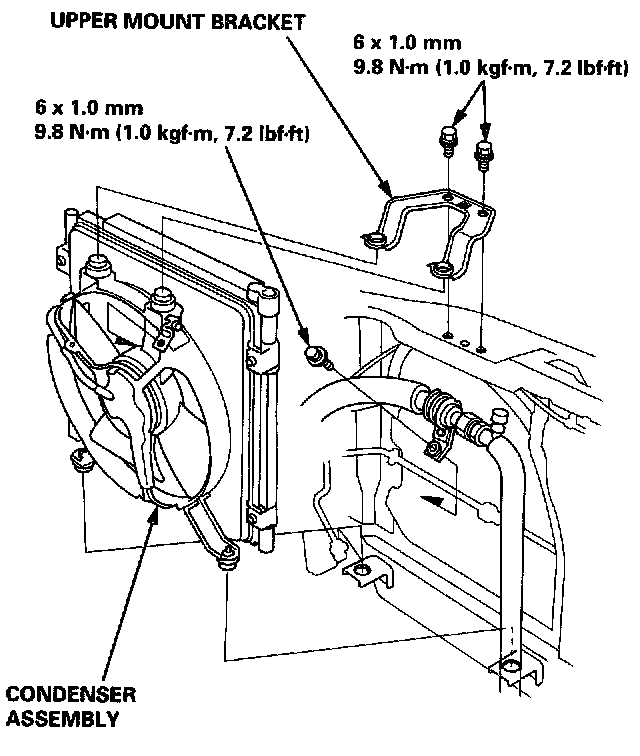
4. Remove the bolt from the suction hose bracket, and remove the two bolts and the upper mount bracket. Remove the condenser assembly by lifting it up.
NOTE: Be careful not to damage the condenser fins when removing the condenser assembly.
5. Install in the reverse order of removal. Make note of the following items.
- If you're installing a new condenser, add refrigerant oil (SANDEN, SP-10 or DENSO, ND-OIL 8).
- Replace the O-rings with new ones at each fitting, and apply a thin coat of refrigerant oil before installing them.
NOTE: Be sure to use the right O-rings for HFC-134a (R-134a) to avoid leakage.
- Be careful not to damage the condenser fins when installing the condenser assembly.
- Charge the system and test its performance.