Air Bag Control Module: Service and Repair
WARNING: DURING SERVICE PROCEDURES, BE VERY CAREFUL WHEN HANDLING SDM. NEVER STRIKE OR JAR SDM. UNDER SOME CIRCUMSTANCES, IT COULD CAUSE DEPLOYMENT AND RESULT IN PERSONAL INJURY OR IMPROPER OPERATION OF THE SUPPLEMENTAL RESTRAINT SYSTEM (SRS). SDM MOUNTING BRACKET BOLTS MUST BE CAREFULLY TORQUED TO ASSURE PROPER OPERATION. THE SRS SHOULD ONLY BE CONNECTED TO A POWER SOURCE WHEN IT IS INSTALLED SECURELY IN THE VEHICLE. THE SDM MAY SUDDENLY DEPLOY THE AIRBAGS CAUSING PERSONAL INJURYWARNING: PROPER OPERATION OF THE SENSING AND DIAGNOSTIC MODULE (SDM) REQUIRES THE SDM TO BE SECURELY INSTALLED ON THE VEHICLE AND THE ARROW ON THE SENSOR MUST BE POINTING TOWARD THE FRONT OF THE VEHICLE.
SDM is specifically calibrated and is keyed to the SDM location SRS wiring harness. Caution should be used to ensure proper location of the SDM. The keying of the SDM to its location and wiring harness connectors should never be modified in the field.
Removal
1. Disable the SRS.
2. Remove dressing panel around the radio and disconnect cigar lighter harness
3. Remove the transfer sift lever knob.
4. Remove the center console.
5. Remove three connector from Powertrain Control Module (PCM). (Y22SE 2.2L Engine only)
6. Remove PCM with bracket. (Fixed tour bolts) (Y22SE 2.2L Engine only)
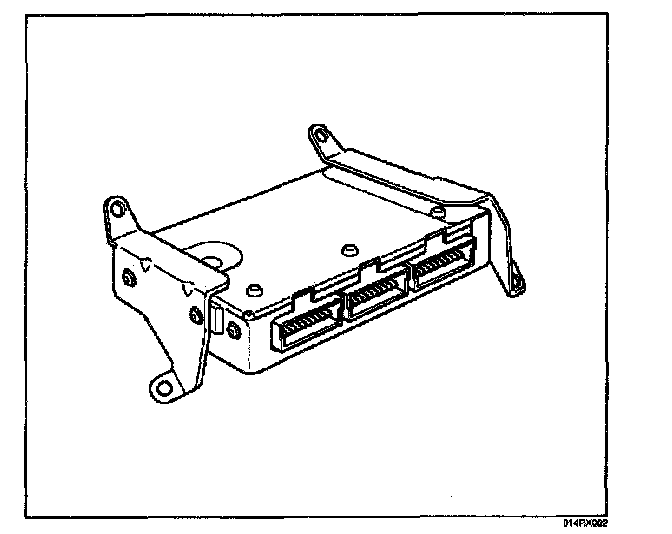
7. Remove right side stay between instrument panel and floor.
8. Remove driver and passenger seat.
9. Turn over carpet to rear side.
10. Remove air conditioning duct for rear seat. (Transform the duct during removing it)
11. Pull CPA (2) (Connector Position Assurance-red color) out and push connector lock down to disconnect the SDM harness connector (3).
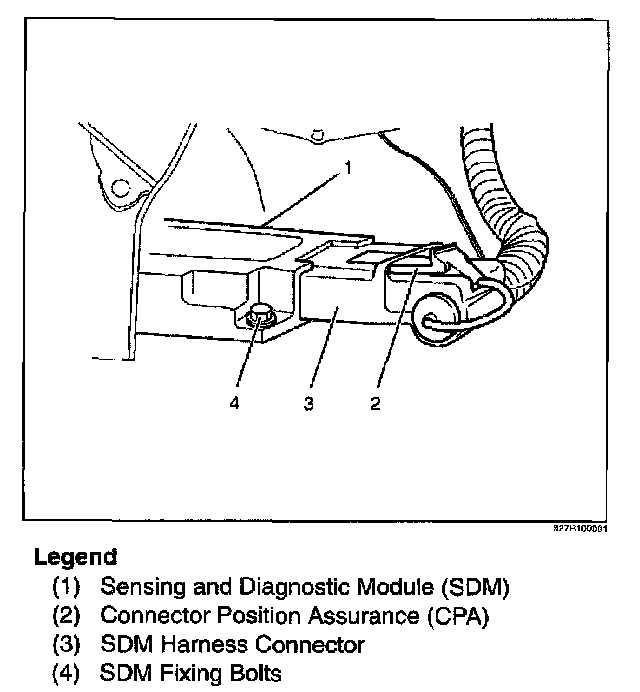
12. Remove the three SDM fixing bolts (4) and remove SDM (3).
Installation
1. Install the SDM (1) on bracket and fixing bolts (4) and tighten the fixing bolts to the specified torque.
Torque: 10 ± 3 N.m (1.0 ± 0.3 kg.m / 87 ± 26 lb.in)
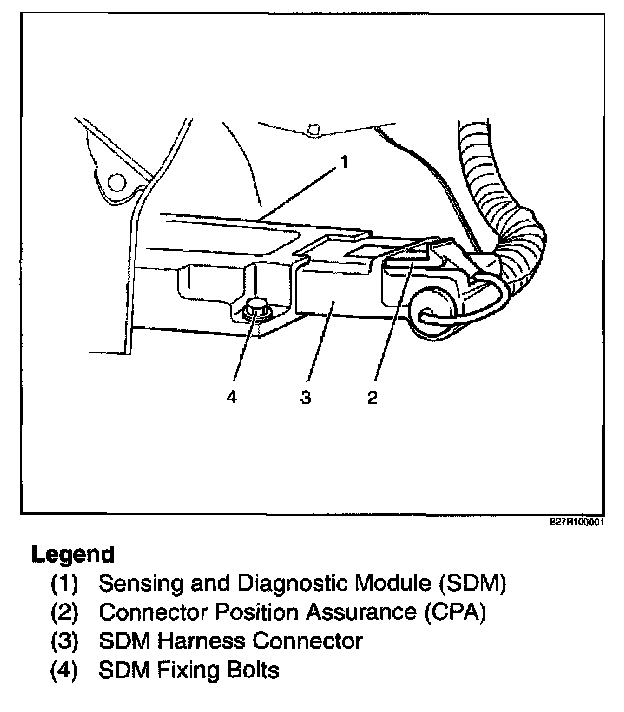
2. Connect the SDM harness connector (3) and after that, put CPA into connector (2).
3. Install air conditioning duct for rear seat to normal position.
4. Return carpet normal position.
5. Install right side stay between instrument panel and floor, tighten to the specified torque.
Torque: 10 ± 3 N.m (1.0 ± 0.3 kg.m / 87 ± 26 lb.in)
6. Install PCM with bracket and tighten to the specified torque. (Y22SE 2.2L Engine only)
Torque: 10 ± 3 N.m (1.0 ± 0.3 kg.m / 87 ± 26 lb.in)
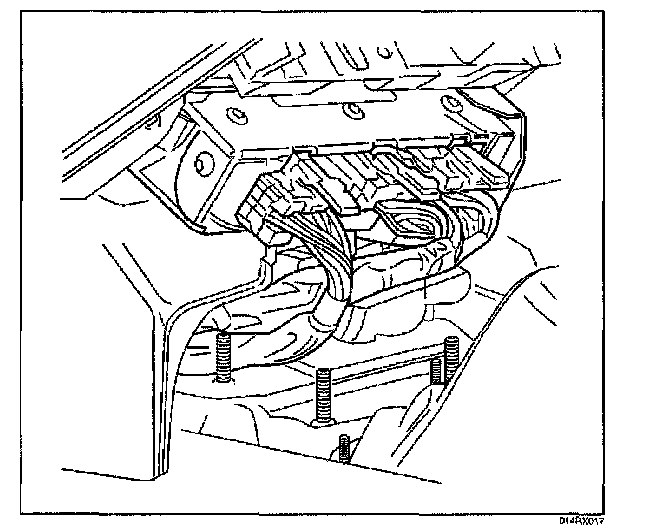
7. Reconnect three connector to Powertrain Control Module (PCM). (Y22SE 2.2L Engine only)
8. Install the center console.
9. Install the transfer shift lever knob.
10. Install the dressing panel around the radio and reconnect cigar lighter harness.
11. Enable the SRS.