Rear Bumper: Service and Repair
Rear Bumper Removal/InstallationNOTE:
- Have an assistant help you when removing the rear bumper.
- Take care not to scratch the rear bumper and body.
- Put on gloves to protect your hands.
1. Remove the taillights.
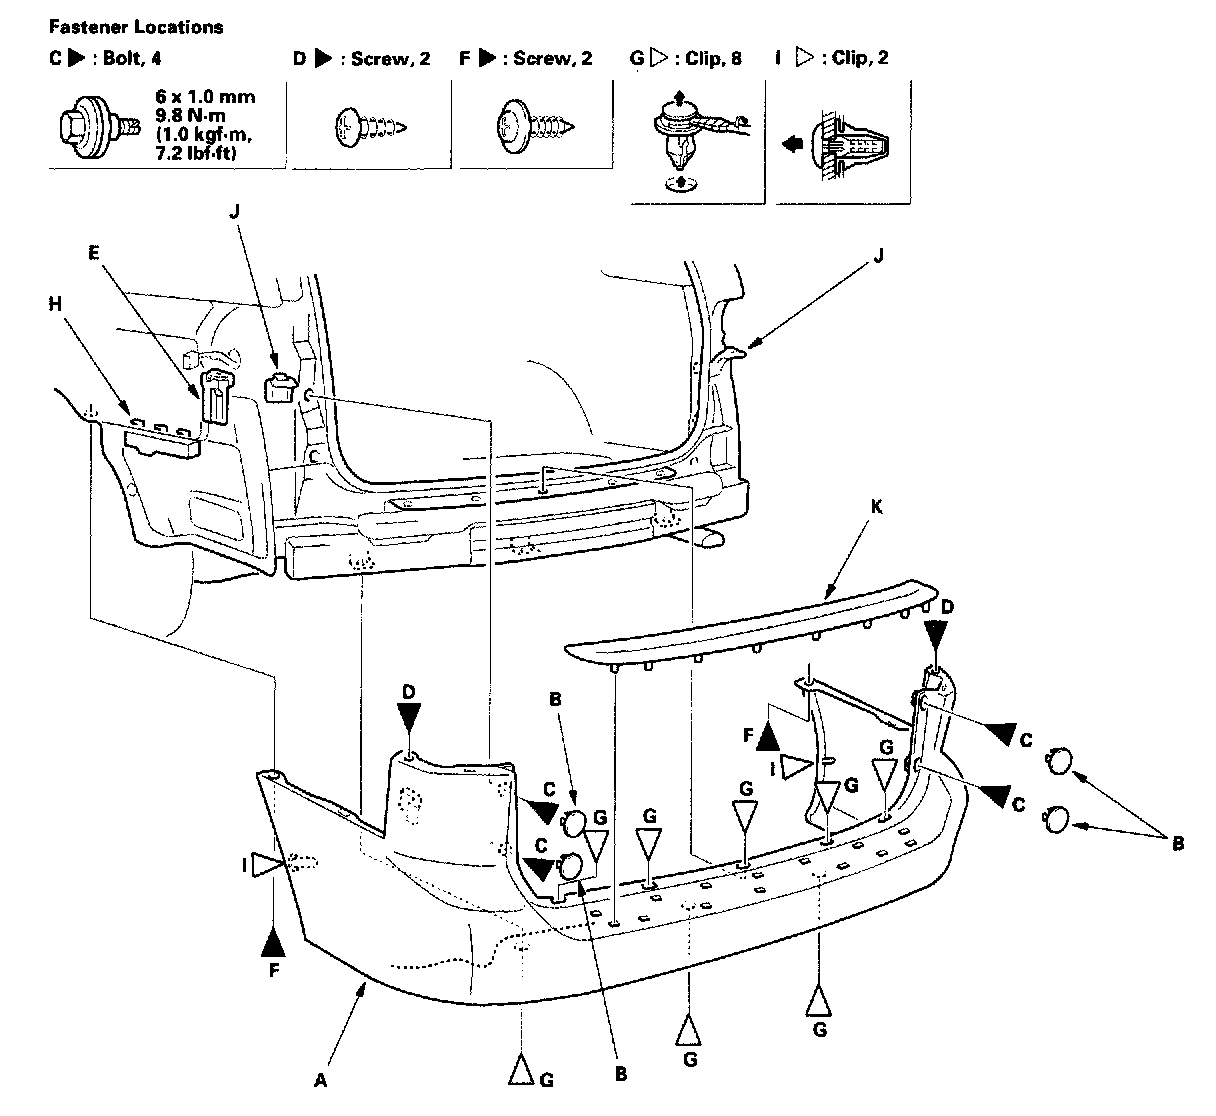
2. Remove the rear bumper (A):
1. Pry out the caps (B), and remove the bolts (C) from each side,
2. Remove the screws (D) securing the rear bumper and rear clip (E) from each side.
3. Remove the screws (F) and clips (G) securing the bumper to the body.
4. With the help of an assistant, pull both side wheel arch portions of the bumper outward to detach the side clips (H), and pull them forward to detach the clips (I).
5. Remove the rear bumper from the hooks (J) and rear clips (E) by pulling it rearward.
3. If necessary, detach the rear bumper step (K).
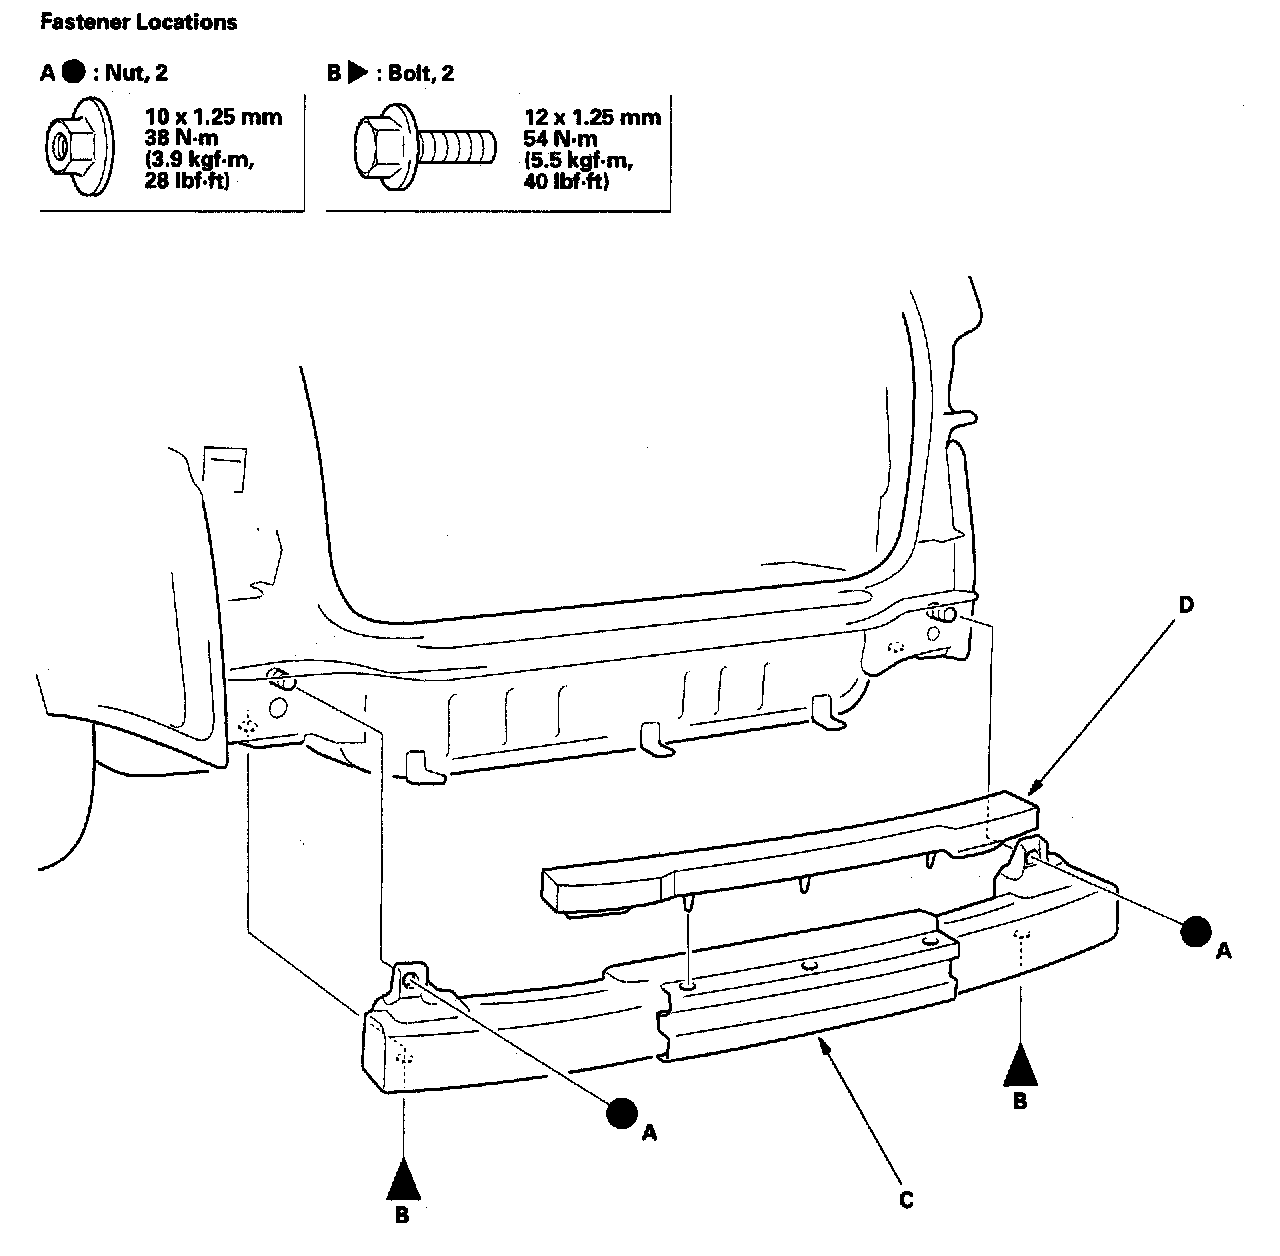
4. Remove the nuts (A) and bolts (B), then remove the rear bumper beam (C). If necessary, remove the absorber (D).
5. Install the rear bumper in the reverse order of removal, and note these items:
- Make sure the rear bumper engages the side clips and the hooks (under the taillight) on each side securely.
- Replace any damaged clips.
- Push the clips into place securely.