Transmission Mount: Service and Repair
Transmission Mount Replacement
1. Remove the PCM Service and Repair.
2. Remove the air cleaner Service and Repair.
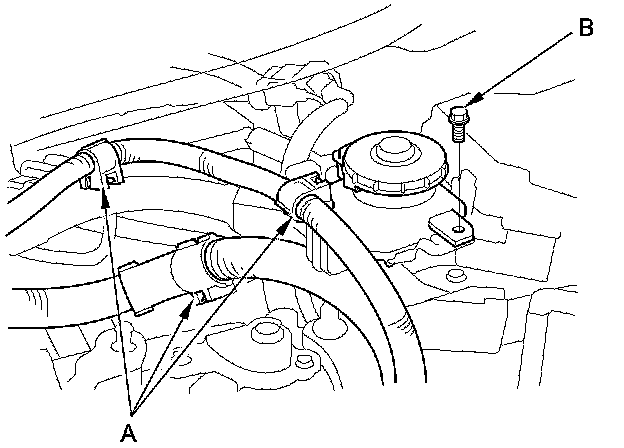
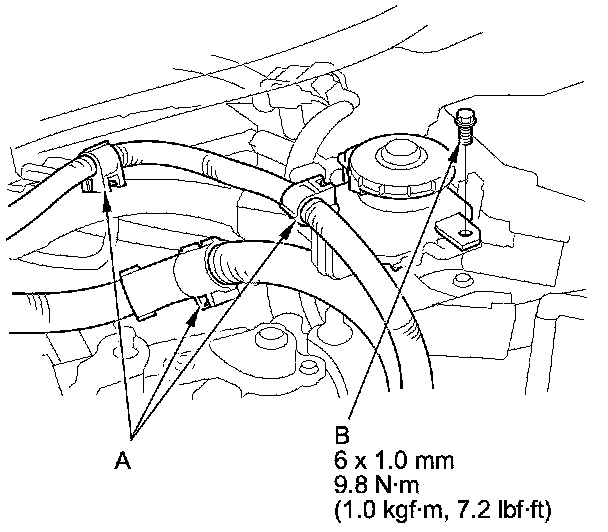
3. Remove the IMA system power cable clamps (A) and the reservoir tank mounting bolt (B).
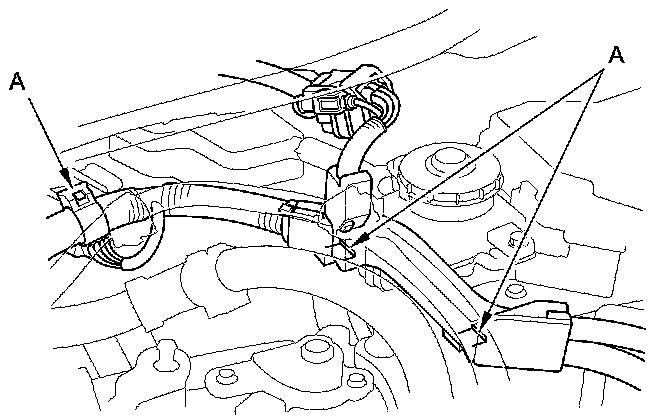
4. Remove the wire harness clamps (A).
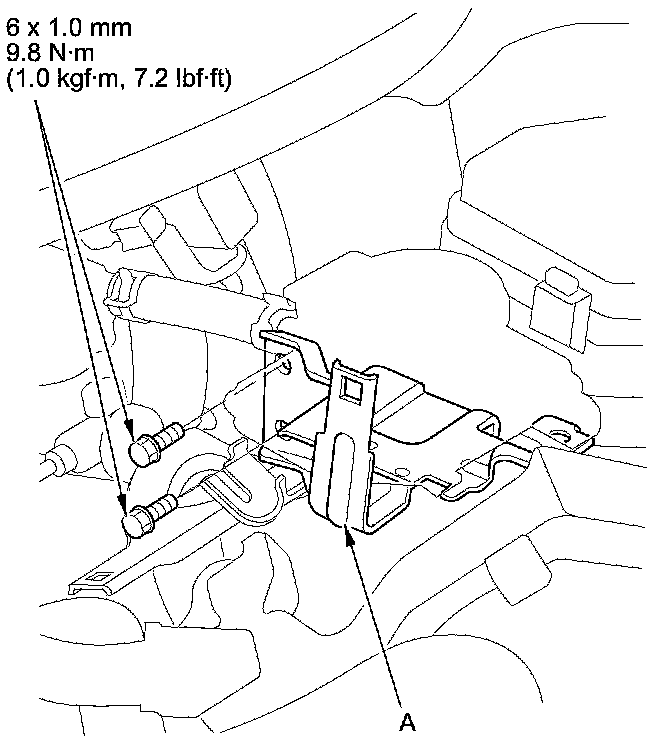
5. Remove the reservoir tank bracket (A).
6. Remove the under-hood fuse/relay box Under-Hood Fuse/Relay Box Removal And Installation.
7. Lift and support the engine with a jack and a wood block under the engine/IMA/transmission.
8. Remove the transmission mount cover (A) and the bracket (B), then remove the transmission mount (C).
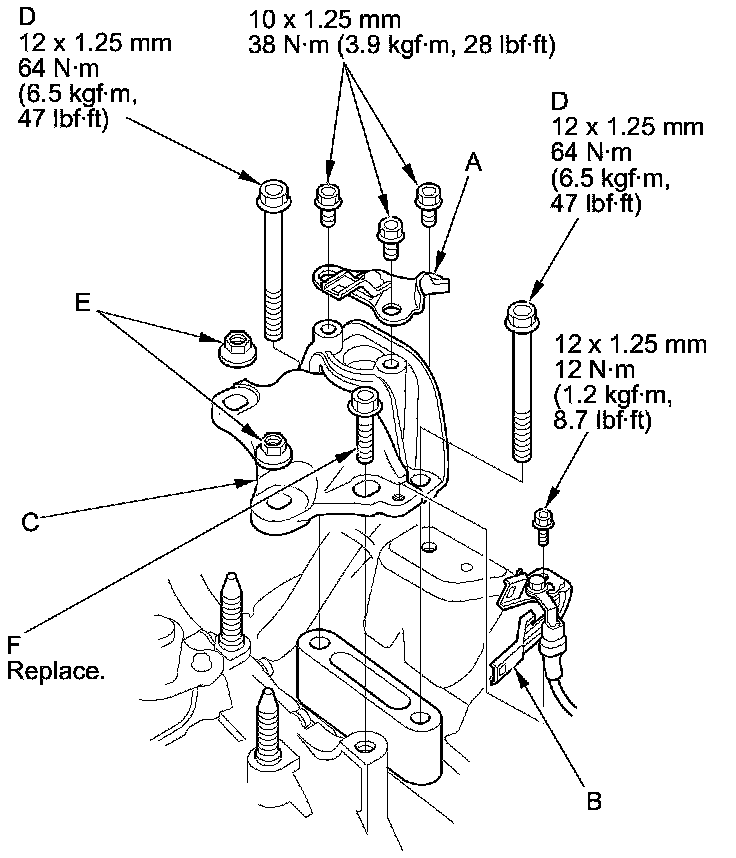
9. Tighten the transmission mount mounting bolts (D) and loosely install the transmission mount bracket support nuts (E) and the new support bolt (F).
10. Install the transmission mount cover and the bracket.
11. Remove the jack and the wood block.
12. Raise the vehicle on the lift.
13. Remove the five clips and the two bolts securing the front undercover, then open the front undercover Front Undercover Replacement.
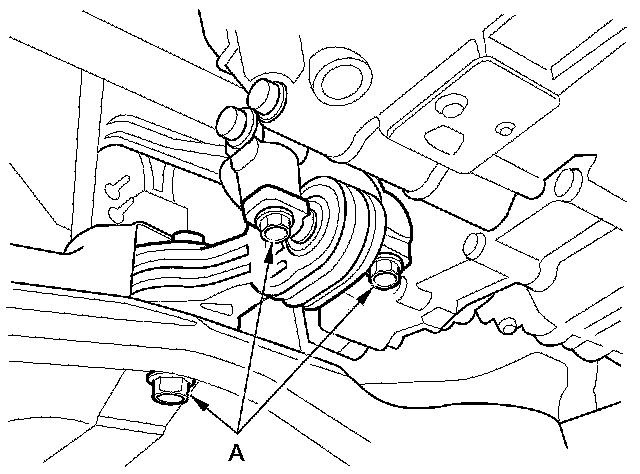
14. Loosen the lower torque rod mounting bolts (A).
15. Lower the vehicle on the lift.
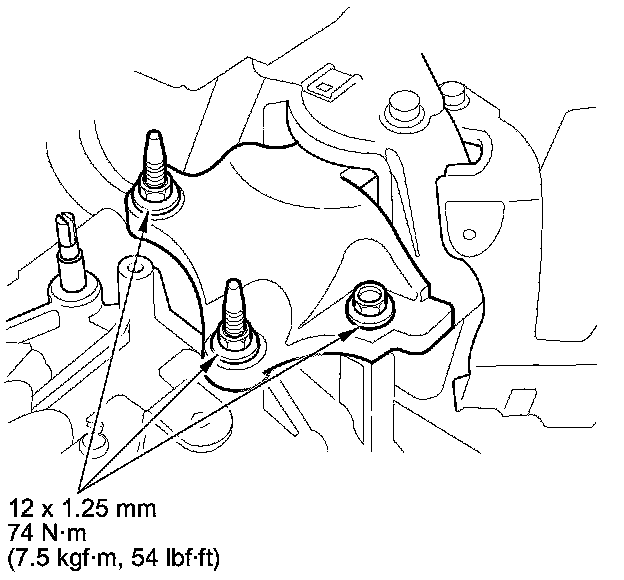
16. Tighten the transmission mount bracket support bolt and nuts.
17. Raise the vehicle on the lift.
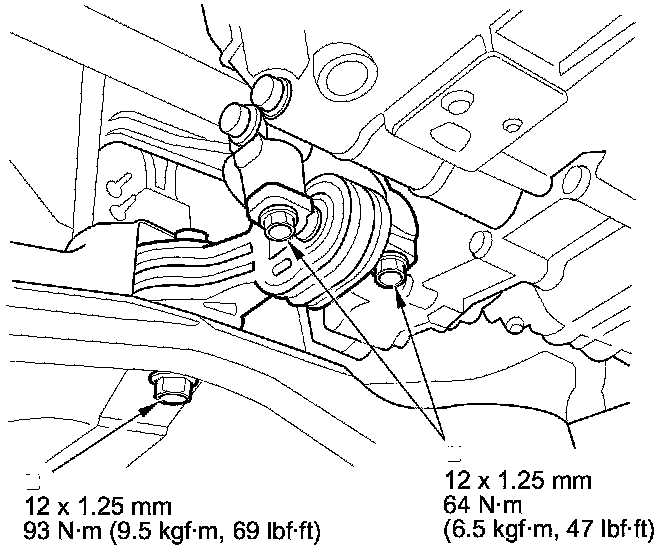
18. Tighten the lower torque rod mounting bolts in the numbered sequence shown.
19. Install the front undercover, the five clips and the two bolts securing the front undercover, then close the front undercover Front Undercover Replacement.
20. Lower the vehicle on the lift.
21. Install the under hood fuse/relay box Under-Hood Fuse/Relay Box Removal And Installation.
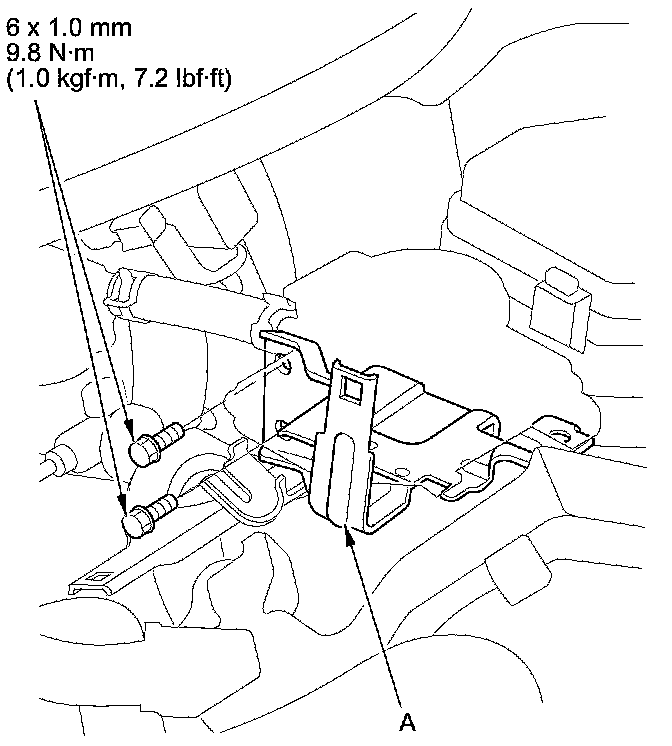
22. Install the reservoir tank bracket (A).
23. Install the wire harness clamps.
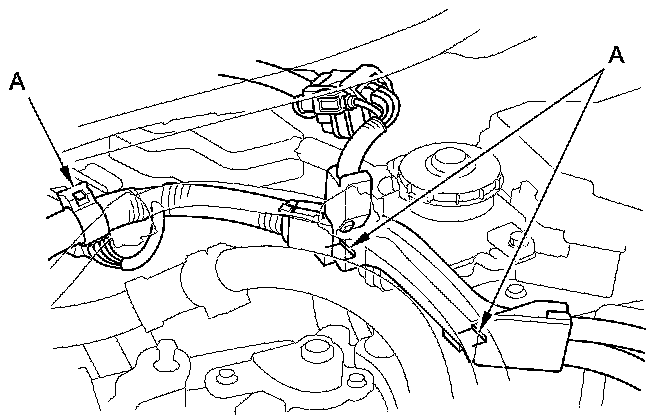
24. Install the IMA system power cable clamps (A) and the reservoir tank mounting bolt (B).
25. Install the air cleaner Service and Repair.
26. Install the PCM Service and Repair.
27. Do the PCM reset procedure.
28. Do the crankshaft position (CKP) pattern clear/CKP pattern learn procedure.
29. Inspect the idle speed Testing and Inspection.