Condenser HVAC: Service and Repair
Air Conditioning Condenser Replacement
Special Tools
J 39400-A Halogen Leak Detector
Removal Procedure
1. Recover the refrigerant. Refer to Refrigerant Recovery and Recharging (Refrigerant Recovery and Recharging).
2. Remove the transmission oil cooler. Refer to Transmission Fluid Auxiliary Cooler Replacement (Service and Repair).
3. Remove the power steering cooler. Refer to Power Steering Fluid Cooler Replacement (Service and Repair).
4. Remove the bolt and nut from the left hood spring.
5. Remove the bolt and nut from the right hood spring.
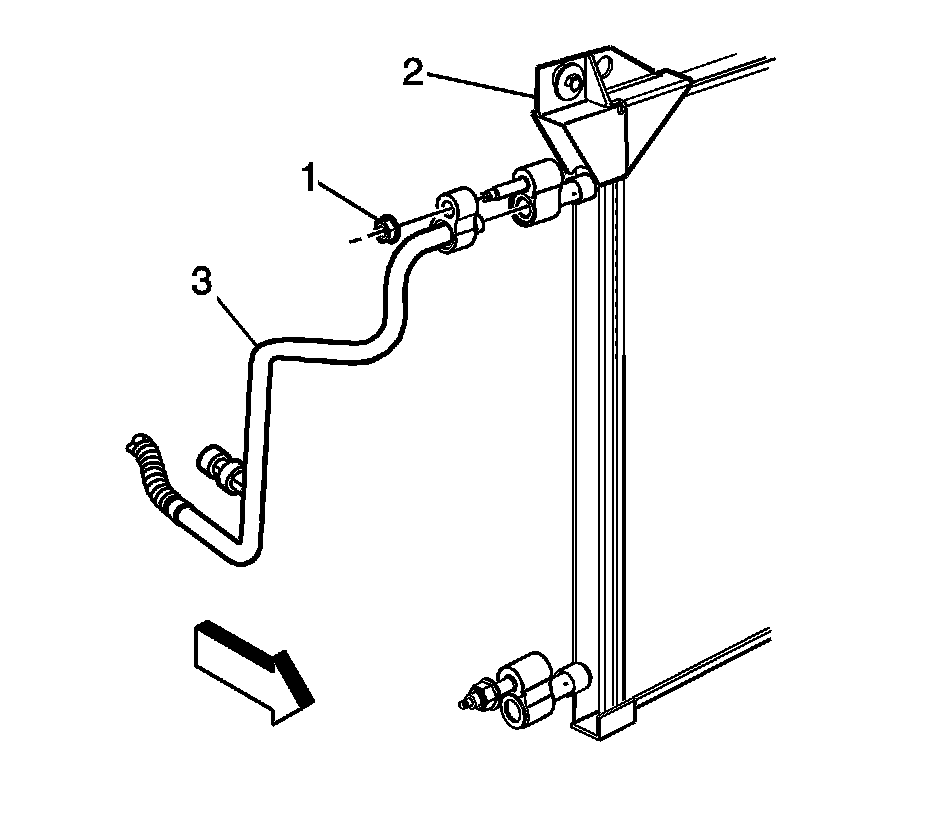
6. Remove the nut (1) from the condenser (2).
7. Remove the compressor discharge hose assembly (3) from the condenser (2).
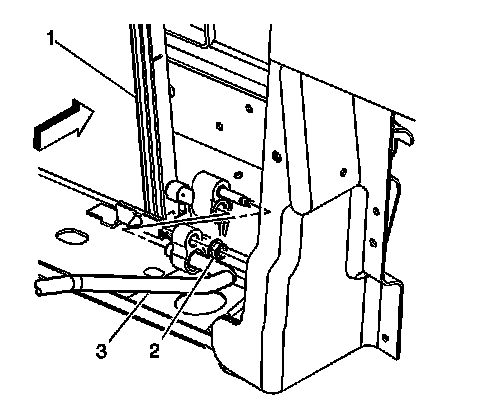
8. Remove the evaporator tube nut (2) from the condenser (1).
9. Remove the evaporator tube (3) from the condenser (1).
10. Remove the bolts (2) from the condenser (3).
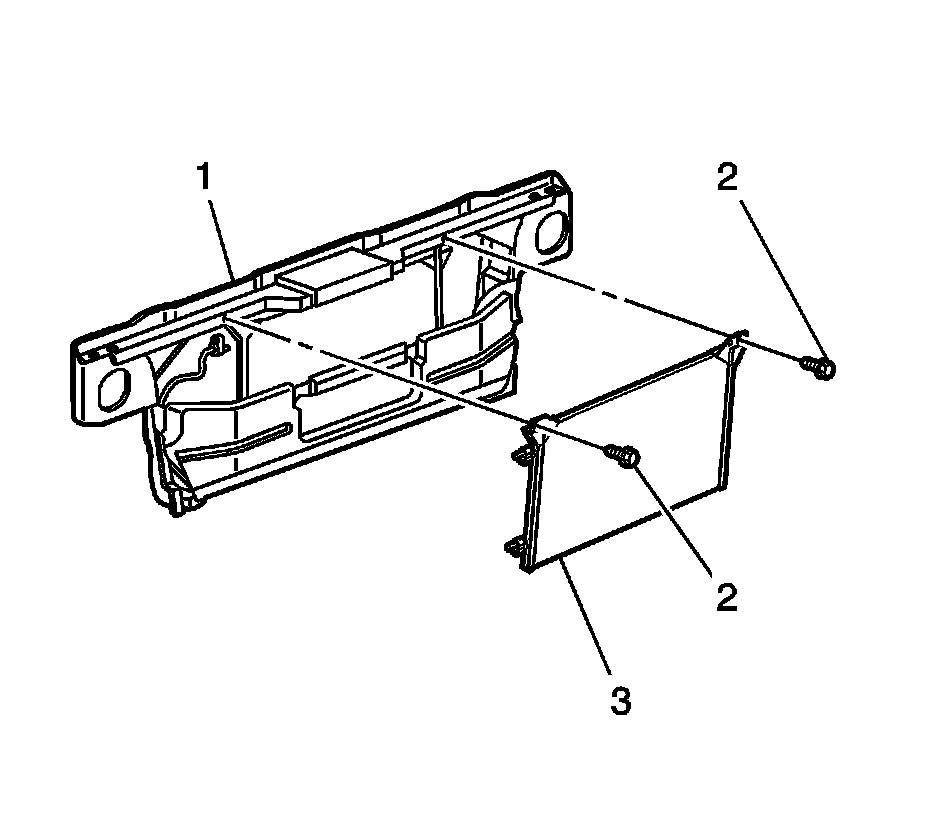
11. Remove the condenser (3) from the vehicle.
Installation Procedure
1. Add the proper amount of PAG oil to the condenser. Refer to Refrigerant System Capacities ([1][2]Capacity Specifications).
2. Install the condenser (3) to the vehicle.
Caution: Refer to Fastener Caution (Fastener Caution).
3. Install the bolts (2) to the condenser (3).
Tighten the bolts to 9 Nm (80 lb in).
4. Install the new sealing washers. Refer to Sealing Washer Replacement (Sealing Washer Replacement).
5. Install the evaporator tube (3) to the condenser (1).
6. Install the evaporator tube nut (2) to the condenser (1).
Tighten the nut to 16 Nm (12 lb ft).
7. Install the compressor discharge hose (3) to the condenser (2).
8. Install the compressor discharge hose nut (1) to the condenser (2).
Tighten the nut to 16 Nm (12 lb ft).
9. Install the transmission oil cooler. Refer to Transmission Fluid Auxiliary Cooler Replacement (Service and Repair).
10. Install the power steering cooler. Refer to Power Steering Fluid Cooler Replacement (Service and Repair).
11. Install the bolt and nut from the right hood spring.
Tighten the nut to 16 Nm (12 lb ft).
12. Install the bolt and nut from the left hood spring.
Tighten the nut to 16 Nm (12 lb ft).
13. Evacuate and recharge the system. Refer to Refrigerant Recovery and Recharging (Refrigerant Recovery and Recharging).
14. Leak test the fittings of the component using the J 39400-A .