Rear
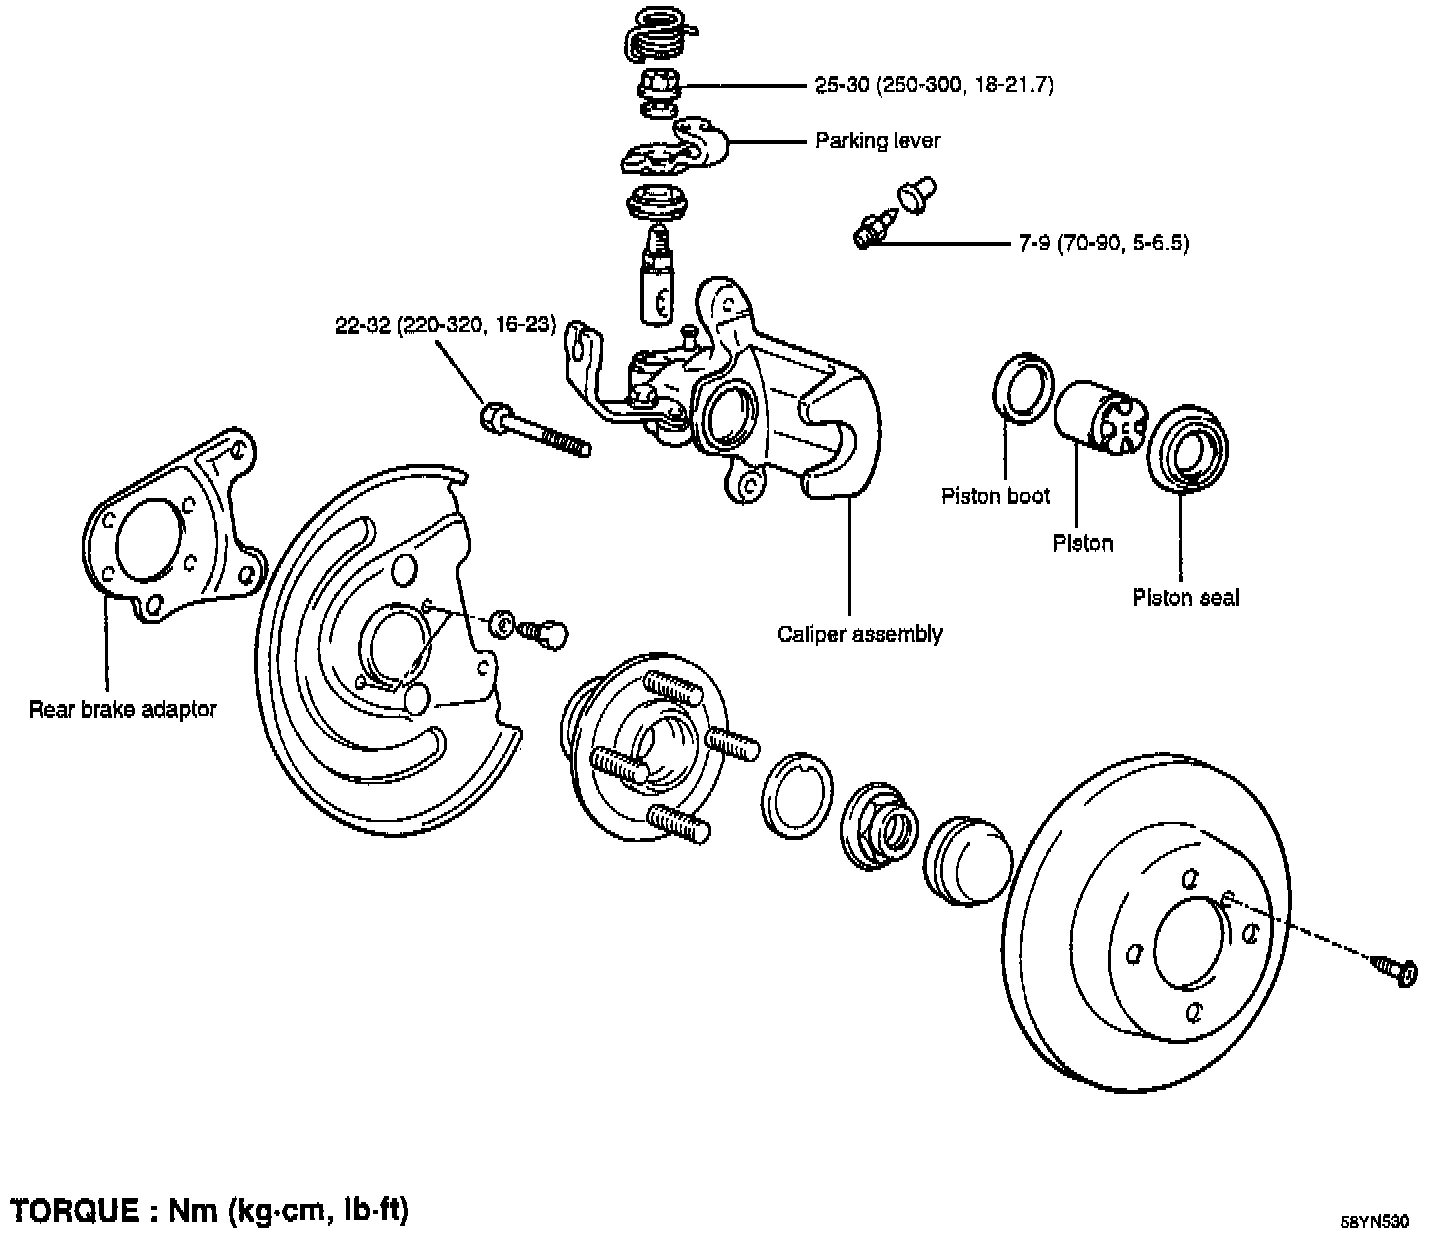
BRAKE PAD AND CALIPER REMOVAL
1. Remove the wheel.

2. Remove the brake fluid hose.

3. Remove the caliper assembly mounting bolts (2EA).

4. Remove the brake pad and caliper assembly.

5. Remove the parking cable after disconnecting the parking cable mounting clip.
INSPECTION
1. Check the pads for wear or oil contamination and replace if necessary.

NOTE: The pads for the right and left wheels should be replaced at the same time
Pad thickness wear limit: 0.8 mm (0.315 inch)
2. Check the leading and trailing shoe keys and retaining screw for damage, or wear. Replace the keys and retaining screw at the same time the pads are replaced.
3. Check for worn or damaged dust boots if dust or mud has entered the caliper assembly through this seal, the caliper assembly must be replaced or rebuilt.
INSTALLATION
NOTE: Before replacing the brake pads, remove brake fluid from the master cylinder reservoir until it is half full.

1. Check for worn, damaged, or rusted piston bore and piston. Replace the damaged parts if necessary.
2. Check for damaged piston seal, boot, and pin insulators.
3. Apply a recommended lubricant to the following parts:
PARTS RECOMMENDED LUBRICANT QUANTITY
Piston seal Brake fluid (Dot 3) As required
Cylinder inner side Brake fluid (Dot 3) As required
Piston boot Brake fluid (Dot 3) As required
Piston outer surface Brake fluid (Dot 3) As required
Guide-rod insulator Rubber grease As required

4. Push the piston into the caliper with special tool.