Repair Procedures
Replacement
Lower Panel Replacement
1. Remove the crash pad side cover.
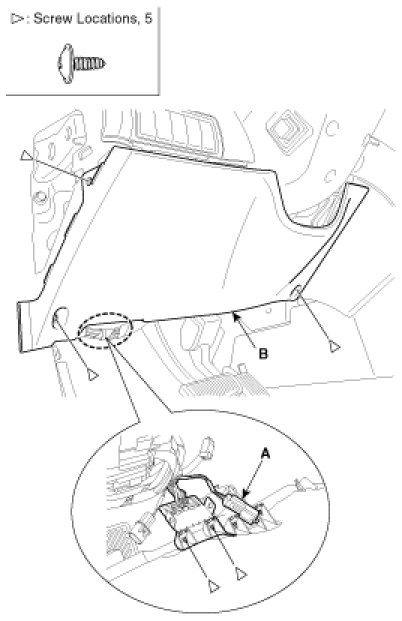
2. After loosening the crash pad lower panel mounting screw, then remove the lower panel (B).
3. Disconnecting the connector (A).
4. Installation is the reverse of removal.
Cluster Facia Panel Replacement
NOTE:
- When prying with a flat-up screwdriver, wrap it with protective tape, and apply protective tape around the related parts, to prevent damage.
- Put on gloves to protect your hands.
1. Tilt the steering column down.
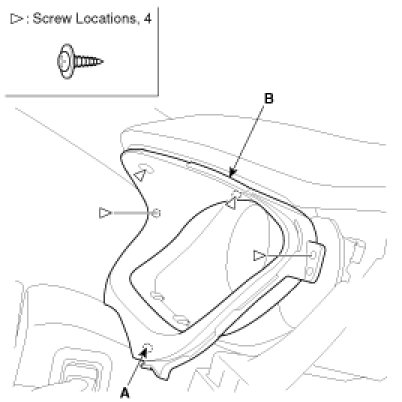
2. After disconnecting the trip sensor connector (A), remove the cluster facia panel (B).
3. Installation is the reverse the removal.
NOTE:
- Make sure the connector is plugged in properly.
Center Facia Panel Replacement
NOTE:
- When prying with a flat-up screwdriver, wrap it with protective tape, and apply protective tape around the related parts, to prevent damage.
- Put on gloves to protect your hands.
1. Remove the crash pad side cover.
2. Remove the lower crash pad panel.
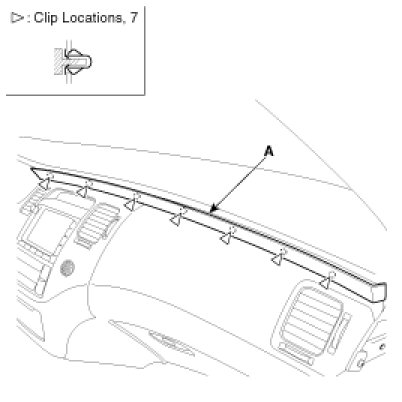
3. Remove the center garnish (A).
4. Loosening the crash pad center facia panel mounting screws.
5. After disconnecting the connector, remove center facia panel (A).
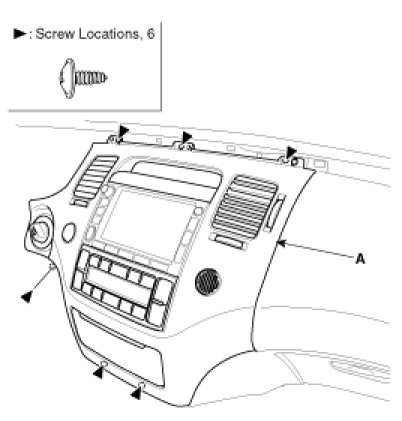
6. Installation is the reverse of removal.
NOTE:
- Make sure the connector is plugged in properly.
Heater Control Unit Replacement
1. Remove the center facia panel.
2. Loosening the heater control mounting screw, remove the heater control unit (A).
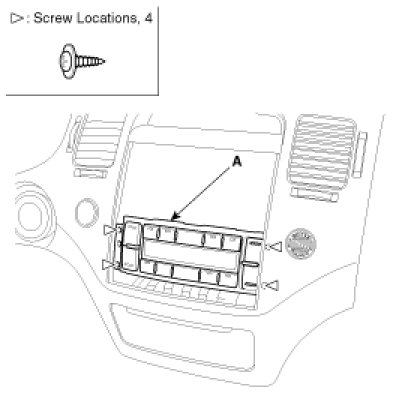
3. Installation is the reverse of removal.
NOTE:
- Make sure the connector is plugged in properly
Cluster Replacement
1. Remove the cluster facia panel.
2. Loosen the screws.
3. Disconnect the cluster connector, then remove the cluster (A).
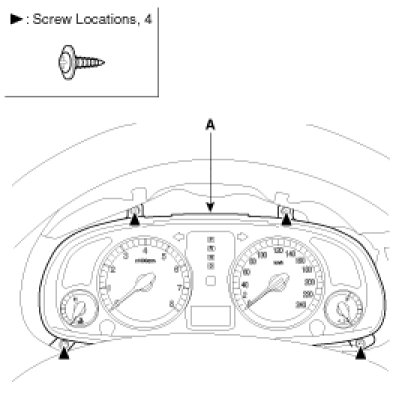
4. Installation is the reverse of removal.
NOTE:
- Make sure the connector is plugged in properly.
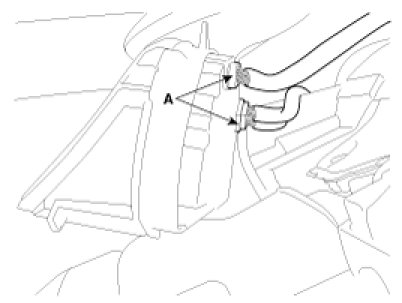
Audio Assembly Replacement
1. Remove the center facia panel.
2. Loosen the screws.
3. Disconnect the audio connector and antenna cable, then remove the audio assembly (A).
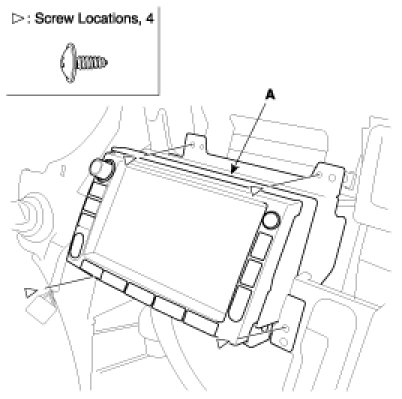
4. Installation is the reverse of removal.
NOTE:
- Make sure the connector is plugged in properly.
Lower Crash Pad Panel Replacement
NOTE:
- When prying with a flat-up screwdriver, wrap it with protective tape, and apply protective tape around the related parts, to prevent damage.
- Put on gloves to protect your hands.
1. Remove the glove box.
2. Loosen the mounting bolts and screws.
3. After disconnecting the connector (A), remove the lower crash pad panel (B).
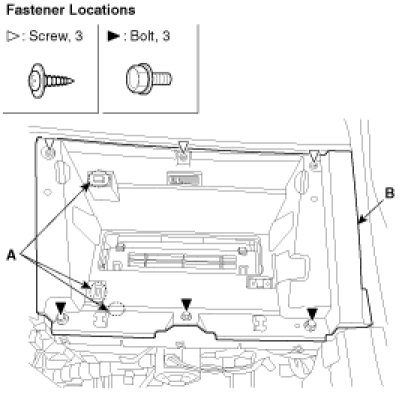
4. Installation is the reverse of removal.
NOTE:
- Make sure the connector is plugged in properly.
Glove Box Replacement
1. Disconnect the damper (B) from the glove box (A).
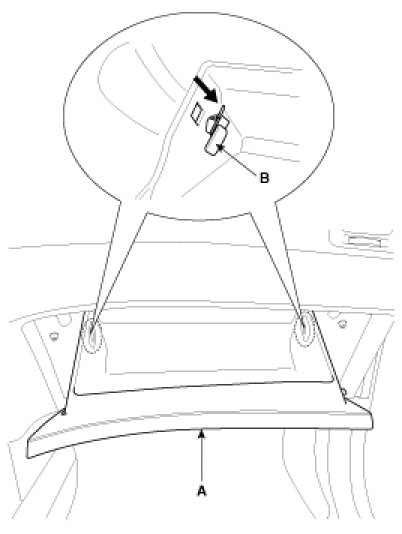
2. Remove the glove box (A) from the lift (B).
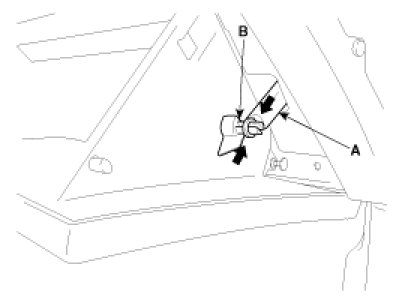
3. Disconnect the pine (A), then remove the glove box (B)
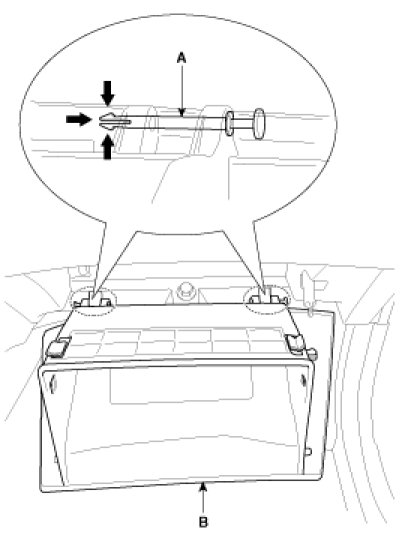
4. Installation is the reverse of removal.
Cover Replacement
NOTE:
- When prying with a flat-up screwdriver, wrap it with protective tape, and apply protective tape around the related parts, to prevent damage.
- Put on gloves to protect your hands.
1. Remove the crash pad side cover (A), crash pad center under cover (B), under cover (C).
(1) Crash pad side cover.
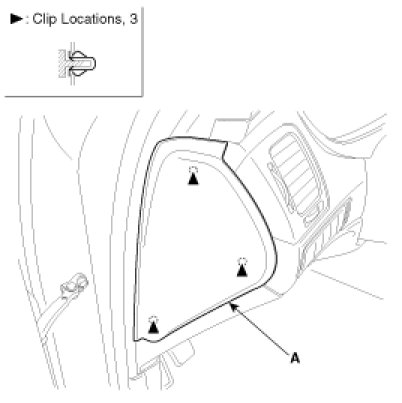
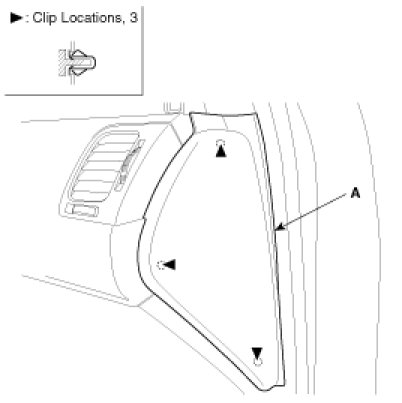
(2) Front crash pad center under cover, LH
- Remove the console assembly.
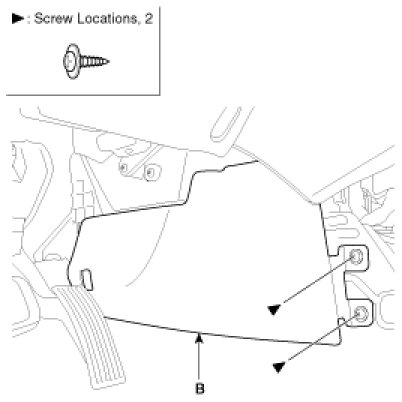
(3) Front crash pad center under cover, RH
- Remove the console assembly.
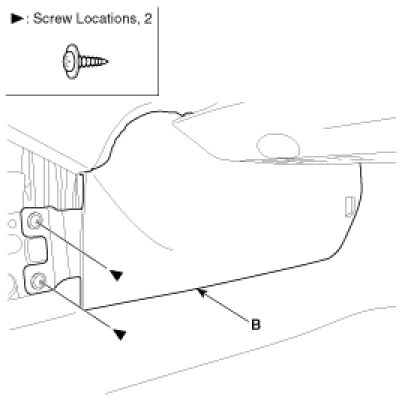
(4) Under cover
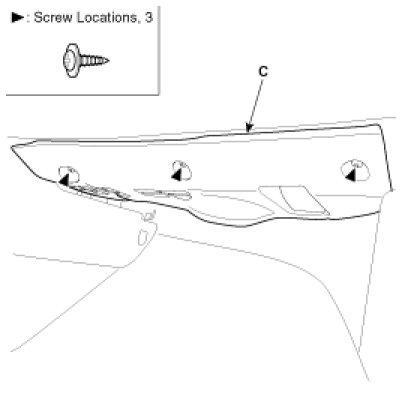
2. Installation is the reverse of removal.
Air Vent Replacement
NOTE:
- When prying with a flat-up screwdriver, wrap it with protective tape, and apply protective tape around the related parts, to prevent damage.
- Put on gloves to protect your hands.
1. Remove the side cover.
2. Loosen the mounting screws, then remove the air vent (A).
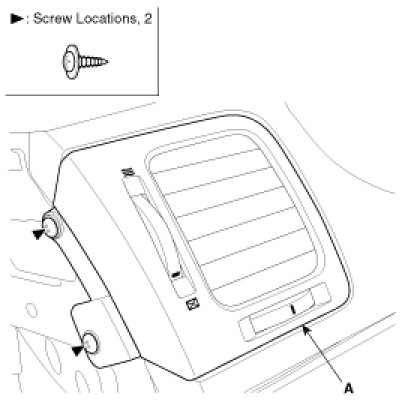
3. Installation is the reverse of removal.
Shroud Replacement
1. Loosen the screws.
2. Disconnect the connector, then remove the shroud assembly (A).
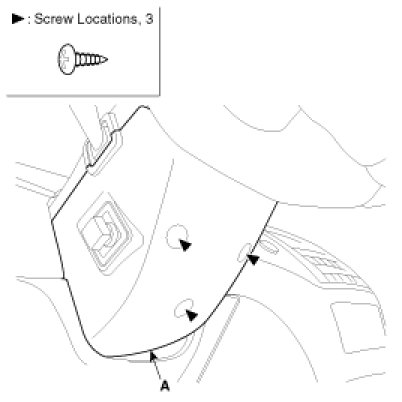
3. Installation is the reverse of removal.
Crash Pad Replacement
NOTE:
- When prying with a flat-up screwdriver, wrap it with protective tape, and apply protective tape around the related parts, to prevent damage.
- Put on gloves to protect your hands.
1. Remove the following items.
A. Front seat.
B. Cluster facia panel, cluster.
C. Audio assembly.
D. Glove box.
E. Side cover, center under cover.
F. Front pillar trim.
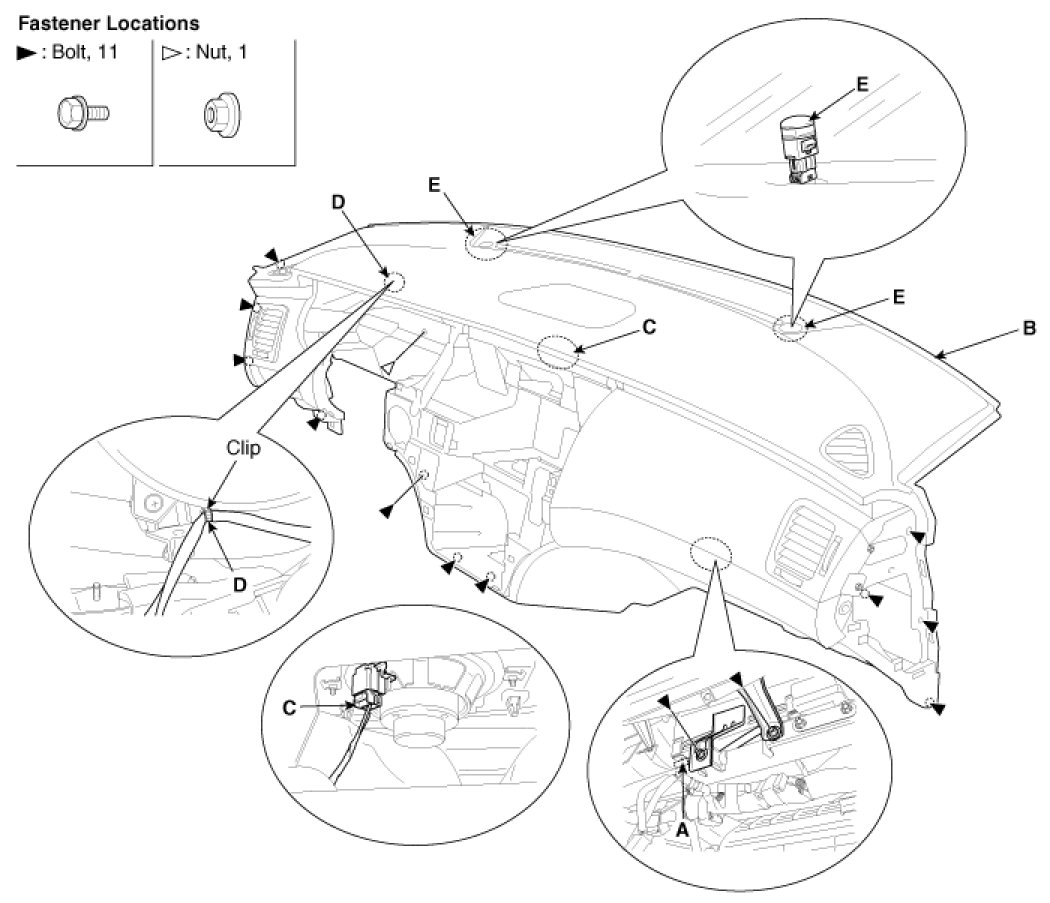
2. Remove the photo sensor (E), speaker connector (C), clip (D).
3. Disconnect the passenger`s air bag connector (A).
Loosen the bolt and nut, then remove the crash pad (B).
4. Installation is the reverse of removal.
NOTE:
- Make sure the crash pad fits onto the guide pins correctly.
- Before tightening the bolts, make sure the crash pad wire harnesses are not pinched.
- Make sure the connectors are plugged in properly, and the antenna lead is connected properly.
- Enter the anti- theft code for the radio, then enter the customer`s radio station presets.
Cowl Cross Bar Assembly Replacement
NOTE:
- When prying with a flat-up screwdriver, wrap it with protective tape, and apply protective tape around the related parts, to prevent damage.
- Put on gloves to protect your hands.
1. Remove the crash pad.
2. Remove the connectors.
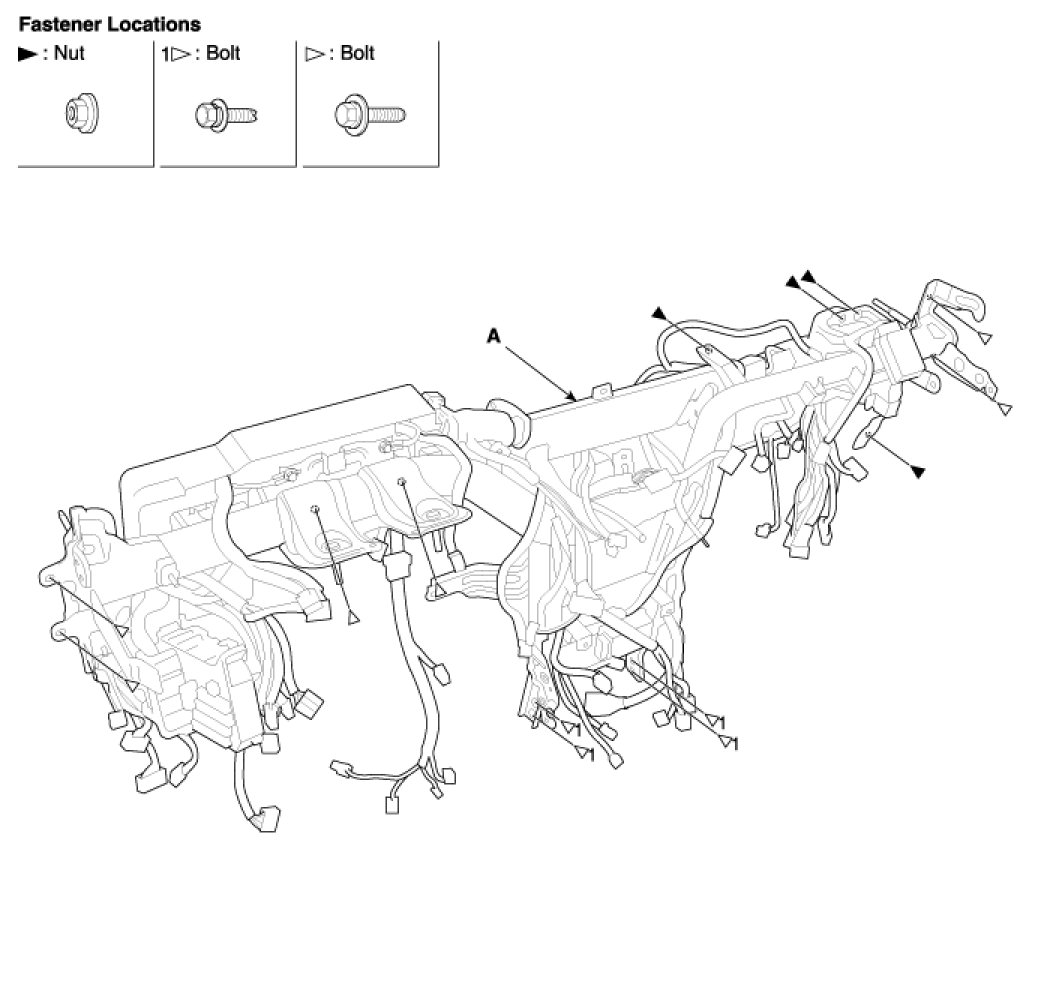
3. Loosen the bolts and nuts, then remove cowl cross bar assembly (A).
4. Installation is the reverse of removal.
NOTE:
- Make sure the crash pad fits onto the guide pins correctly.
- Before tightening the bolts, make sure the crash pad wire harnesses are not pinched.
- Make sure the connectors are plugged in properly, and the antenna lead is connected properly.
- Enter the anti- theft code for the radio, then enter the customer`s radio station presets.