Exhaust System
EXHAUST SYSTEMRemoval and Installation
Exploded View EX-3:
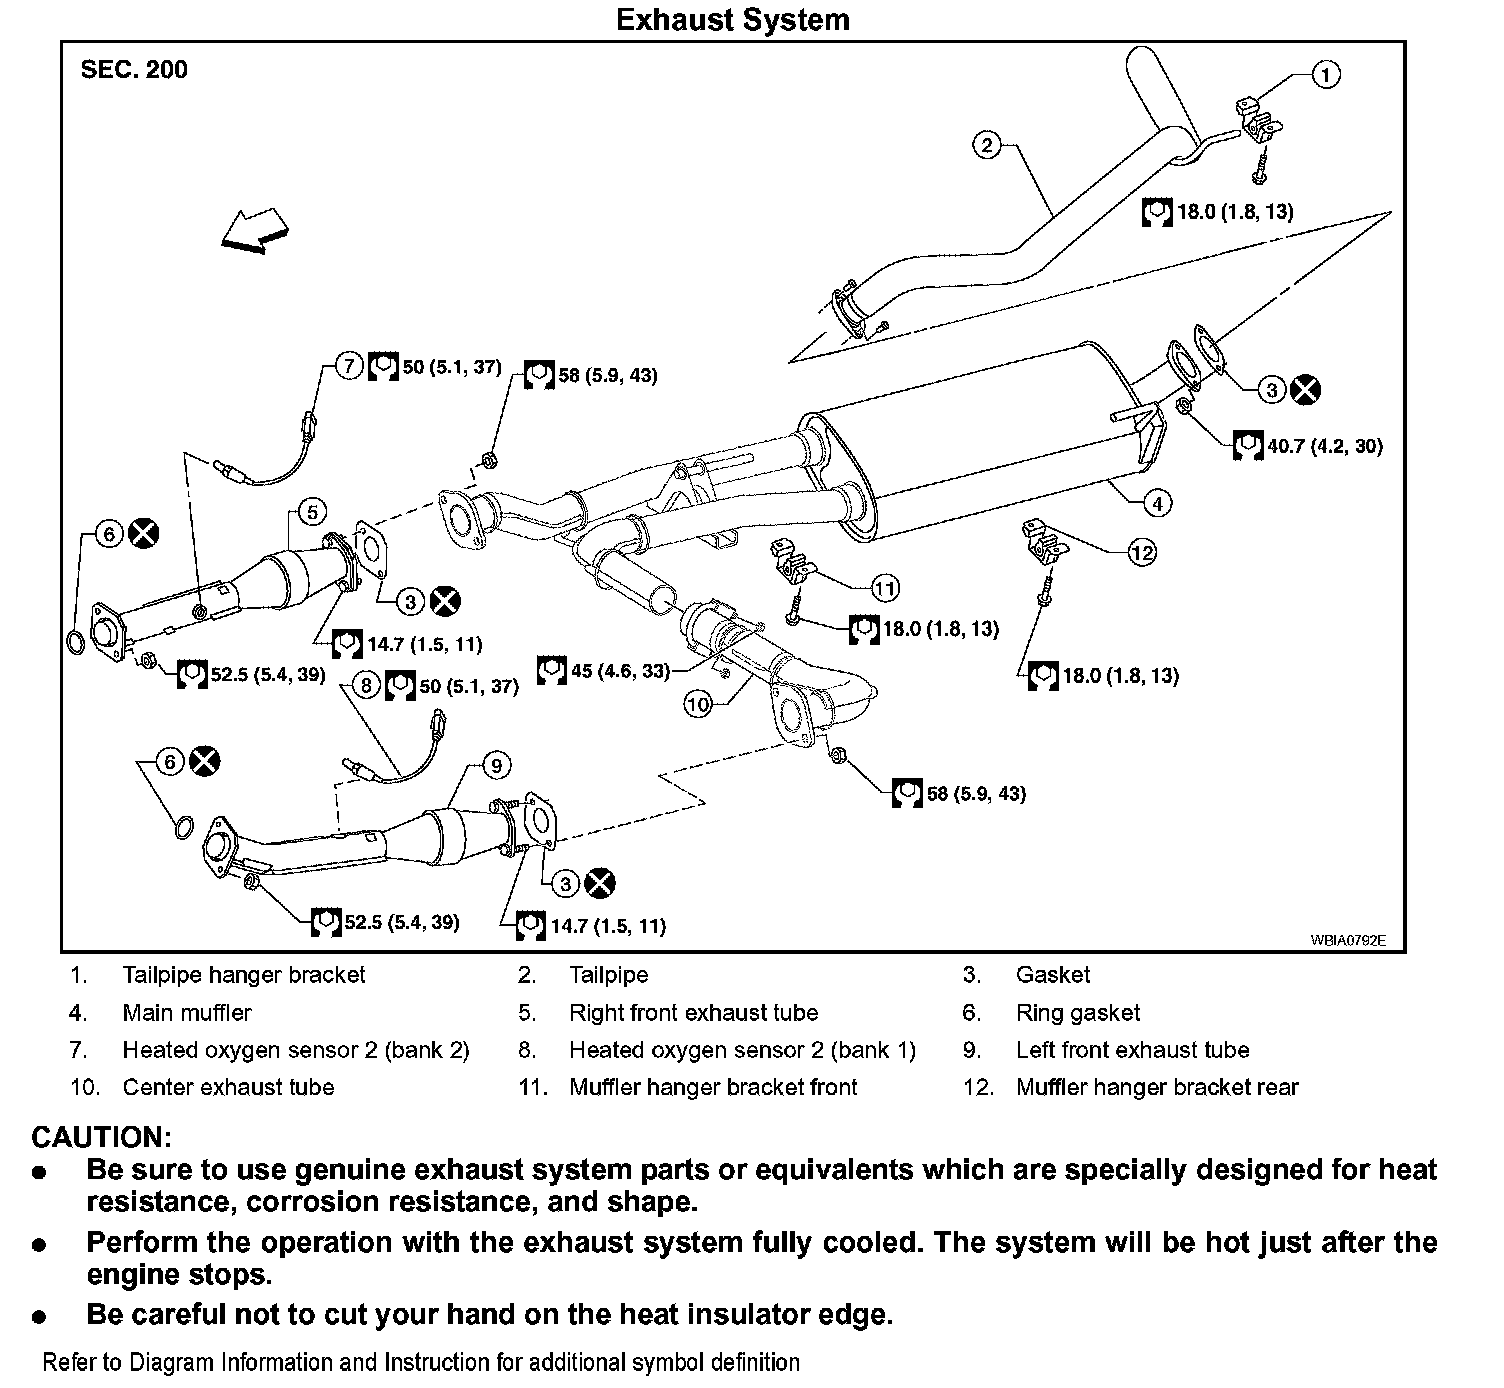
REMOVAL
Remove exhaust system components using power tool.
INSTALLATION
Installation is in the reverse order of removal.
CAUTION:
^ Always replace exhaust gaskets with new ones when reassembling.
^ Before installing a new heated oxygen sensor, clean and lube the exhaust tube threads using Tool.
Tool number
A: - (J-43897-18)
B: - (J-43897-12)
^ Discard any heated oxygen sensor which has been dropped from a height of more than 0.5 m (19.7 in) onto a hard surface such as a concrete floor; replace with a new one.
^ Do not over-torque the heated oxygen sensor. Doing so may damage the heated oxygen sensor, resulting in the MIL coming on.
^ If any mounting insulator is badly deformed, repair or replace it. If deposits such as mud pile up on the mounting insulators, clean and inspect them.
^ Temporarily tighten the nuts on the exhaust manifold side and the bolts on the vehicle side. Check each part for interference with other components, and then tighten the nuts and bolts to specification.
INSPECTION AFTER INSTALLATION
^ With the engine running, check exhaust tube joints for gas leakage and unusual noises.
^ Check to ensure that mounting brackets and mounting rubbers are installed properly and free from undue stress. Improper installation could result in excessive noise and vibration.