Oil Pan: Service and Repair
REMOVAL1. Disconnect negative cable from battery.
2. Raise the vehicle.
3. Remove the oil pan drain plug and drain the engine oil.
4. Remove the engine starter motor.
5. Remove the flywheel/torque converter housing access cover.
6. Position a jack stand directly under the engine vibration damper.
7. Place a piece of wood (2 x 2) between the jack stand and the engine vibration damper.
8. Remove the engine mount through bolts.
9. Using the jack stand, raise the engine until adequate clearance is obtained to remove the oil pan.
10. Remove transmission oil cooling lines (if equipped) and oxygen sensor wiring supports that are attached to the oil pan studs.
11. Remove the oil pan fasteners. Carefully remove the oil pan and gasket.
INSTALLATION
1. Clean the block and pan gasket surfaces.
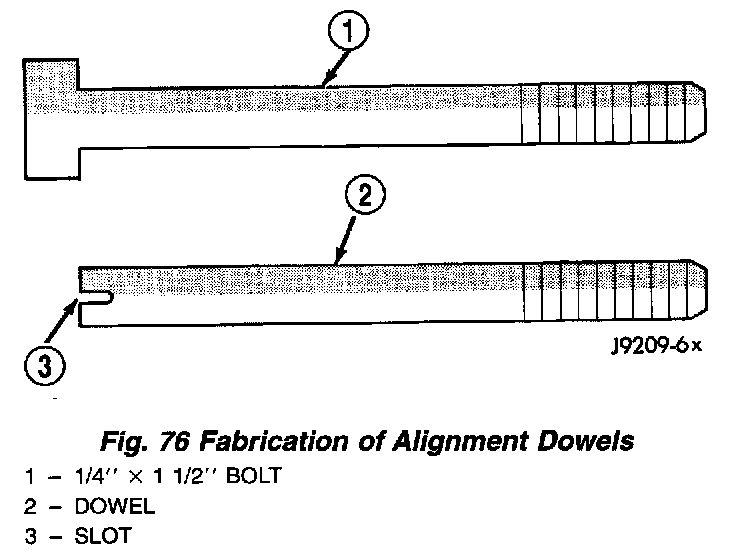
Fig. 76
2. Fabricate 4 alignment dowels from 1/4 x 1 1/2 inch bolts. Cut the head off the bolts and cut a slot into the top of the dowel. This will allow easier installation and removal with a screwdriver (Fig. 76).
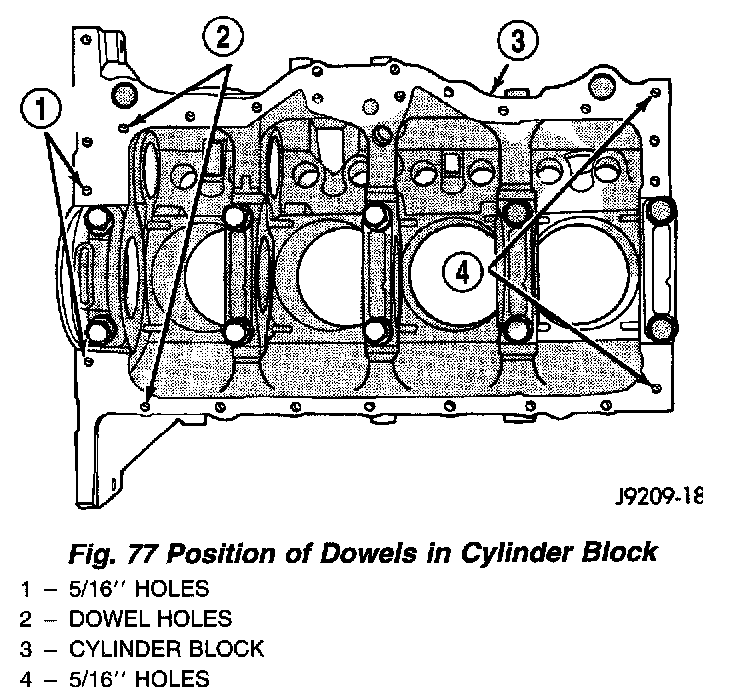
Fig. 77
3. Install two dowels in the timing case cover. Install the other two dowels in the cylinder block (Fig. 77).
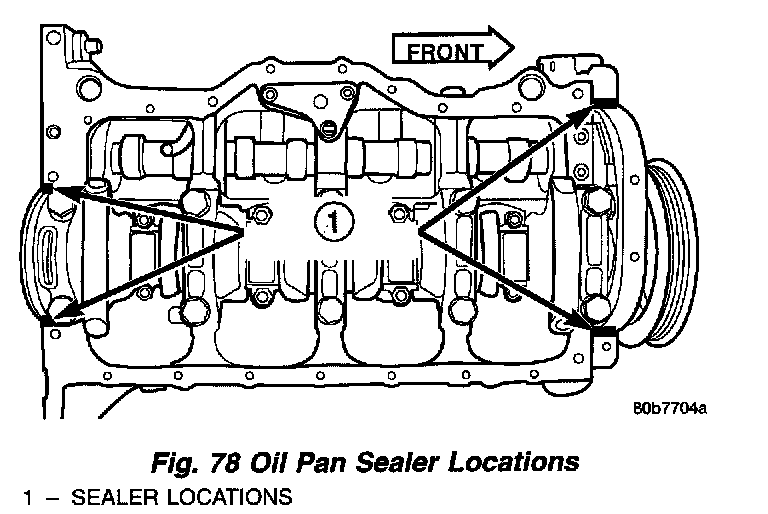
Fig. 78
4. Apply Mopar Silicone Rubber Adhesive Sealant on cylinder block to rear main bearing cap corners and cylinder block to front cover joints (four places).
5. Slide the one-piece gasket over the dowels and onto the block and timing case cover.
6. Position the oil pan over the dowels and onto the gasket.
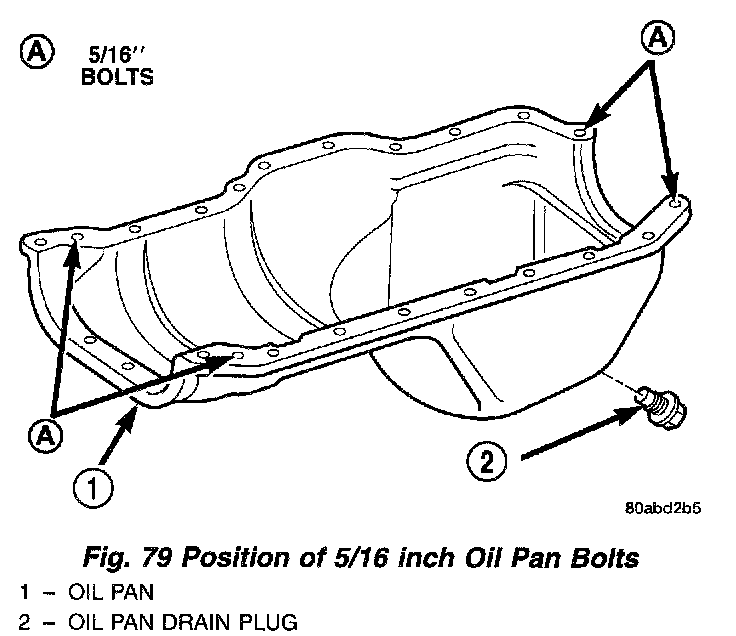
Fig. 79
7. Install the 1/4 inch oil pan fasteners. Tighten these fasteners to 9.5 Nm (84 in. lbs.) torque. Install the 5/16 inch oil pan fasteners (Fig. 79). Tighten these fasteners to 15 Nm (132 in. lbs.) torque.
8. Remove the dowels. Install the remaining 1/4 inch oil pan fasteners and tighten to 9.5 Nm (84 in. lbs.).
9. Lower the engine until it is properly located on the engine mounts.
10. Install the through bolts and tighten the nuts.
11. Lower the jack stand and remove the piece of wood.
12. Install the flywheel and torque converter housing access cover.
13. Install the engine starter motor.
14. Connect the exhaust pipe to the hanger and to the engine exhaust manifold.
15. Install transmission oil cooling lines (if equipped) and oxygen sensor wiring supports that attach to the oil pan studs.
16. Install the oil pan drain plug (Fig. 79). Tighten the plug to 34 Nm (25 ft. lbs.) torque.
17. Lower the vehicle.
18. Connect negative cable to battery.
19. Fill the oil pan with engine oil to the specified level.
WARNING: USE EXTREME CAUTION WHEN THE ENGINE IS OPERATING. DO NOT STAND IN A DIRECT LINE WITH THE FAN. DO NOT PUT YOUR HANDS NEAR THE PULLEYS, BELTS OR FAN. DO NOT WEAR LOOSE CLOTHING.
20. Start the engine and inspect for leaks.