Trunk / Liftgate: Service and Repair
LIFTGATE REMOVAL/INSTALLATION
1. Remove the LH and RH D-pillar trim panels. See - Locations.
2. Remove the safety seat tether anchors. See Service and Repair.
3. Remove the 3 headliner pin-type retainers and lower the headliner to access the liftgate electrical connectors and the rear washer union.
4. Disconnect the liftgate wiring harness electrical connector located under the right rear of the headliner.
5. Release the wiring harness locator and position the harness outside of the vehicle.
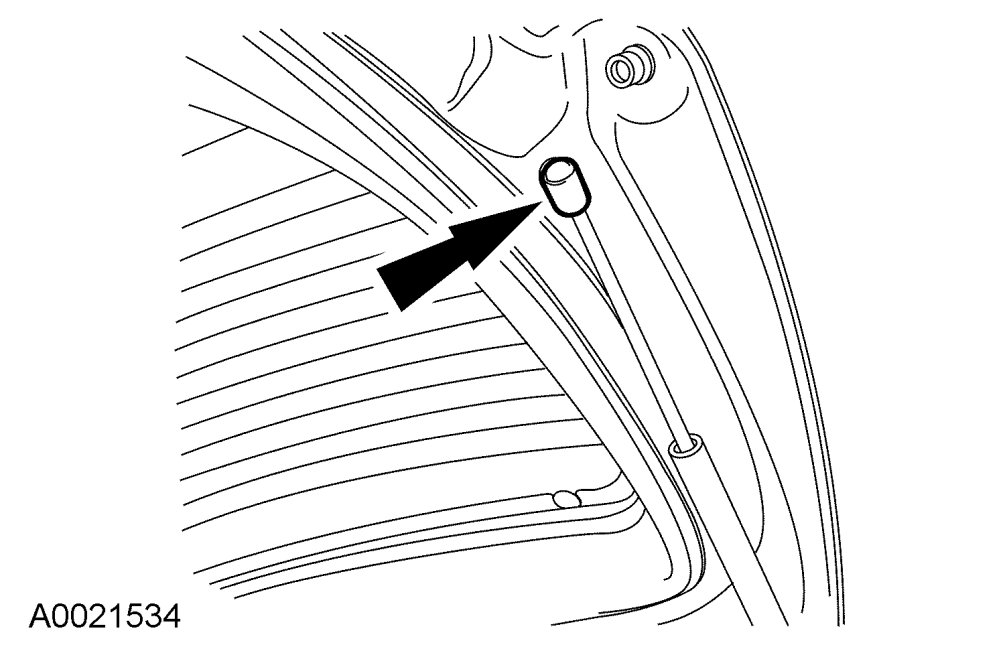
6. Disconnect the rear washer hose union located under the left rear of the headliner.
7. Release the rear washer hose grommet and position outside of the vehicle.
8. Remove the 2 liftgate struts from the liftgate.
- Remove the 2 spring retainers.
CAUTION:Support the liftgate before removing the liftgate struts.
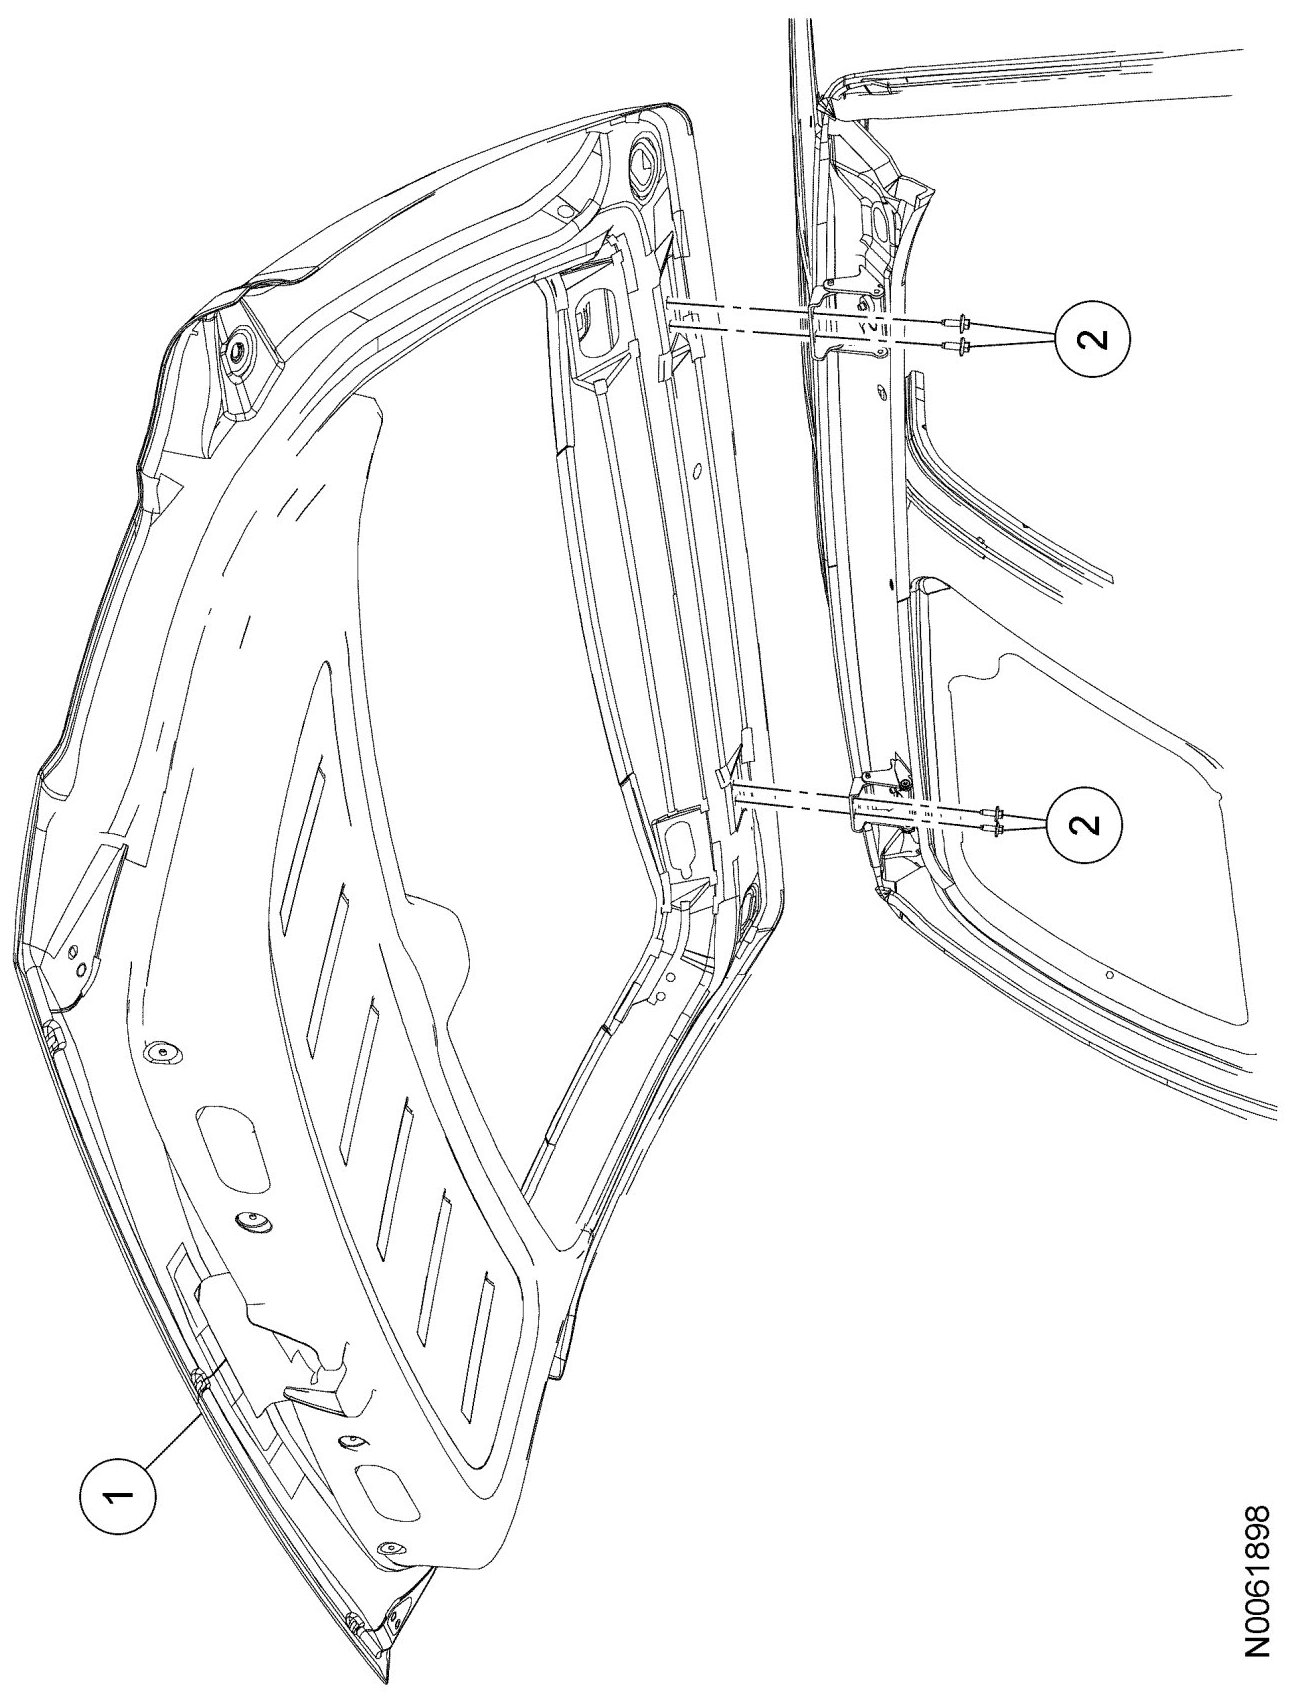
9. With a wax pencil, mark the position of each hinge and remove the 4 liftgate hinge-to-liftgate bolts.
- To install, tighten to 30 Nm {3.0 kgf-m, 22 ft-lbf}.
CAUTION:To minimize the possibility of the cross threading, hand-start all fasteners during the installation.
CAUTION:To avoid damaging the liftgate, this step requires an assistant.
10. Remove the liftgate.
11. To install, reverse the removal procedure.