Evaporative Emission Control Canister: Service and Repair
EVAPORATIVE EMISSION CANISTER REMOVAL/INSTALLATION
WARNING:Do not smoke, carry lighted tobacco or have an open flame of any type when working on or near any fuel-related component. Highly flammable mixtures are always present and may be ignited. Failure to follow these instructions may result in serious personal injury.
WARNING:Do not carry personal electronic devices such as cell phones, pagers or audio equipment of any type when working on or near any fuel-related component. Highly flammable mixtures are always present and may be ignited. Failure to follow these instructions may result in serious personal injury.
WARNING:Always disconnect the battery ground cable at the battery when working on an evaporative emission (EVAP) system or fuel-related component. Highly flammable mixtures are always present and may be ignited. Failure to follow these instructions may result in serious personal injury.
1. With the vehicle in NEUTRAL, position it on a hoist. See Lifting.
2. Disconnect the battery ground cable. See Battery Disconnect.
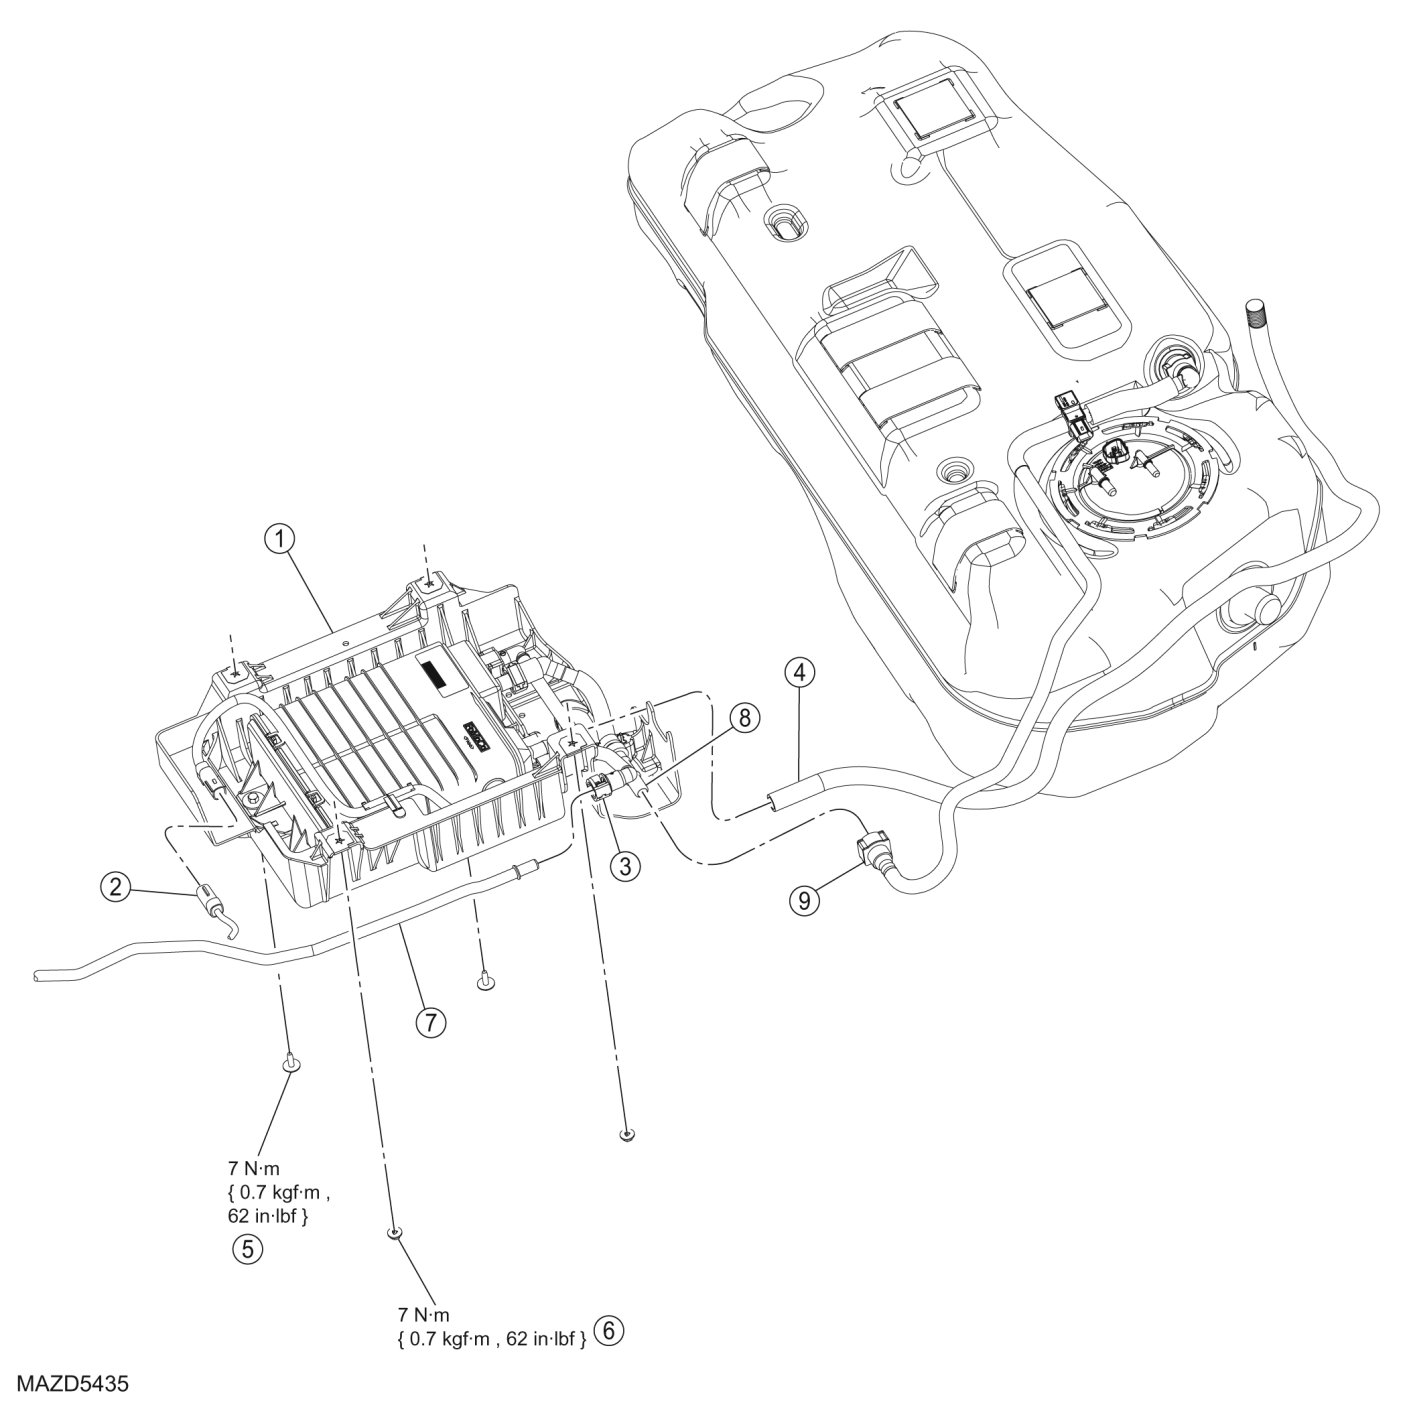
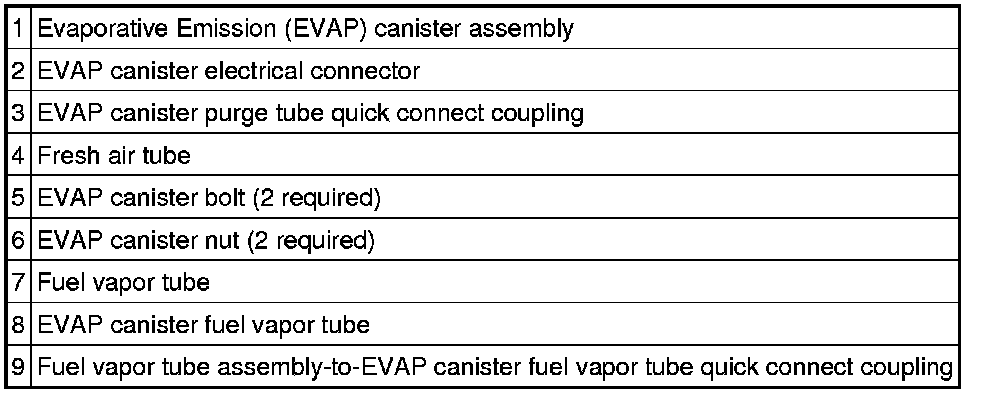
3. Disconnect the Evaporative Emission (EVAP) canister electrical connector.
4. Disconnect the fresh air tube from the EVAP canister.
5. Disconnect the fuel vapor tube assembly-to-EVAP canister fuel vapor tube quick connect coupling. See - Quick Release Coupling - Double Locking.
6. Disconnect the EVAP canister purge tube-to-fuel vapor tube quick connect coupling. See - Quick Release Coupling - Double Locking.
7. Remove the 2 nuts, 2 bolts and the EVAP canister assembly.
- To install, tighten to 7 Nm {0.7 kgf-m, 62 in-lbf}.
8. To install, reverse the removal procedure.
- Carry out the Evaporative Emission System Leak Test. See Component Tests and General Diagnostics.