Transaxle Front Support Insulator Removal/Installation
TRANSAXLE FRONT SUPPORT INSULATOR REMOVAL/INSTALLATION
1. Raise and support the vehicle on a hoist. See Lifting.
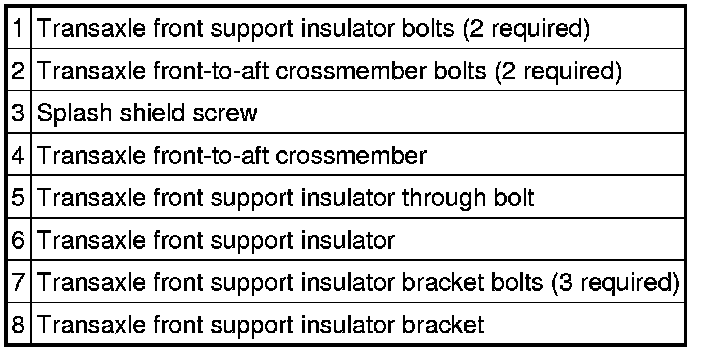
2. Using the special tool, support the engine.
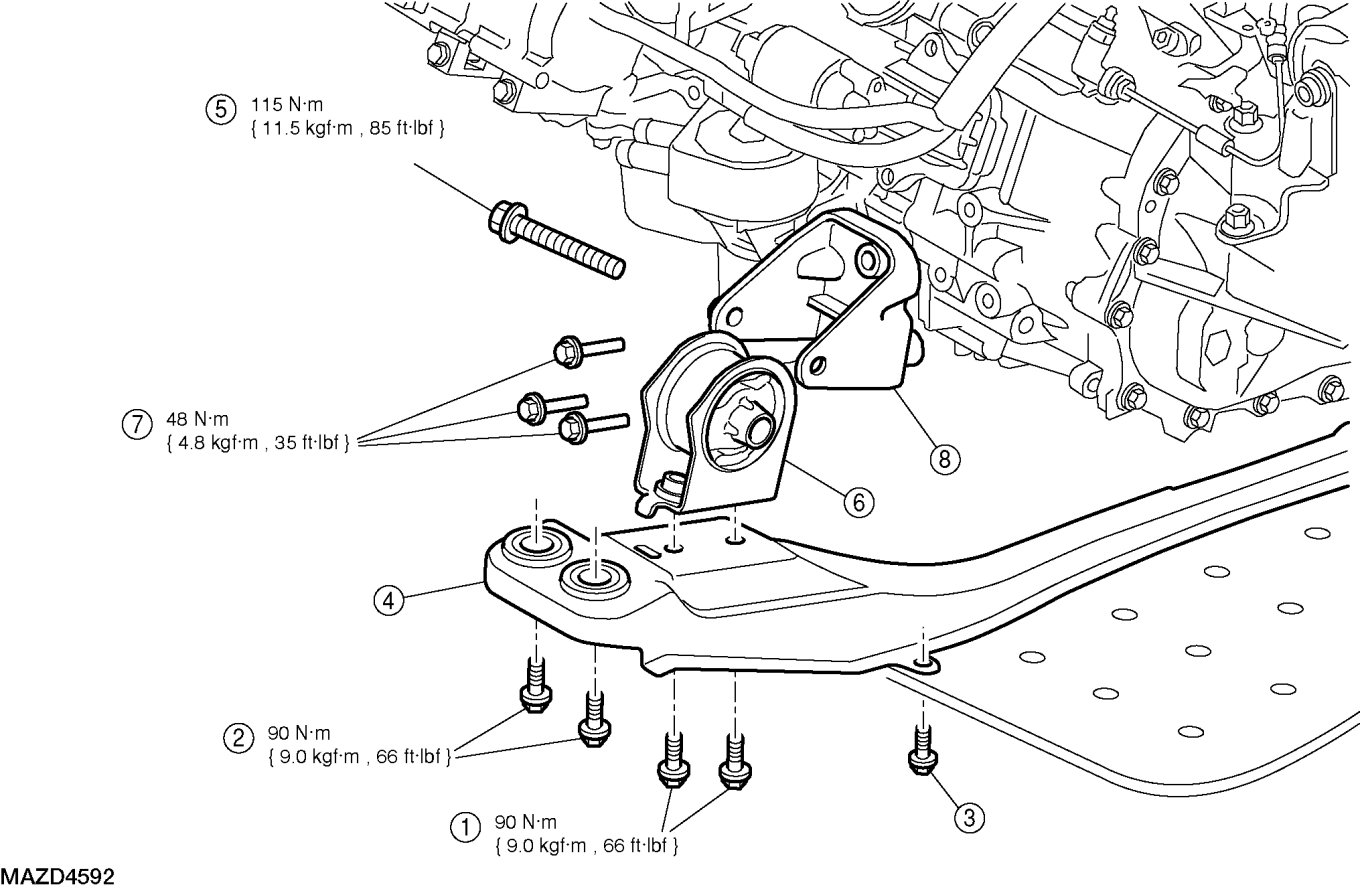
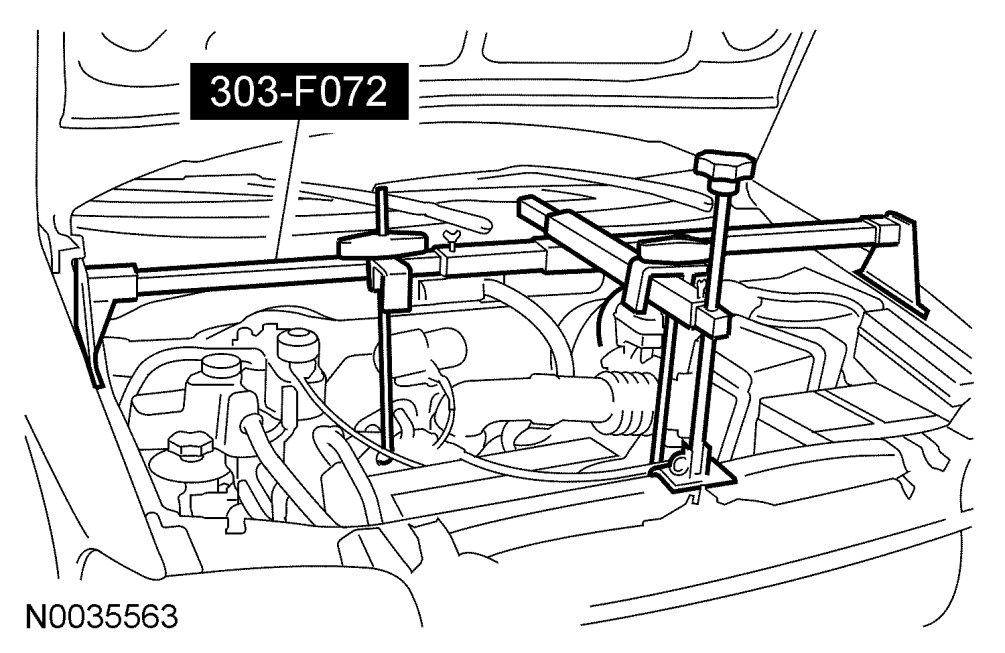
3. Remove the front-to-aft crossmember.
a. Remove the 2 transaxle front support insulator bolts.
b. Remove the splash shield screw.
i. To install, tighten to 90 Nm {9.0 kgf-m, 66 ft-lbf}.
c. Remove the 2 front-to-aft crossmember bolts and the nut.
i. To install, tighten to 90 Nm {9.0 kgf-m, 66 ft-lbf}.
ii. To install, tighten nut to 175 Nm {17.5 kgf-m, 129 ft-lbf}.
d. Remove the crossmember.
4. Remove the through bolt and the transaxle front support insulator.
- To install, tighten nut to 115 Nm {11.5 kgf-m, 85 ft-lbf}.
5. If necessary, remove the 3 bolts and the transaxle front support insulator bracket.
- To install, tighten to 48 Nm {4.8 kgf-m, 35 ft-lbf}.
6. To install, reverse the removal procedure.