EGR Valve: Service and Repair
EXHAUST GAS RECIRCULATION (EGR) VALVE REMOVAL/INSTALLATION - 2.5L
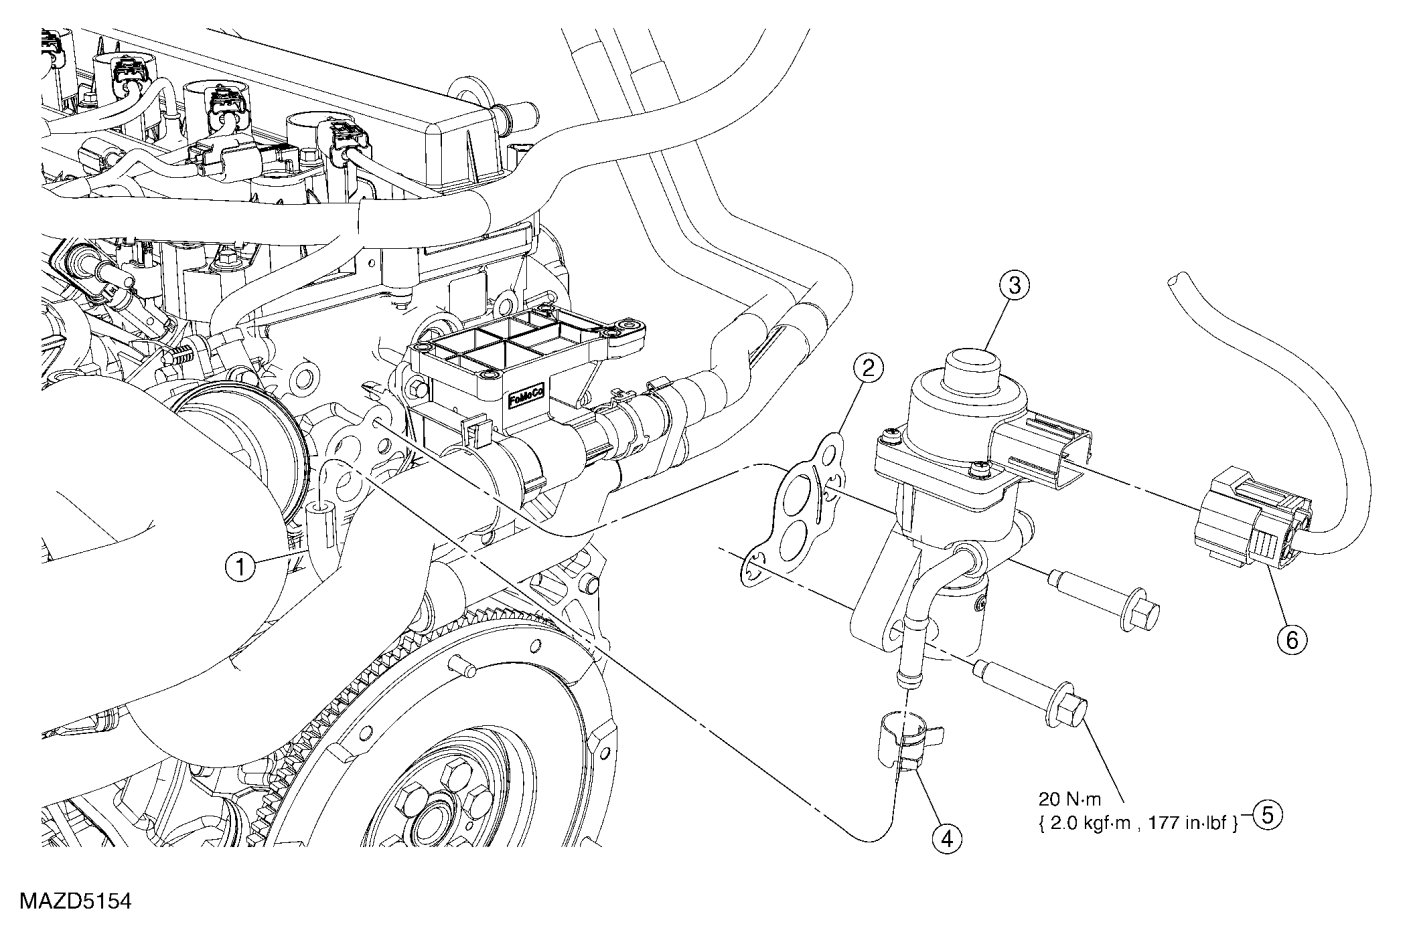
1. Drain the cooling system. See Removal and Replacement.
2. Remove the air cleaner outlet pipe. See - Air Cleaner Outlet Pipe Removal/Installation.
3. Disconnect the EGR valve electrical connector.
4. Release the clamp and remove the coolant hose from the EGR valve.
5. Remove the 2 bolts and the EGR valve.
- To install, tighten to 20 Nm {2.0 kgf-m, 177 in-lbf}.
6. Remove and discard the EGR valve gasket.
- Clean and inspect the EGR gasket mating surfaces.
CAUTION:Do not use metal scrapers, wire brushes, power abrasive discs or other abrasive means to clean the sealing surfaces. These tools cause scratches and gouges that make leak paths. Use a plastic scraping tool to remove all traces of the exhaust gas recirculation (EGR) valve gasket.
NOTE:If there is no residual gasket material present, metal surface prep can be used to clean and prepare the surfaces.
NOTE:Do not reuse the exhaust gas recirculation (EGR) valve gasket.
7. To install, reverse the removal procedure.
NOTE:Install a new EGR valve gasket.
8. Fill and bleed the cooling system. See Removal and Replacement.