 |
am6zzw00012471
SAS CONTROL MODULE CONNECTOR COVER REMOVAL/INSTALLATION
id081000805000
Removal
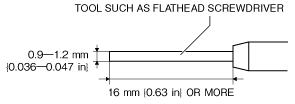
1. Obtain a tool such as a flathead screwdriver of the dimensions shown in the figure.
am6zzw00012471
|
2. Switch the ignition OFF (LOCK).
3. Disconnect the negative battery cable and wait for 1 min or more. (See NEGATIVE BATTERY CABLE DISCONNECTION/CONNECTION [SKYACTIV-G 2.0, SKYACTIV-G 2.5].)(See NEGATIVE BATTERY CABLE DISCONNECTION/CONNECTION [SKYACTIV-G 2.0, SKYACTIV-G 2.5 (WITHOUT i-stop)].)(See NEGATIVE BATTERY CABLE DISCONNECTION/CONNECTION [SKYACTIV-D 2.2].)
4. Remove the following parts:
5. Set the parking brake lever aside. (See PARKING BRAKE LEVER REMOVAL/INSTALLATION.)
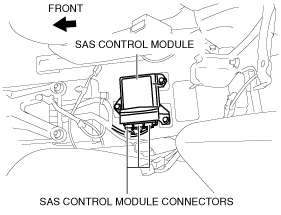
6. Disconnect the SAS control module connectors.
am6zzw00012472
|
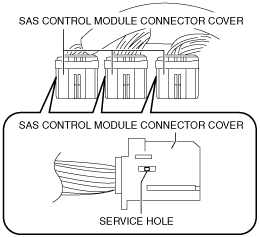
7. Insert the flathead screwdriver into the service hole of the SAS control module connector cover in the position shown in the figure.
am6zzw00012473
|
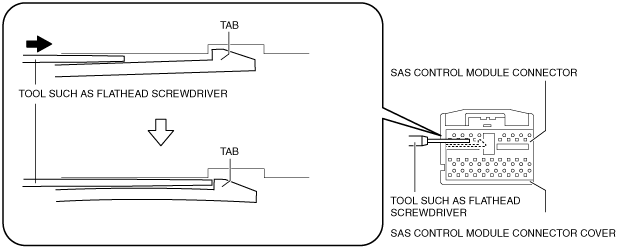
8. Insert the flathead screwdriver in the direction of the arrow shown in the figure until the SAS control module connector cover tab is detached from the SAS control module connector.
am6zzw00012474
|
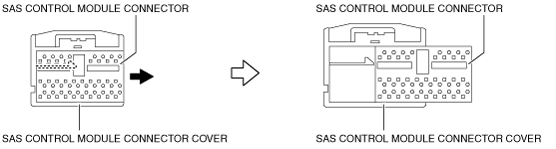
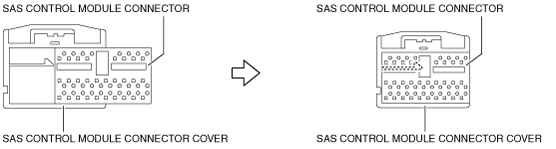
9. Pull out the SAS control module connector in the direction of the arrow shown in the figure and remove the SAS control module connector cover.
am6zzw00012475
|
Installation
1. Install the SAS control module connector cover to the SAS control module connector.
am6zzw00012476
|
2. Connect the SAS control module connectors.
am6zzw00012472
|
3. Install the following parts:
4. Connect the negative battery cable. (See NEGATIVE BATTERY CABLE DISCONNECTION/CONNECTION [SKYACTIV-G 2.0, SKYACTIV-G 2.5].) (See NEGATIVE BATTERY CABLE DISCONNECTION/CONNECTION [SKYACTIV-G 2.0, SKYACTIV-G 2.5 (WITHOUT i-stop)].) (See NEGATIVE BATTERY CABLE DISCONNECTION/CONNECTION [SKYACTIV-D 2.2].)
5. Switch the ignition ON (engine off or on).
6. Verify that the air bag/front seat belt pre-tensioner system warning light turns on for approx. 6 s and turns off.