Caution
• Affix protective tape to the position shown in the figure.
ac5uuw00001739
|
FRONT CONSOLE REMOVAL/INSTALLATION
id091700457400
ac5uuw00001739
|
1. Disconnect the negative battery cable. (See NEGATIVE BATTERY CABLE DISCONNECTION/CONNECTION [SKYACTIV-G 2.0, SKYACTIV-G 2.5].) (See NEGATIVE BATTERY CABLE DISCONNECTION/CONNECTION [SKYACTIV-G 2.0, SKYACTIV-G 2.5 (WITHOUT i-stop)].) (See NEGATIVE BATTERY CABLE DISCONNECTION/CONNECTION [SKYACTIV-D 2.2].)
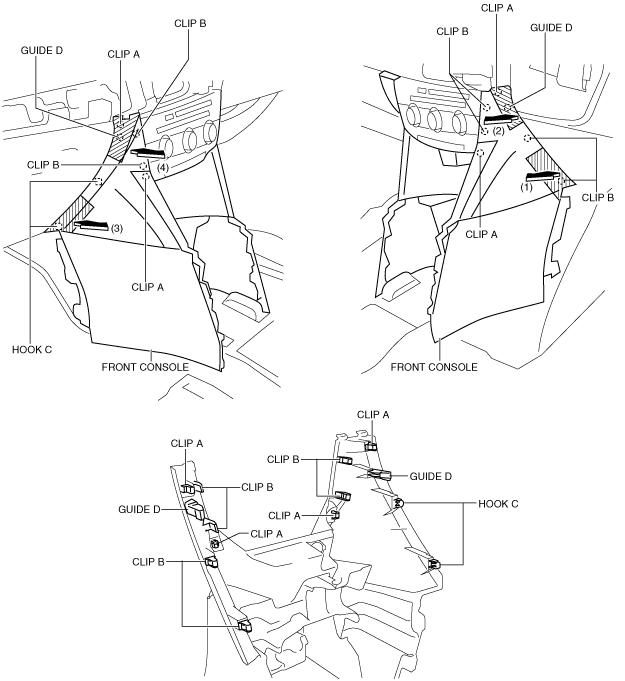
2. Remove the following parts:
3. Take the shaded area shown in the figure, and remove the front console in the direction of the arrow in the order of (1), (2), (3), (4) while detaching clips A, clips B, hooks C, guides D.
ac5uuw00001740
|
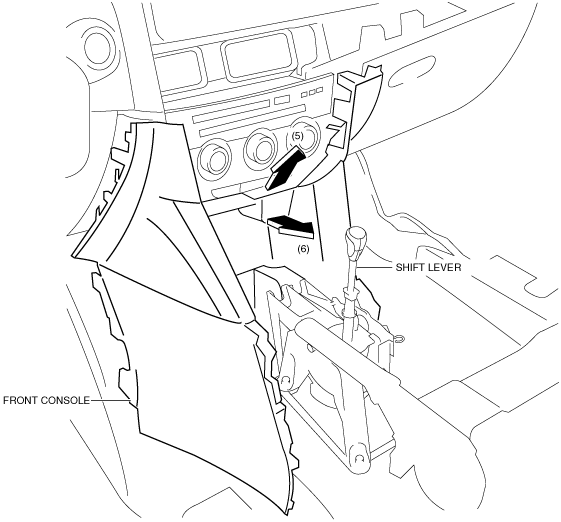
4. Disconnect the front accessory socket connector.
5. Pull the front console in the direction of the arrow in the order of (5), (6) and remove the front console while detaching the selector lever (ATX) or shift lever (MTX).
ATX
ac5wzw00004615
|
MTX
ac5wzw00004616
|
6. Install in the reverse order of removal.