|
ac5uuw00005269
LOWER PANEL REMOVAL/INSTALLATION
id091700801100
Driver-side
1. Disconnect the negative battery terminal. (See NEGATIVE BATTERY TERMINAL DISCONNECTION/CONNECTION.)
2. Remove the following parts:
3. Partially peel back the seaming welt.
ac5uuw00005269
|
4. Remove the bolt.
ac5wzw00011194
|
5. Pull the driver-side lower panel in the order of arrows (1), (2), (3), and (4) shown in the figure, and remove it while detaching the clips, hook, tab, and guide.
L.H.D.
ac5wzw00011343
|
R.H.D.
ac5wzw00011344
|
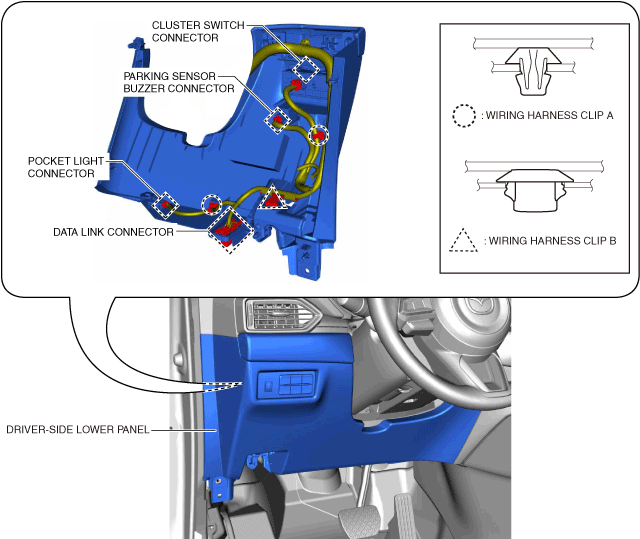
6. Disconnect the cluster switch connector.
ac5wzw00013164
|
7. Remove the data link connector.
8. Disconnect the parking sensor buzzer connector. (with parking sensor)
9. Disconnect the pocket light connector. (with pocket light)
10. Remove wiring harness clips A and B.
Passenger-side
Removal
1. Disconnect the negative battery terminal. (See NEGATIVE BATTERY TERMINAL DISCONNECTION/CONNECTION.)
2. Remove the following parts:
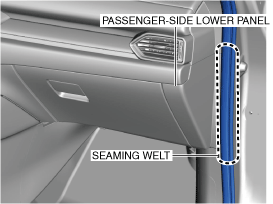
3. Partially peel back the seaming welt.
ac5uuw00005273
|
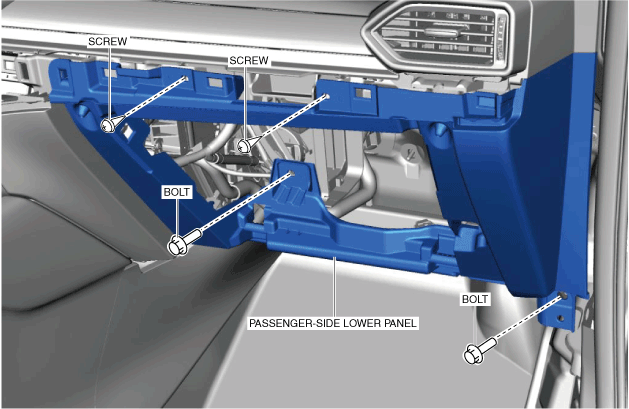
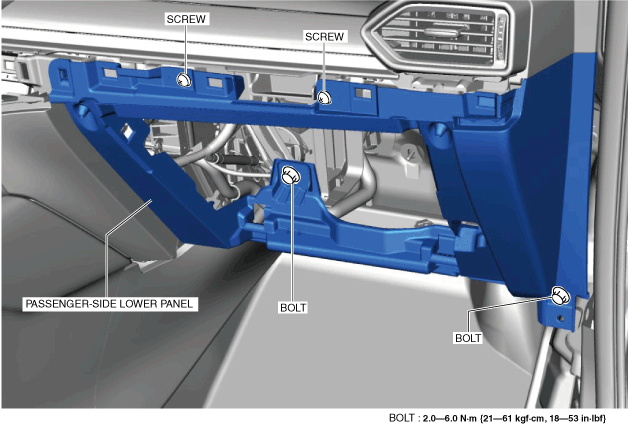
4. Remove the bolts.
ac5uuw00005274
|
5. Remove the screws.
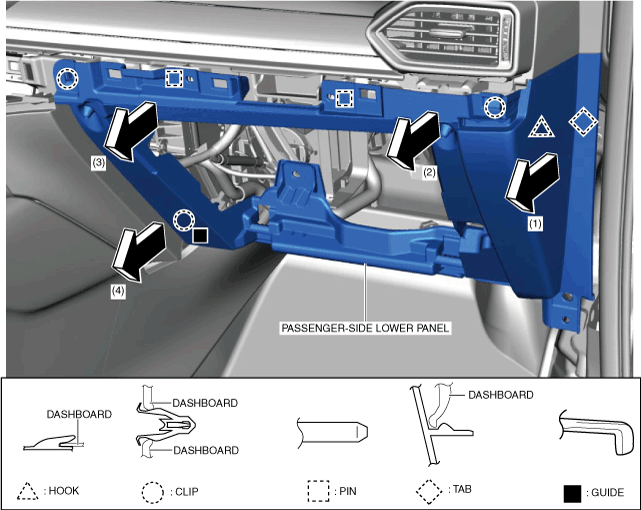
6. Move the passenger-side lower panel in the order of arrows (1), (2), (3), and (4) shown in the figure, and remove it while detaching the hook, clips, pins, tab, and guide.
ac5wzw00013165
|
Installation
1. Install the hook, clips, pins, tab, and guide while pressing the passenger-side lower panel in the order of arrows (1), (2), (3), and (4) shown in the figure.
ac5wzw00013166
|
2. Assemble the passenger-side lower panel to the dashboard and tighten the bolts and screws temporarily.
ac5uuw00005274
|
3. Install the glove compartment. (See GLOVE COMPARTMENT REMOVAL/INSTALLATION.)
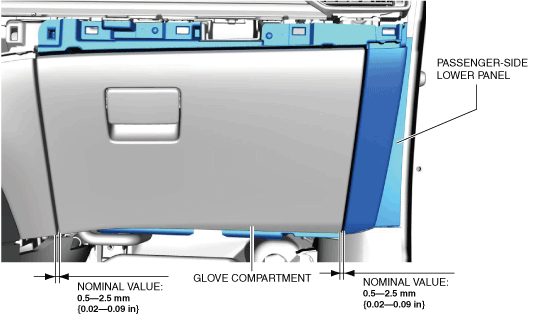
4. Measure the gap between the glove compartment and the passenger-side lower panel and verify that the measured value is within the nominal value.
ac5wzw00011956
|
5. Remove the glove compartment. (See GLOVE COMPARTMENT REMOVAL/INSTALLATION.)
6. Tighten the bolts and screws completely.
ac5wzw00011195
|
7. Install the following parts:
8. Install the seaming welt.
ac5uuw00005279
|
9. Connect the negative battery terminal. (See NEGATIVE BATTERY TERMINAL DISCONNECTION/CONNECTION.)