 |
ac5wzw00009018
BONNET RELEASE LEVER AND RELEASE CABLE REMOVAL/INSTALLATION
id091400006600
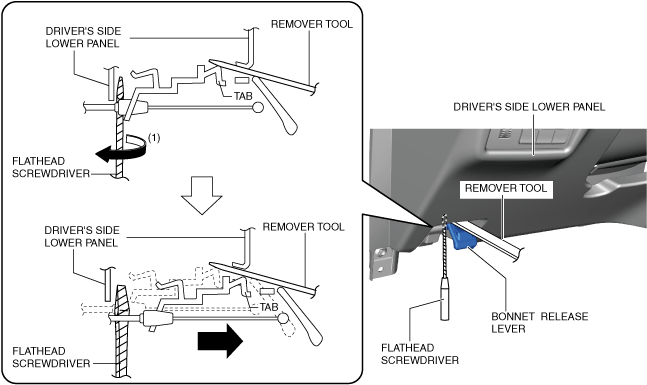
Bonnet Release Lever
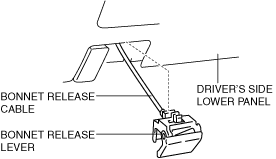
1. While pulling the bonnet release lever, insert a remover tool into the position shown in the figure.
ac5wzw00009018
|
2. Insert a tape-wrapped flathead screwdriver into the position shown in the figure and rotate it in the direction of arrow (1) to detach the bonnet release lever from the driver’s side lower panel.
3. Disconnect the bonnet release cable from the bonnet release lever.
ac5wzw00009019
|
4. Install in the reverse order of removal.
Bonnet Release Cable
L.H.D.
1. Disconnect the negative battery terminal. (See NEGATIVE BATTERY TERMINAL DISCONNECTION/CONNECTION.)
2. Remove the following parts:
3. Remove the bonnet latch protector. (See BONNET LATCH REMOVAL/INSTALLATION.)
4. Disconnect the bonnet release cable from the bonnet latch.
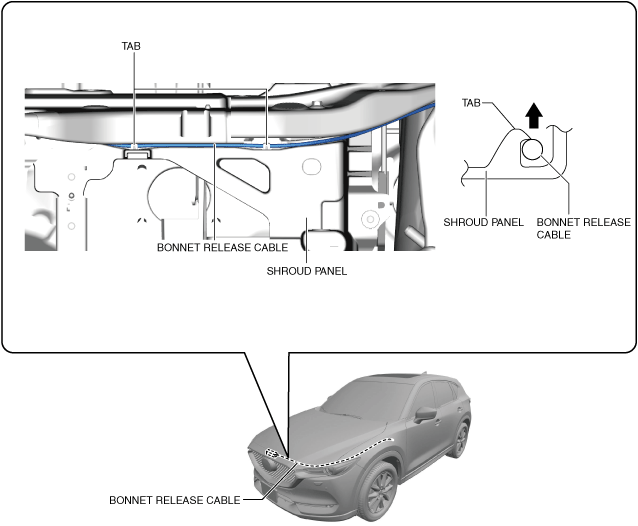
5. Remove the bonnet release cable from shroud panel.
ac5wzw00009020
|
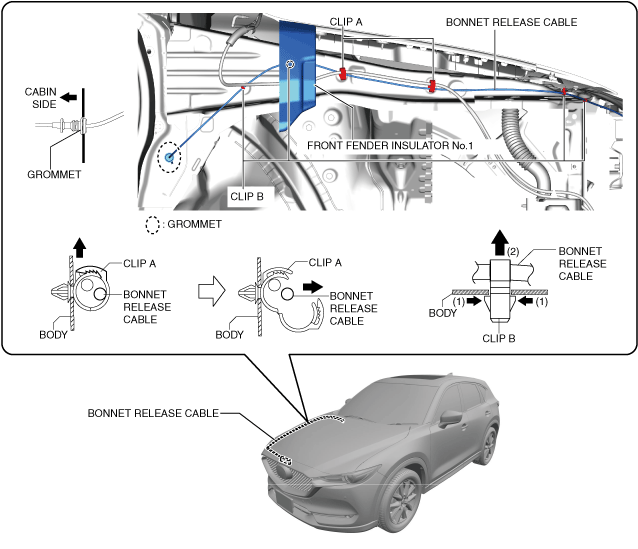
6. Remove the clips.
ac5wzw00009021
|
7. Remove the grommet.
8. Pull out the bonnet release cable from front fender insulator No.1.
9. Remove the bonnet release cable.
10. Install in the reverse order of removal.
R.H.D.
1. Disconnect the negative battery terminal. (See NEGATIVE BATTERY TERMINAL DISCONNECTION/CONNECTION.)
2. Remove the following parts:
3. Remove the bonnet latch protector. (See BONNET LATCH REMOVAL/INSTALLATION.)
4. Disconnect the bonnet release cable from the bonnet latch.
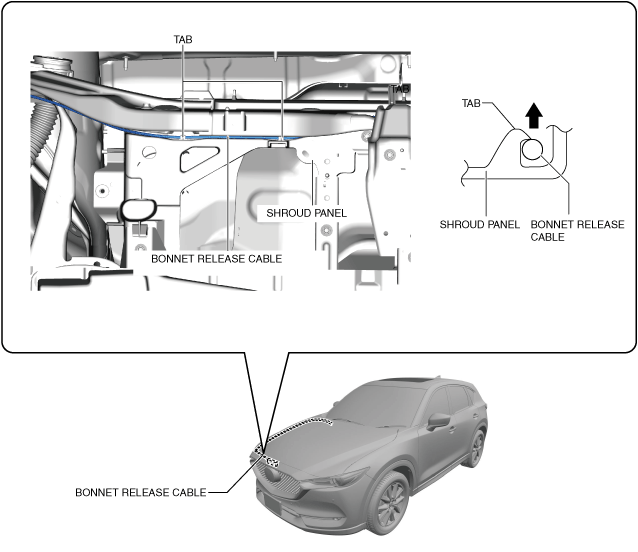
5. Remove the bonnet release cable from shroud panel.
ac5wzw00009022
|
6. Remove the bonnet release cable from clip A and clip B.
ac5wzw00009023
|
7. Remove the grommet.
8. Pull out the bonnet release cable from front fender insulator No.1.
9. Remove the bonnet release cable.
10. Install in the reverse order of removal.