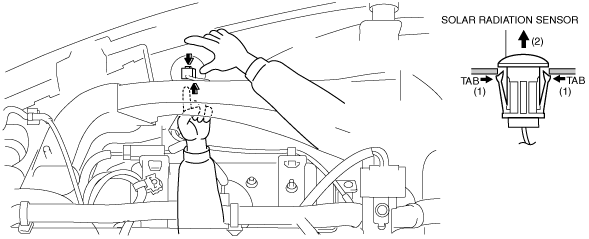
Note
• When removing the solar radiation sensor, perform the procedure in the posture shown in the figure.
ac5wzw00001865
|
SOLAR RADIATION SENSOR REMOVAL/INSTALLATION [FULL-AUTO AIR CONDITIONER]
id0740a1802800
ac5wzw00001865
|
1. Disconnect the negative battery cable. (See NEGATIVE BATTERY CABLE DISCONNECTION/CONNECTION [SKYACTIV-G 2.0, SKYACTIV-G 2.5].)(See NEGATIVE BATTERY CABLE DISCONNECTION/CONNECTION [SKYACTIV-G 2.0, SKYACTIV-G 2.5 (WITHOUT i-stop)].)(See NEGATIVE BATTERY CABLE DISCONNECTION/CONNECTION [SKYACTIV-D 2.2].)
2. Remove the following parts:
3. Press the tab from the inside of the dashboard and press out the solar radiation sensor as shown in the figure.
ac5wzw00001866
|
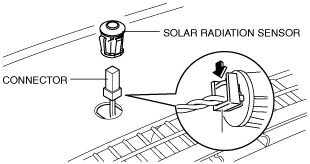
4. Disconnect the solar radiation sensor connector.
ac5wzw00001867
|
5. Remove the solar radiation sensor.
6. Install in the reverse order of removal.
Solar Radiation Sensor Installation Note
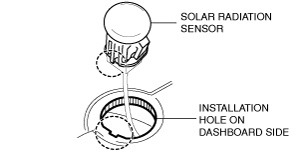
1. Align the shape of the solar radiation sensor with the shape of the installation hole on the dashboard side, and install as shown in the figure.
ac5wzw00001868
|