 |
ac5wzw00010978
TRANSFER REMOVAL/INSTALLATION [FW6AX-EL]
id0316g68006g1
1. Disconnect the negative battery terminal. (See NEGATIVE BATTERY TERMINAL DISCONNECTION/CONNECTION.)
2. Remove the TWC. (See EXHAUST SYSTEM REMOVAL/INSTALLATION [SKYACTIV-G 2.5].)
3. Remove the propeller shaft. (See PROPELLER SHAFT REMOVAL/INSTALLATION.)
4. Remove the front crossmember component. (See FRONT CROSSMEMBER REMOVAL/INSTALLATION.)
5. Remove the exhaust manifold (WU-TWC). (See EXHAUST SYSTEM REMOVAL/INSTALLATION [SKYACTIV-G 2.5].)
6. Remove the front drive shaft (RH). (See FRONT DRIVE SHAFT REMOVAL/INSTALLATION.)
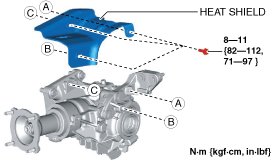
7. Remove the heat shield.
ac5wzw00010978
|
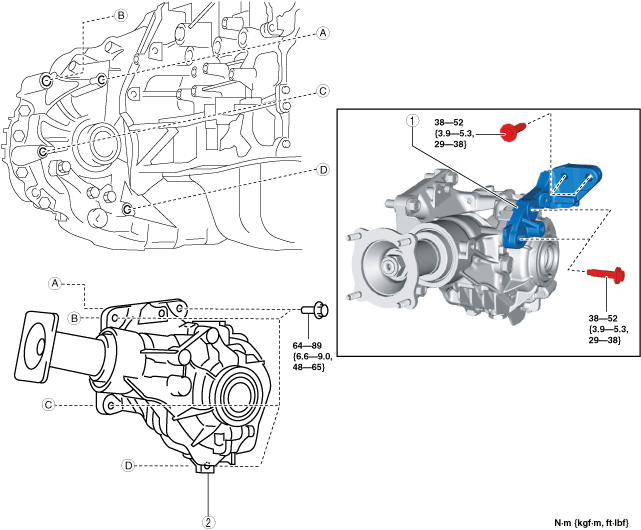
8. Remove in the order indicated in the table.
9. Install in the reverse order of removal.
10. Warm up the engine and transaxle, inspect for oil leakage, and inspect the transfer operation.
ac8wzw00003531
|
|
1
|
Transfer bracket
|
|
2
|
Transfer
|
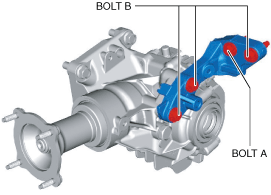
Transfer Bracket Installation Note
1. Install the transfer bracket to the transfer and temporarily tighten bolts A and B.
ac8wzw00004071
|
2. Completely tighten bolts A and B in order.