 |
ac8wzw00003488
TUNER AND AMP UNIT (TAU) REMOVAL/INSTALLATION
id092000031200
L.H.D.
1. Disconnect the negative battery terminal. (See NEGATIVE BATTERY TERMINAL DISCONNECTION/CONNECTION.)
2. Remove the glove compartment. (See GLOVE COMPARTMENT REMOVAL/INSTALLATION.)
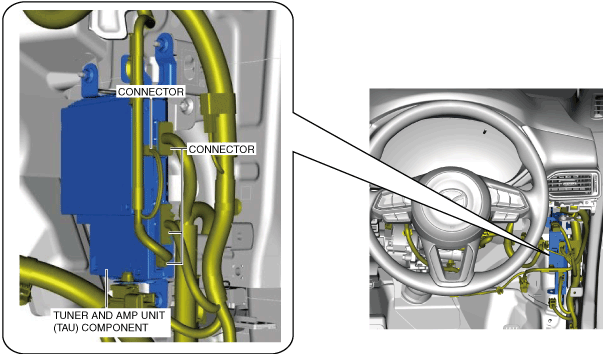
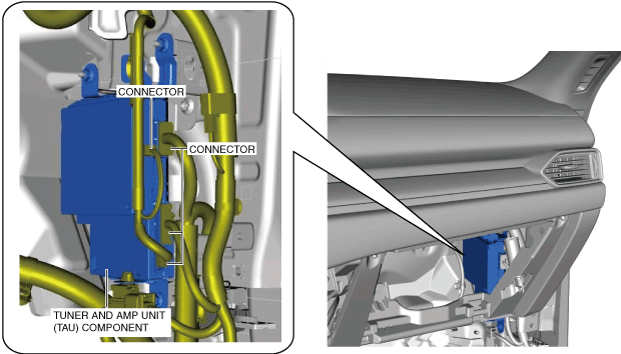
3. Disconnect the connectors.
ac8wzw00003488
|
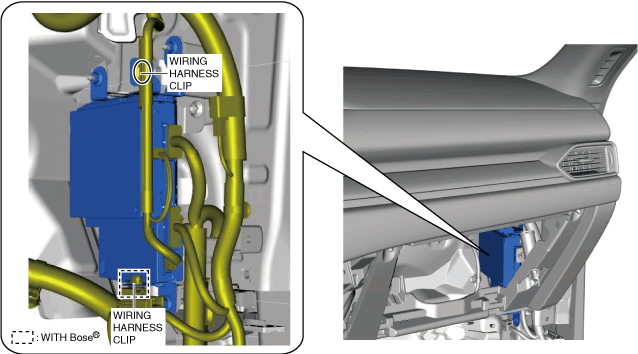
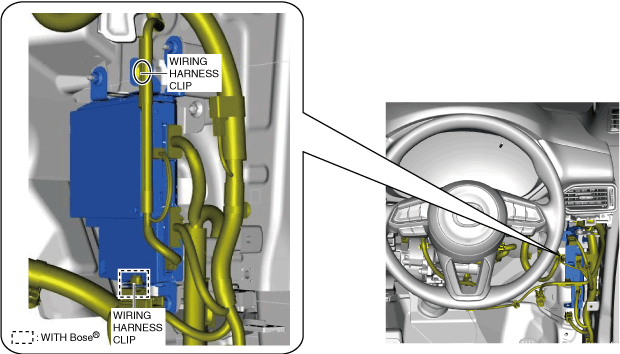
4. Detach the wiring harness clips.
ac8wzw00003489
|
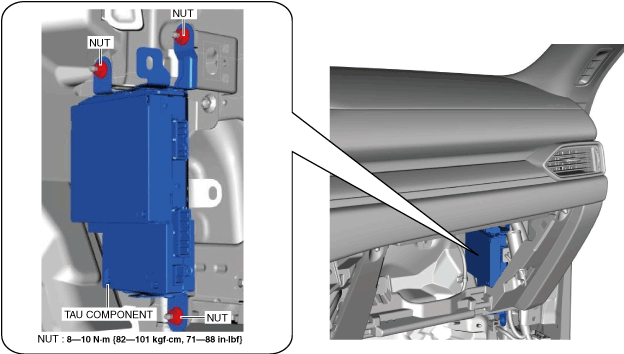
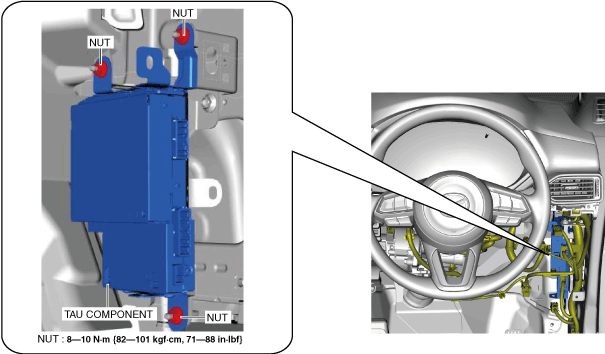
5. Remove the nuts.
ac8wzw00003490
|
6. Remove the TAU component.
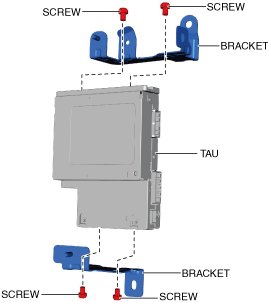
7. Remove the screws.
ac8wzw00001811
|
8. Remove the bracket.
9. Remove the TAU.
10. Install in the reverse order of removal.
R.H.D.
1. Disconnect the negative battery terminal. (See NEGATIVE BATTERY TERMINAL DISCONNECTION/CONNECTION.)
2. Remove the following parts:
3. Disconnect the connectors.
ac8wzw00003123
|
4. Detach the wiring harness clips.
ac8wzw00003124
|
5. Remove the nuts.
ac8wzw00003125
|
6. Remove the TAU component.
7. Remove the screws.
ac8wzw00001811
|
8. Remove the bracket.
9. Remove the TAU.
10. Install in the reverse order of removal.