 |
ac9uuw00004144
CONVERTER HOUSING REMOVAL/INSTALLATION [AY6A-EL, AY6AX-EL]
id0517k3332500
1. Drain the ATF. (See AUTOMATIC TRANSAXLE FLUID (ATF) REPLACEMENT [AY6A-EL, AY6AX-EL].)
2. Remove the transaxle. (See AUTOMATIC TRANSAXLE REMOVAL/INSTALLATION [AY6A-EL, AY6AX-EL].)
3. Clean the transaxle. (See AUTOMATIC TRANSAXLE CLEANING [AY6A-EL, AY6AX-EL].)
4. Remove the torque converter. (See AUTOMATIC TRANSAXLE CLEANING [AY6A-EL, AY6AX-EL].)
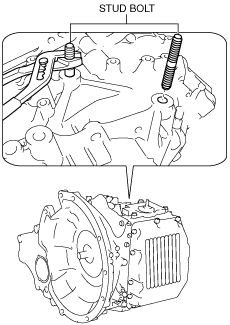
5. Remove the stud bolts.
ac9uuw00004144
|
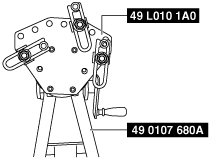
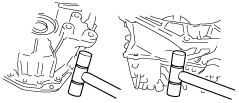
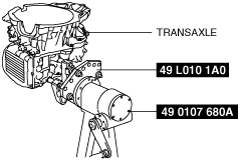
6. Set the SSTs as shown in the figure.
ac9wzw00002030
|
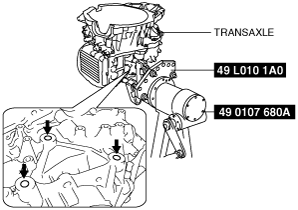
7. Install the transaxle to the SSTs.
ac9wzw00002032
|
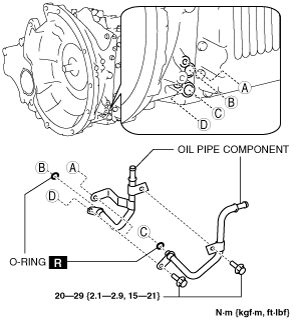
8. Remove the oil pipe component and the O-rings.
ac9uuw00004145
|
9. Refer to the “AUTOMATIC TRANSAXLE DISASSEMBLY/ASSEMBLY PRECAUTION” before disassembling/assembling the transaxle. (See AUTOMATIC TRANSAXLE DISASSEMBLY/ASSEMBLY PRECAUTION [AY6A-EL, AY6AX-EL].)
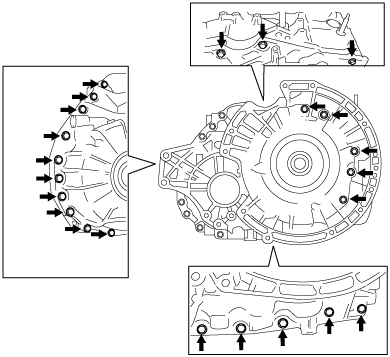
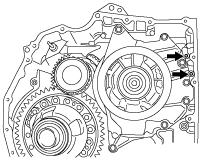
10. Remove the bolts as shown in the figure.
am6xuw00004221
|
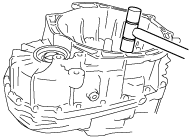
11. Using a plastic hammer, tap the converter housing to remove it.
am6xuw00004222
|
12. Remove the case gaskets as shown in the figure.
ac9uuw00004037
|
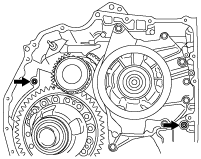
13. Remove the gaskets as shown in the figure.
am6xuw00004224
|
14. Clean the contact surface of the transaxle case and the converter housing and the bolt holes.
15. Install the gaskets as shown in the figure.
am6xuw00004224
|
16. Install the case gaskets as shown in the figure.
ac9uuw00004037
|
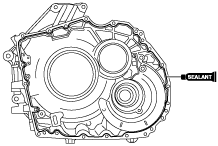
17. Apply sealant to the converter housing as shown in the figure.
am6xuw00004225
|
18. Install the converter housing before the applied sealant starts to harden.
am6xuw00004226
|
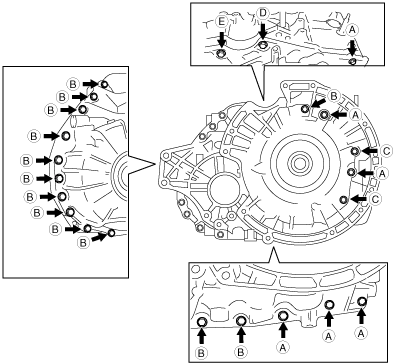
19. Temporarily tighten the bolts by hand as shown in the figure.
am6xuw00004381
|
|
Bolt number |
Bolt size |
Length (measured from below the head) (mm {in}) |
|---|---|---|
|
A
|
M8 × 1.25
|
30 {1.2}
|
|
B
|
M8 × 1.25
|
35 {1.4}
|
|
C
|
M8 × 1.25
|
39 {1.5}
|
|
D
|
M10 × 1.25
|
28 {1.1}
|
|
E
|
M10 × 1.25
|
43 {1.7}
|
20. Tighten the bolts.
21. Install the oil pipe component and new O-rings.
ac9uuw00004145
|
22. Remove the transaxle from the SSTs.
ac9wzw00002031
|
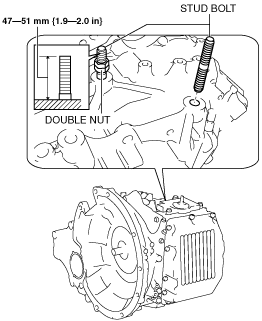
23. Install the stud bolts using double nutted.
ac9uuw00003997
|
24. Remove the double nutted from the stud bolts.
25. Install the torque converter. (See TORQUE CONVERTER REMOVAL/INSTALLATION [AY6A-EL, AY6AX-EL].)
26. Install the transaxle. (See AUTOMATIC TRANSAXLE REMOVAL/INSTALLATION [AY6A-EL, AY6AX-EL].)
27. Add ATF. (See AUTOMATIC TRANSAXLE FLUID (ATF) LEVEL ADJUSTMENT [AY6A-EL, AY6AX-EL].)
28. Adjust the ATF level. (See AUTOMATIC TRANSAXLE FLUID (ATF) LEVEL ADJUSTMENT [AY6A-EL, AY6AX-EL].)
29. Perform the “MECHANICAL SYSTEM TEST”. (See MECHANICAL SYSTEM TEST [AY6A-EL, AY6AX-EL].)