FRONT DOOR CHECKER REMOVAL/INSTALLATION
id091100043000
-
Caution
-
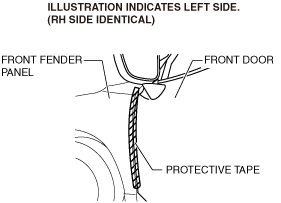
• When the front door checker installation bolts are removed, the front door may open until it contacts the front fender panel causing the front door and the front fender panel to be damaged. Before removing the front door checker, overlap and apply the protective tape to the position shown in the figure and be careful not to damage the front door and the front fender.
1. Fully close the front door glass.
2. Disconnect the negative battery terminal. (See NEGATIVE BATTERY TERMINAL DISCONNECTION/CONNECTION.)
3. Remove the following parts:
- (1) Inner garnish (See INNER GARNISH REMOVAL/INSTALLATION.)
-
- (2) Power window main switch (to remove from driver’s side) (See POWER WINDOW MAIN SWITCH REMOVAL/INSTALLATION.)
-
- (3) Power window subswitch (to remove from passenger’s side) (See POWER WINDOW SUBSWITCH REMOVAL/INSTALLATION.)
-
- (4) Front door trim (See FRONT DOOR TRIM REMOVAL/INSTALLATION.)
-
- (5) Service hole cover No.1 (See FRONT DOOR GLASS REMOVAL/INSTALLATION.)
-
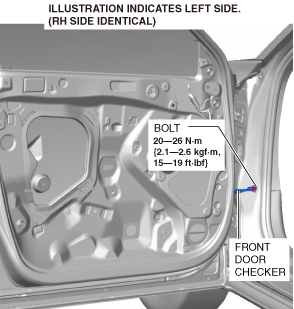
4. Remove the bolt.
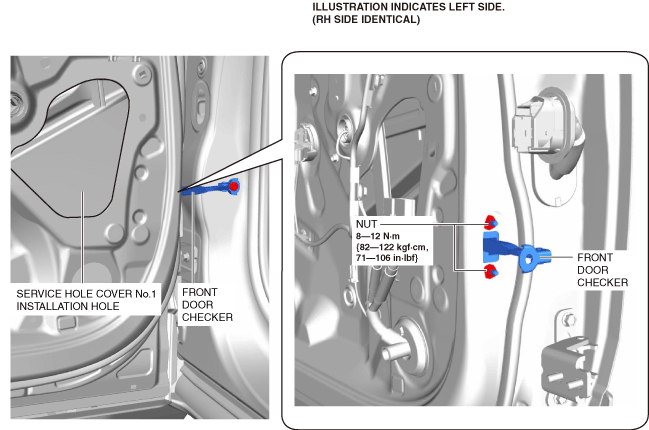
5. Remove the nuts.
6. Remove the front door checker from the service hole cover No.1 installation hole.
7. Install in the reverse order of removal.