 |
a30zzw00000688
FRONT DOOR GLASS REMOVAL/INSTALLATION
id091200700200
Replacement parts
|
Service hole cover No.1
Quantity: 1
Location of use: Front door panel
|
Grommet
Quantity: 3
Location of use: Front door panel
|
Fasteners
Quantity: 4
Location of use: Service hole cover No.2
|
|
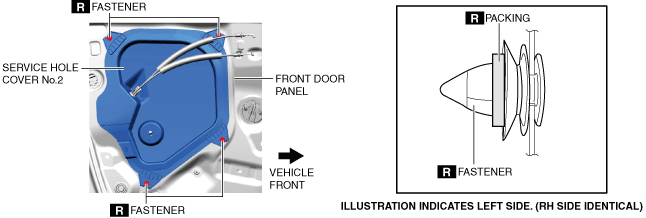
Packing
Quantity: 4
Location of use: Fastener
|
—
|
—
|
1. Perform the front door glass preparation. (See Front Door Glass Preparation.)
2. Disconnect the negative battery terminal. (See NEGATIVE BATTERY TERMINAL DISCONNECTION/CONNECTION.)
3. Remove the following parts.
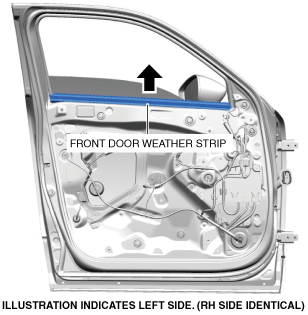
4. Pull up the front door weatherstrip in the direction of the arrow shown in the figure and remove it.
a30zzw00000688
|
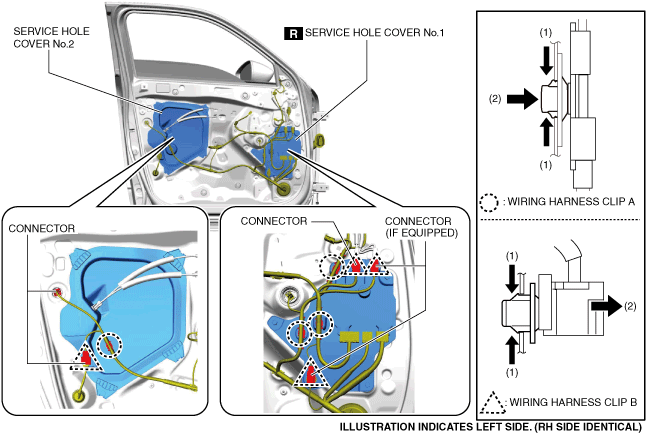
5. Disconnect the connectors.
a30zzw00000689
|
6. While pressing the tab of wiring harness clip A in the direction of arrow (1) shown in the figure, move wiring harness clip A in the direction of arrow (2) and remove it.
7. While pressing the tab of wiring harness clip B in the direction of arrow (1) shown in the figure, move wiring harness clip B in the direction of arrow (2) and remove it.
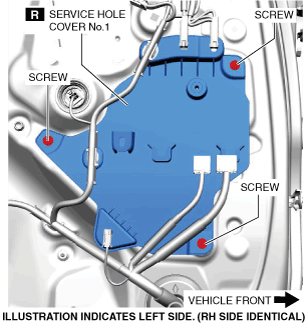
8. Remove the screws.
a30zzw00000690
|
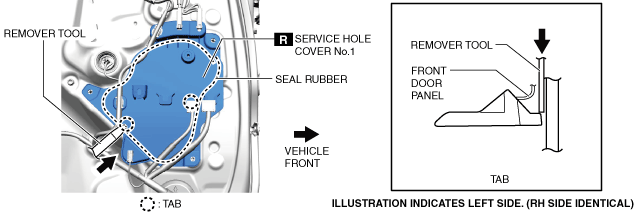
9. Insert the remover tool into the positions shown in the figure.
a30zzw00000691
|
10. Push the tab of service hole cover No.1 in the direction of the arrow shown in the figure to detach the service hole cover No.1 from the front door panel.
11. Remove service hole cover No.1.
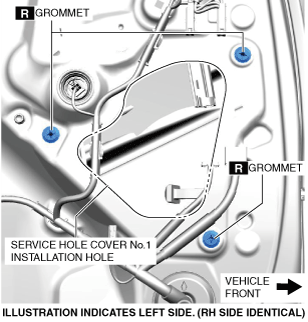
12. Remove the grommet.
a30zzw00000692
|
13. Release the fastener from the front door panel.
a30zzw00000693
|
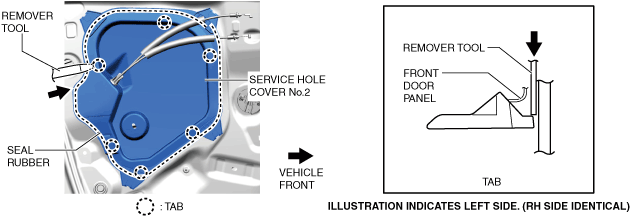
14. Insert the remover tool into the positions shown in the figure.
a30zzw00000694
|
15. Push the tab of service hole cover No.2 in the direction of the arrow shown in the figure to detach the service hole cover No.2 from the front door panel.
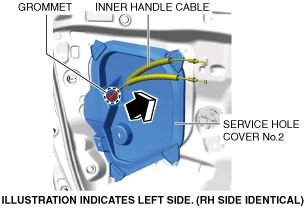
16. Remove the grommet from service hole cover No.2.
a30zzw00000695
|
17. Move service hole cover No.2 in the direction of the arrow shown in the figure and pull it out of the inner handle cable.
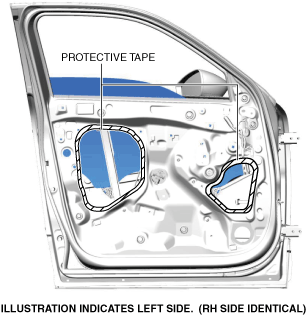
18. Apply protective tape along the edges of the service hole cover installation holes to prevent damage.
a30zzw00000696
|
19. Remove bolt (1).
a30zzw00000697
|
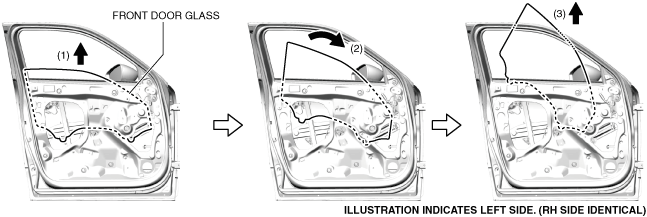
20. Remove bolt (2).
21. Move the front door glass in the direction of arrow (1) shown in the figure.
a30zzw00000698
|
22. Tilt the front door glass in the direction of arrow (2) and move it in the direction of arrow (3) to remove it from the front door.
23. Install in the reverse order of removal. (See Service Hole Cover No.2 Installation Note.)
24. Perform the power window system initialization. (See POWER WINDOW SYSTEM INITIALIZATION PROCEDURE.)
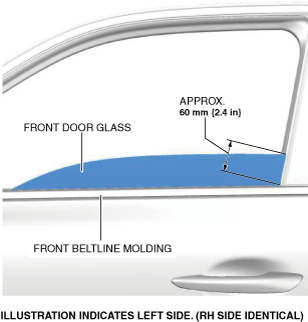
Front Door Glass Preparation
a30zzw00000699
|
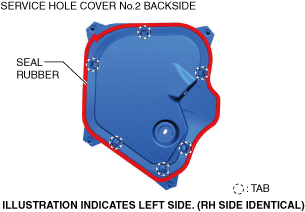
Service Hole Cover No.2 Installation Note
a30zzw00000700
|