 |
amxuuw00003876
CONDENSER REMOVAL/INSTALLATION
id071100801200
1. Disconnect the negative battery terminal. (See NEGATIVE BATTERY TERMINAL DISCONNECTION/CONNECTION.)
2. Discharge the refrigerant from the system. (See REFRIGERANT RECOVERY.) (See REFRIGERANT CHARGING.)
3. Remove the following parts:
4. Drain the engine coolant. (See ENGINE COOLANT REPLACEMENT [SKYACTIV-G 1.5, SKYACTIV-G 2.0].)
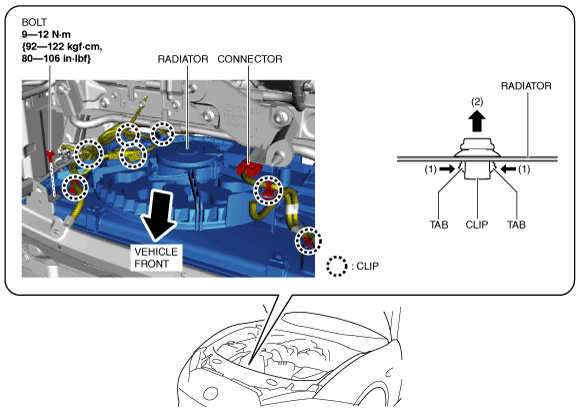
5. Remove the bolt.
amxuuw00003876
|
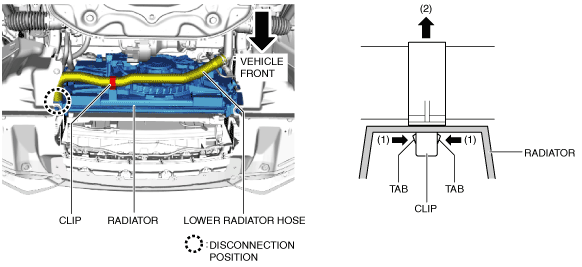
6. While pressing the clip tabs in the direction of arrows (1) shown in the figure, pull the clip in the direction of arrow (2) to detach the clip tabs from the radiator.
7. Remove the clips.
8. Disconnect the connector.
9. Remove the bolts.
amxuuw00003877
|
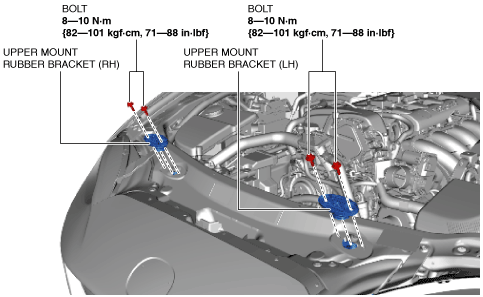
10. Remove the upper mount rubber brackets.
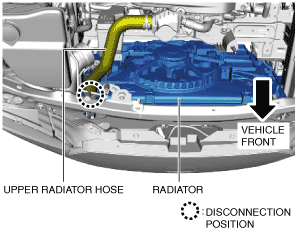
11. Disconnect the upper radiator hose.
amxuuw00003878
|
12. While pressing the clip tabs in the direction of arrows (1) shown in the figure, pull the clip in the direction of arrow (2) to detach the clip tabs from the radiator.
amxuuw00003879
|
13. Remove the clip.
14. Disconnect the lower radiator hose.
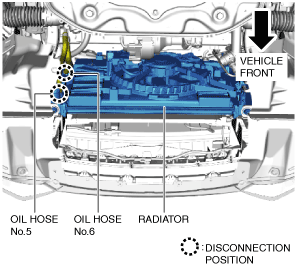
15. Disconnect the oil hoses No.5 and No.6. (AT)
amxuuw00003880
|
16. Remove the bolt.
amxzzw00003122
|
17. Disconnect the cooler hose (HI).
18. Remove the bolt.
amxuuw00003882
|
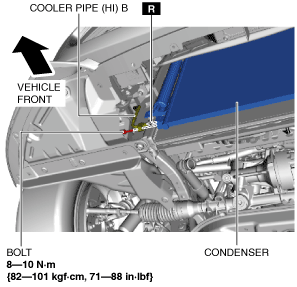
19. Disconnect the cooler pipe (HI) B.
20. Remove the bolts.
amxuuw00003883
|
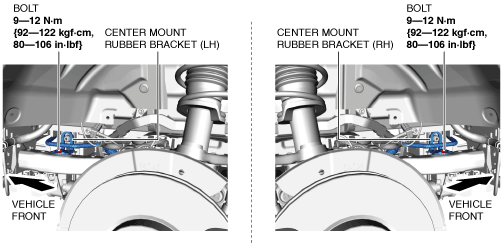
21. Remove the center mount rubber brackets.
22. Remove the bolts.
amxuuw00003884
|
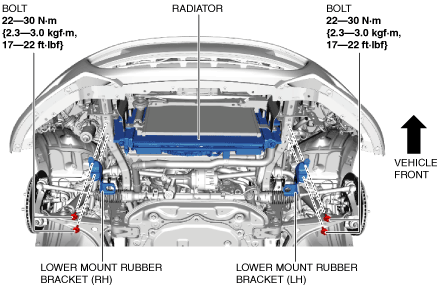
23. Remove the lower mount rubber brackets.
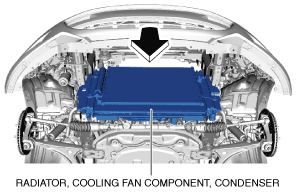
24. Remove the radiator, cooling fan component, and condenser as a single unit.
amxuuw00003885
|
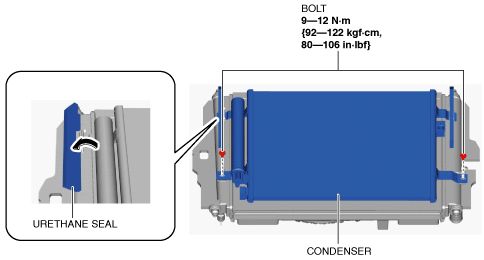
25. Remove the bolts.
amxuuw00003886
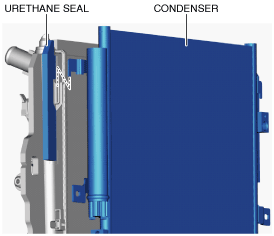
|
26. Fold the urethane seal in the direction of the arrow shown in the figure.
27. Remove the condenser.
amxuuw00003887
|
28. Install in the reverse order of removal.
29. When replacing the condenser, add compressor oil to the refrigerant cycle.
30. Inspect for engine coolant leakage. (See ENGINE COOLANT LEAKAGE INSPECTION [SKYACTIV-G 1.5, SKYACTIV-G 2.0].)
31. Perform the refrigerant system performance test. (See REFRIGERANT SYSTEM PERFORMANCE TEST.)