 |
am2zzw00014994
REAR BUMPER DISASSEMBLY/ASSEMBLY
id091000800800
4SD
1. Remove the ultrasonic sensor short-cord. (with parking sensor system) (See ULTRASONIC SENSOR SHORT-CORD REMOVAL/INSTALLATION.)
2. Remove the ultrasonic sensor. (with parking sensor system) (See ULTRASONIC SENSOR REMOVAL/INSTALLATION.)
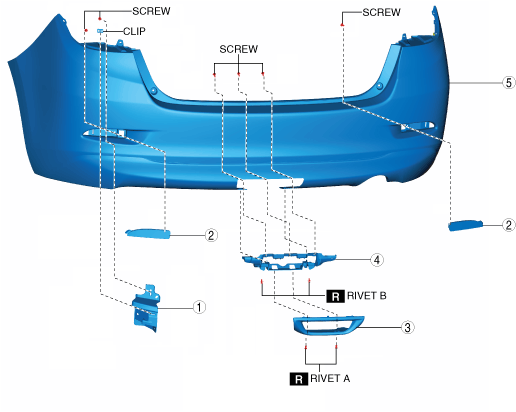
3. Disassemble in the order indicated in the table.
am2zzw00014994
|
|
1
|
Bracket (with bracket)
|
|
2
|
Rear reflector
|
|
3
|
Rear fog light cover (with rear fog light)
(See Rivet Removal Note.)
|
|
4
|
Rear fog light bracket (with rear fog light)
(See Rivet Removal Note.)
|
|
5
|
Rear bumper face
|
4. Assemble in the reverse order of disassembly.
5HB
1. Remove the following parts:
2. Disassemble in the order indicated in the table.
am2zzw00014995
|
|
1
|
Rear bumper garnish (with rear bumper garnish)
|
|
2
|
Licence plate light
|
|
3
|
Cap (without rear mount camera)
|
|
4
|
Rear bumper face
|
3. Assemble in the reverse order of disassembly.
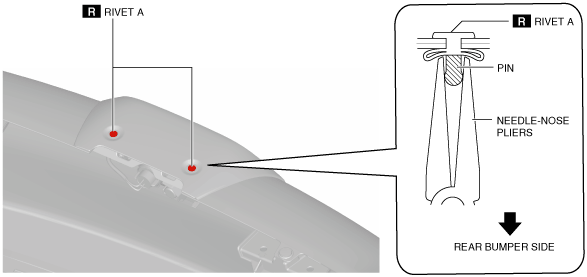
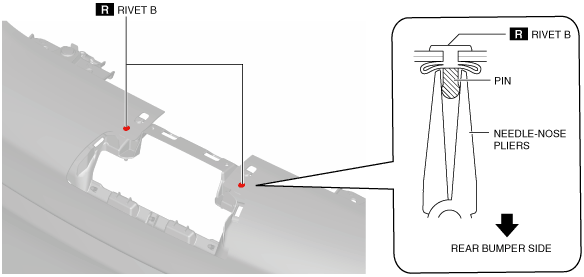
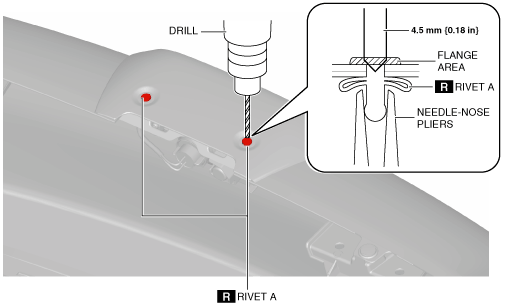
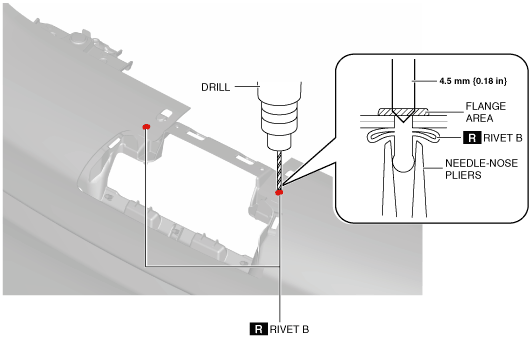
Rivet Removal Note
1. When removing the rivet, perform the following procedure:
Rivet A
am2zzw00008794
|
Rivet B
am2zzw00008795
|
Rivet A
am2zzw00008796
|
Rivet B
am2zzw00008797
|