DOOR SASH FILM REMOVAL
id091600805200
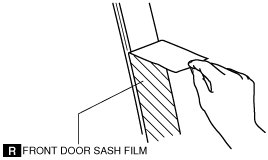
Front door sash film removal
1. Perform the front door glass preparation.(See FRONT DOOR GLASS REMOVAL/INSTALLATION)
2. Disconnect the negative battery cable. (See NEGATIVE BATTERY CABLE DISCONNECTION/CONNECTION)
3. Remove the following parts:
- (1) Sail garnish (See SAIL GARNISH REMOVAL/INSTALLATION)
- (2) Front beltline molding (See FRONT BELTLINE MOLDING REMOVAL/INSTALLATION)
- (3) Power window main switch (driver-side) (See POWER WINDOW MAIN SWITCH REMOVAL/INSTALLATION)
- (4) Power window subswitch (passenger-side) (See POWER WINDOW SUBSWITCH REMOVAL/INSTALLATION)
- (5) Front door trim (See FRONT DOOR TRIM REMOVAL/INSTALLATION)
- (6) Front door speaker (See FRONT DOOR SPEAKER REMOVAL/INSTALLATION)
- (7) Front door glass (See FRONT POWER WINDOW MOTOR REMOVAL/INSTALLATION)
4. Remove the glass run channel.
-
Caution
-
• The removed glass run channel cannot be reused.
5. Peel off the front door sash film by pulling it outward from one end.
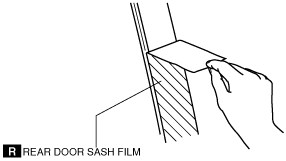
Rear door sash film removal
1. Perform the rear door glass preparation. (See REAR DOOR GLASS REMOVAL/INSTALLATION)
2. Disconnect the negative battery cable. (See NEGATIVE BATTERY CABLE DISCONNECTION/CONNECTION)
3. Remove the following parts:
- (1) Rear beltline molding (See REAR BELTLINE MOLDING REMOVAL/INSTALLATION)
- (2) Power window subswitch (rear) (with power window system) (See POWER WINDOW SUBSWITCH REMOVAL/INSTALLATION.)
- (3) Regulator handle (with manual window system) (See REGULATOR HANDLE REMOVAL.)
- (4) Rear door trim (See REAR DOOR TRIM REMOVAL/INSTALLATION)
- (5) Rear door speaker (See REAR DOOR SPEAKER REMOVAL/INSTALLATION)
- (6) Rear door glass (See REAR DOOR GLASS REMOVAL/INSTALLATION)
4. Remove the glass run channel.
-
Caution
-
• The removed glass run channel cannot be reused.
5. Peel off the rear door sash film by pulling it outward from one end.