|
am2zzw00008186
BODY CONTROL MODULE (BCM) BRACKET REMOVAL/INSTALLATION
id094000004000
L.H.D.
1. Disconnect the negative battery cable. (See NEGATIVE BATTERY CABLE DISCONNECTION/CONNECTION.)
2. Remove the following parts:
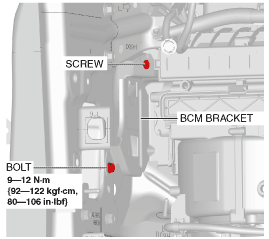
3. Remove the bolt.
am2zzw00008186
|
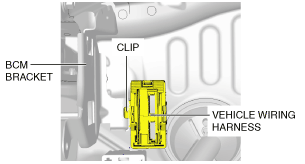
4. Remove the screw.
5. Remove the vehicle wiring harness clip.
am2zzw00008187
|
6. Remove the BCM bracket.
7. Install in the reverse order of removal.
R.H.D.
1. Disconnect the negative battery cable. (See NEGATIVE BATTERY CABLE DISCONNECTION/CONNECTION.)
2. Remove the following parts:
3. Remove the bolt.
am2zzw00007487
|
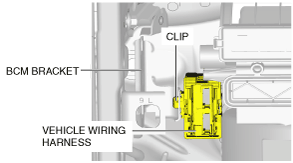
4. Remove the screw.
5. Remove the vehicle wiring harness clip.
am2zzw00007488
|
6. Remove the BCM bracket.
7. Install in the reverse order of removal.