 |
am3zzw00038122
FRONT DOOR GLASS RUN-CHANNEL REMOVAL/INSTALLATION (5HB) [(E)]
id0912007047x2
Common Procedure
1. Perform the front door glass preparation. (See FRONT DOOR GLASS REMOVAL/INSTALLATION.)
2. Disconnect the negative battery terminal. (See NEGATIVE BATTERY TERMINAL DISCONNECTION/CONNECTION [(E)].)
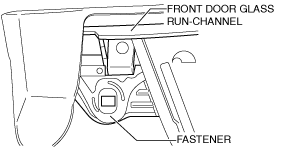
3. Remove the following parts:
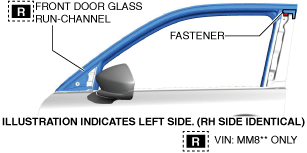
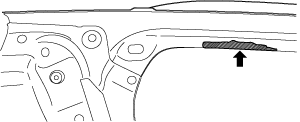
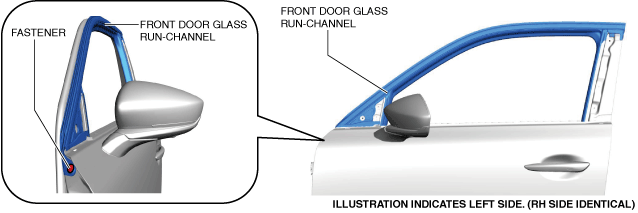
4. Remove the fastener.
am3zzw00038122
|
5. Perform front door glass run-channel removal/installation according to the flow. (See Flow.)
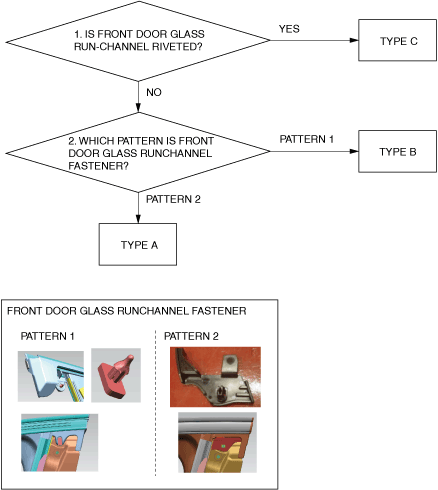
Flow
am3zzw00038161
|
TYPE A
Replacement part (VIN: MM8**)
|
Front door glass run-channel
Quantity: 1
Location of use: Front door
|
1. Remove the fastener.
am3zzw00038186
|
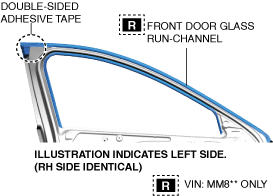
2. Remove the double-sided adhesive tape using the utility knife. (VIN: MM8** only)
am3zzw00038162
|
3. Partially peel back the front door glass run-channel.
am3zzw00038187
|
4. Move the front door glass run-channel in the order of arrows (1), (2), and (3) shown in the figure and remove it from the front door hooks.
am3zzw00038188
|
5. Remove the front door glass run-channel.
6. Install in the reverse order of removal. (See Front door glass run-channel installation note (VIN: MM8**)
Front door glass run-channel installation note (VIN: MM8**)
1. Remove any grease or dirt from the adhesion surface of the front door.
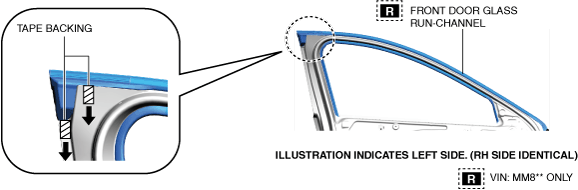
2. After installing the front door glass run-channel, peel off the tape backing from the double-sided adhesive tape in the direction of the arrows shown in the figure.
am3zzw00038163
|
3. Press the double-sided adhesive tape areas of the front door glass run-channel.
TYPE B
Replacement part
|
Rivet (Part number: 90257-4810)
Quantity: 1
Location of use: Front door glass run-channel
|
Front door glass run-channel
Quantity: 1
Location of use: Front door
|
1. Remove the fastener. (See Fastener installation note.)
am3zzw00035835
|
2. Partially peel back the front door glass run-channel.
am3zzw00038189
|
3. Move the front door glass run-channel in the order of arrows (1), (2), and (3) shown in the figure and remove it from the front door hooks.
am3zzw00035837
|
4. Remove the front door glass run-channel.
5. If adhesive agent remains on the front door, remove the adhesive agent, and then clean and degrease.
am3zzw00038125
|
6. Install in the reverse order of removal.
Fastener installation note
1. Cut off the area shown in the figure.
am3zzw00038126
|
2. Install the fastener to the front door glass run-channel.
am3zzw00038127
|
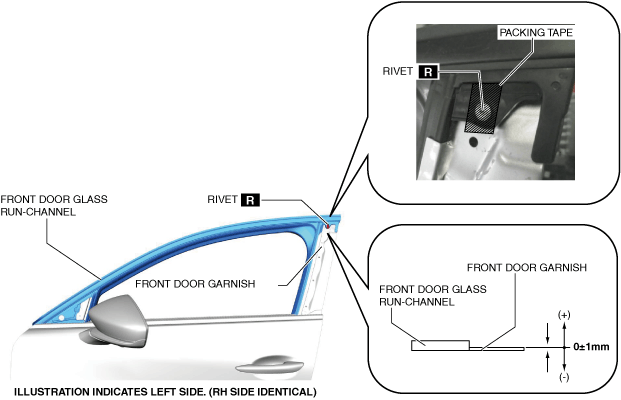
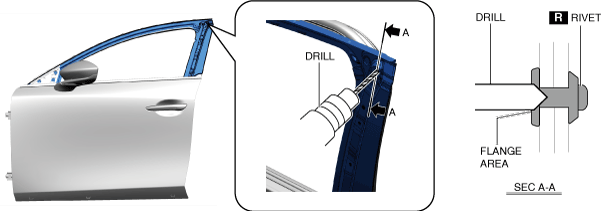
3. Install the fastener.
am3zzw00038122
|
4. Verify that the difference in level between the front door garnish and the front door glass run-channel is within the range shown in the figure.
am3zzw00038128
|
5. Install the rivet.
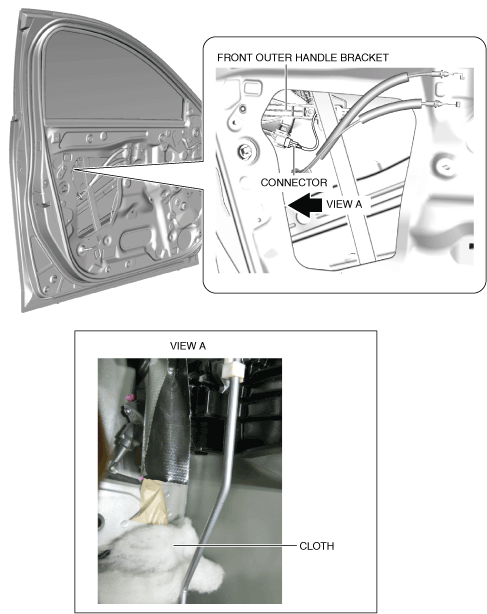
6. Apply cloth packing tape to the position shown in the figure.
TYPE C
Replacement part
|
Rivet (Part number: 90257-4810)
Quantity: 1
Location of use: Front door glass run-channel
|
1. Remove the service hole cover. (See FRONT DOOR LATCH AND LOCK ACTUATOR REMOVAL/INSTALLATION.)
2. Remove the front door latch and lock actuator. (See FRONT DOOR LATCH AND LOCK ACTUATOR REMOVAL/INSTALLATION.)
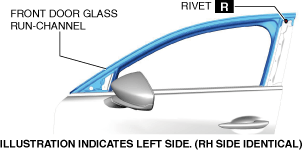
3. Remove the rivet. (See Rivet Removal Note.) (See Rivet Installation Note.)
am3zzw00038129
|
4. Partially peel back the front door glass run-channel.
am3zzw00038189
|
5. Move the front door glass run-channel in the order of arrows (1), (2), and (3) shown in the figure and remove it from the front door hooks.
am3zzw00035837
|
6. Remove the front door glass run-channel.
7. Install in the reverse order of removal.
Rivet Removal Note
1. Perform the following procedure to prevent the rivet from penetrating the interior of the front door panel.
am3zzw00038130
|
am3zzw00038131
|
2. Perform the following procedure and remove the fastener.
am3zzw00038132
|
3. Collect the remaining rivet using the following procedure.
am3zzw00038133
|
Rivet Installation Note
1. Cut off the area shown in the figure.
am3zzw00038126
|
2. Install the fastener to the front door glass run-channel.
am3zzw00038127
|
3. Install the fastener.
am3zzw00038122
|
4. Verify that the difference in level between the front door garnish and the front door glass run-channel is within the range shown in the figure.
am3zzw00038128
|
5. Install the rivet.
6. Apply cloth packing tape to the position shown in the figure.