 |
am3zzw00027946
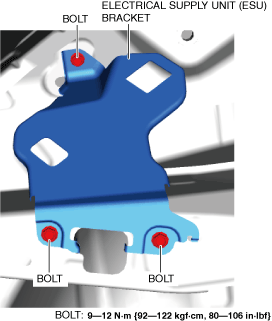
ELECTRICAL SUPPLY UNIT (ESU) BRACKET REMOVAL/INSTALLATION
id094000004200
1. Disconnect the negative battery terminal. (See NEGATIVE BATTERY TERMINAL DISCONNECTION/CONNECTION [(E)].)
2. Remove the following parts:
3. Partially peel the trunk side trim (LH). (See TRUNK SIDE TRIM REMOVAL/INSTALLATION [(E)].)
4. Remove the electrical supply unit (ESU). (See ELECTRICAL SUPPLY UNIT (ESU) REMOVAL/INSTALLATION.)
5. Remove the bolts.
am3zzw00027946
|
6. Remove the electrical supply unit (ESU) bracket.
7. Install in the reverse order of removal.