 |
am3zzw00007668
ANTENNA AMPLIFIER REMOVAL/INSTALLATION
id092000813300
1. Disconnect the negative battery cable.
2. Remove the following parts:
3. Remove in the order indicated in the table.
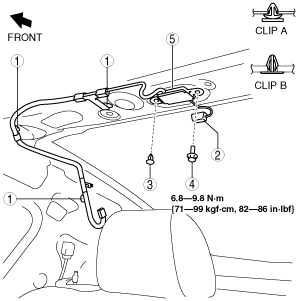
Without RDS (radio date system)
am3zzw00007668
|
|
1
|
Clip A
|
|
2
|
Connector B (See Connector B Removal Note.)
|
|
3
|
Clip B
|
|
4
|
Bolt
|
|
5
|
Antenna amplifier
|
With RDS (radio date system)
am3zzw00006018
|
|
1
|
Connector A
|
|
2
|
Connector B (See Connector B Removal Note.)
|
|
3
|
Clip
|
|
4
|
Bolt
|
|
5
|
Antenna amplifier
|
4. Install in the reverse order of removal.
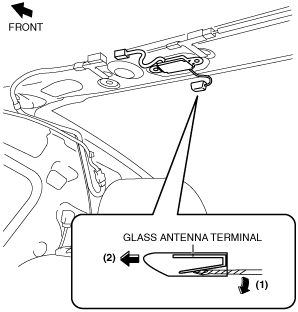
Connector B Removal Note
1. Remove the connector B in the direction of the arrow (2) shown in the figure while pressing the glass antenna terminal in the direction of the arrow (1).
am3zzw00006019
|