 |
ac5uuw00004013
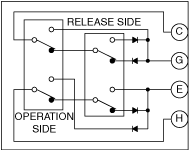
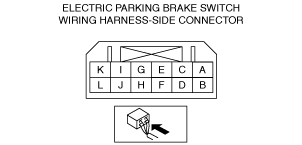
ELECTRIC PARKING BRAKE SWITCH INSPECTION
id041200523300
Continuity Inspection
1. Disconnect the negative battery terminal. (See NEGATIVE BATTERY TERMINAL DISCONNECTION/CONNECTION.)
2. Remove the console side panel No.1. (See CONSOLE SIDE PANEL REMOVAL/INSTALLATION.)
3. Remove the shift panel. (See SHIFT PANEL REMOVAL/INSTALLATION.)
4. Remove the electric parking brake switch. (See ELECTRIC PARKING BRAKE SWITCH REMOVAL/INSTALLATION.)
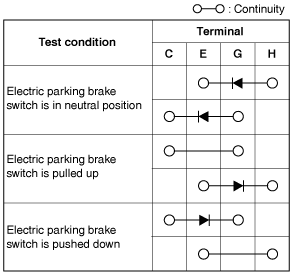
5. Verify that the continuity is as indicated in the table.
ac5uuw00004013
|
am6xuw00010663
|
am6zzw00013244
|
Illumination Light Inspection
1. Disconnect the negative battery terminal. (See NEGATIVE BATTERY TERMINAL DISCONNECTION/CONNECTION.)
2. Remove the console side panel No.1. (See CONSOLE SIDE PANEL REMOVAL/INSTALLATION.)
3. Remove the shift panel. (See SHIFT PANEL REMOVAL/INSTALLATION.)
4. Remove the electric parking brake switch. (See ELECTRIC PARKING BRAKE SWITCH REMOVAL/INSTALLATION.)
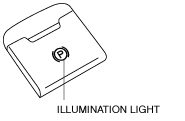
5. Apply battery positive voltage to electric parking brake switch terminal I, and connect terminal J to ground.
ac5uuw00004013
|
6. Verify that the illumination light turns on.
ac5uuw00003931
|
Indicator Light Inspection
1. Disconnect the negative battery terminal. (See NEGATIVE BATTERY TERMINAL DISCONNECTION/CONNECTION.)
2. Remove the console side panel No.1. (See CONSOLE SIDE PANEL REMOVAL/INSTALLATION.)
3. Remove the shift panel. (See SHIFT PANEL REMOVAL/INSTALLATION.)
4. Remove the electric parking brake switch. (See ELECTRIC PARKING BRAKE SWITCH REMOVAL/INSTALLATION.)
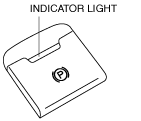
5. Apply battery positive voltage to electric parking brake switch terminal K, and connect terminal L to ground.
ac5uuw00004013
|
6. Verify that the indicator light turns on.
ac5uuw00003932
|