|
am6xuw00011867
REAR CONSOLE REMOVAL/INSTALLATION
id091700898500
1. Disconnect the negative battery terminal. (See NEGATIVE BATTERY TERMINAL DISCONNECTION/CONNECTION.)
2. Remove the following parts:
3. Move the console panel in the order of arrows (1), (2) shown in the figure, and remove it while detaching the hooks, clips.
am6xuw00011867
|
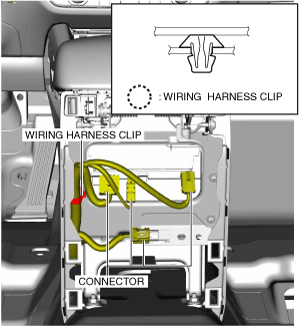
4. Disconnect the connectors.
am6xuw00011868
|
5. Remove the wiring harness clip.
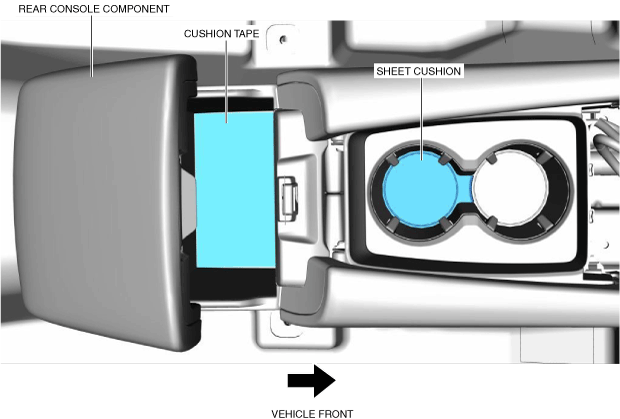
6. Remove the cushion tape.
am6xuw00011869
|
7. Remove the sheet cushion.
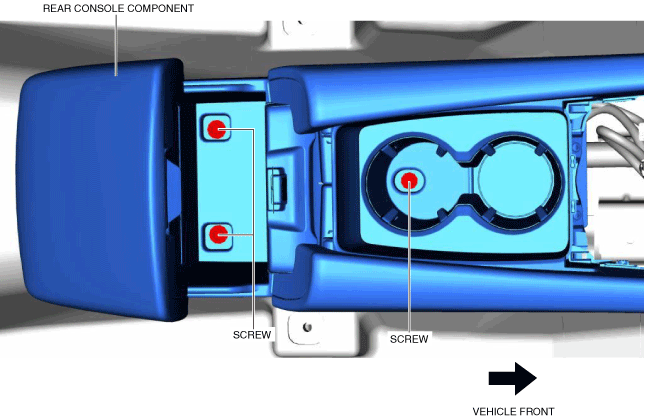
8. Remove the screws.
am6xuw00011870
|
9. Remove the fasteners.
am6xuw00011871
|
10. Move the rear console component in the direction of the arrow shown in the figure, detach the clips from the center lower panel, and remove the rear console component.
am6xuw00012728
|
11. Install in the reverse order of removal.