 |
am6zzw00016662
HEADLIGHT CLEANER MOTOR REMOVAL/INSTALLATION
id091900803300
1. Disconnect the negative battery terminal. (See NEGATIVE BATTERY TERMINAL DISCONNECTION/CONNECTION.)
2. Remove the set plate. (See SET PLATE REMOVAL/INSTALLATION.)
3. Remove the fresh-air duct installation bolts. (See INTAKE-AIR SYSTEM REMOVAL/INSTALLATION [SKYACTIV-G 2.5T].) (See INTAKE-AIR SYSTEM REMOVAL/INSTALLATION [SKYACTIV-G 2.5 (WITH CYLINDER DEACTIVATION)].) (See INTAKE-AIR SYSTEM REMOVAL/INSTALLATION [SKYACTIV-G 2.0, SKYACTIV-G 2.5 (WITHOUT CYLINDER DEACTIVATION)].) (See INTAKE-AIR SYSTEM REMOVAL/INSTALLATION [SKYACTIV-D 2.2].)
4. Remove the front bumper. (See FRONT BUMPER REMOVAL/INSTALLATION.)
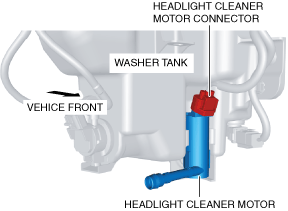
5. Disconnect the headlight cleaner motor connector.
am6zzw00016662
|
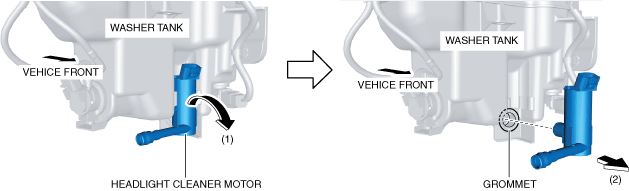
6. Tilt the upper part of the headlight cleaner motor in the direction of the arrow (1) shown in the figure and remove the headlight cleaner motor from the washer tank in the direction of the arrow (2).
am6zzw00016663
|
7. Remove the grommet from the washer tank.
8. Install in the reverse order of removal.