 |
am6xuw00009594
ACTIVE AIR SHUTTER REMOVAL/INSTALLATION
id092300000500
1. Disconnect the negative battery terminal. (See NEGATIVE BATTERY TERMINAL DISCONNECTION/CONNECTION.)
2. Remove the set plate. (See SET PLATE REMOVAL/INSTALLATION.)
3. Remove the front bumper. (See FRONT BUMPER REMOVAL/INSTALLATION.)
4. Remove the bumper stiffener lower. (See BUMPER STIFFENER LOWER REMOVAL/INSTALLATION.)
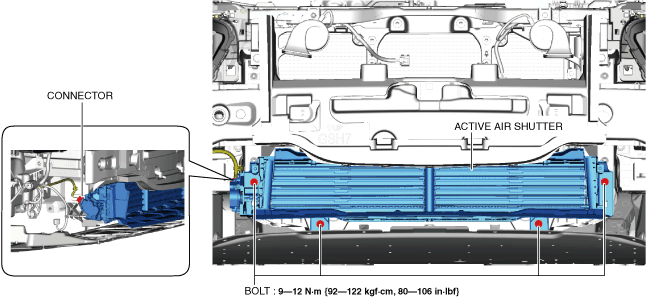
5. Disconnect the connector. (with connector)
am6xuw00009594
|
6. Remove the bolts.
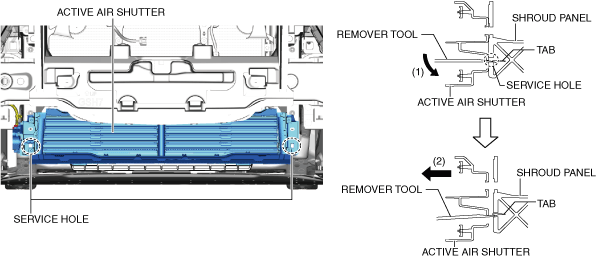
7. Insert the remover tool into the service hole shown in the figure.
am6xuw00009595
|
8. While moving the remover tool in the direction of arrow (1) shown in the figure, pull the active air shutter in the direction of arrow (2) to detach the tabs of the active air shutter from the shroud panel.
9. Remove the active air shutter.
10. Install in the reverse order of removal.