 |
am6zzw00010620
BLOWER UNIT REMOVAL/INSTALLATION
id071100800500
L.H.D.
1. Disconnect the negative battery cable. (See NEGATIVE BATTERY CABLE DISCONNECTION/CONNECTION [SKYACTIV-G 2.0, SKYACTIV-G 2.5].)(See NEGATIVE BATTERY CABLE DISCONNECTION/CONNECTION [SKYACTIV-G 2.0, SKYACTIV-G 2.5 (WITHOUT i-stop)].)(See NEGATIVE BATTERY CABLE DISCONNECTION/CONNECTION [SKYACTIV-D 2.2].)
2. Remove the following parts:
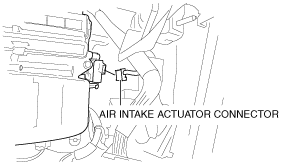
3. Disconnect the blower motor connector.
4. Disconnect the air intake actuator connector.
am6zzw00010620
|
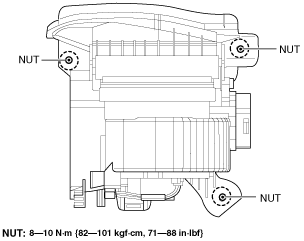
5. Remove the blower unit installation nuts.
am6zzw00010621
|
6. Remove the blower unit as shown in the figure.
am6zzw00010622
|
7. Install in the reverse order of removal.
R.H.D.
1. Disconnect the negative battery cable. (See NEGATIVE BATTERY CABLE DISCONNECTION/CONNECTION [SKYACTIV-G 2.0, SKYACTIV-G 2.5].)(See NEGATIVE BATTERY CABLE DISCONNECTION/CONNECTION [SKYACTIV-G 2.0, SKYACTIV-G 2.5 (WITHOUT i-stop)].)(See NEGATIVE BATTERY CABLE DISCONNECTION/CONNECTION [SKYACTIV-D 2.2].)
2. Remove the following parts:
3. Disconnect the blower motor connector.
4. Disconnect the air intake actuator connector.
am6zzw00010624
|
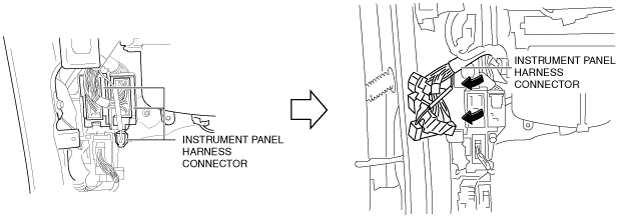
5. Disconnect the instrument panel harness connector.
am6zzw00010625
|
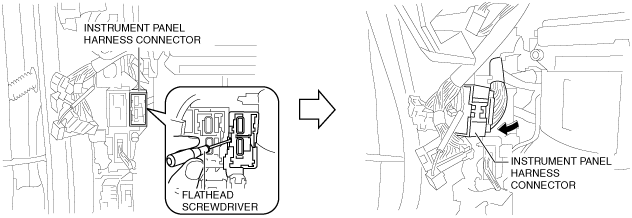
6. Set the instrument panel harness connector out of the way as shown in the figure.
7. Remove the instrument panel harness connector using a flathead screwdriver.
am6zzw00010626
|
8. Set the instrument panel harness connector out of the way as shown in the figure.
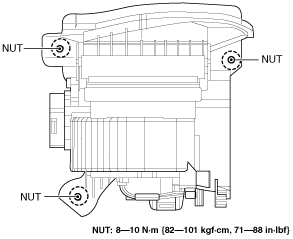
9. Remove the blower unit installation nuts.
am6zzw00010627
|
10. Remove the blower unit as shown in the figure.
am6zzw00010628
|
11. Install in the reverse order of removal.