1. Disconnect the negative battery cable. (See BATTERY REMOVAL/INSTALLATION [YF (2.0L Zetec)].) (See BATTERY REMOVAL/INSTALLATION [L3, AJ (3.0L Duratec)].)
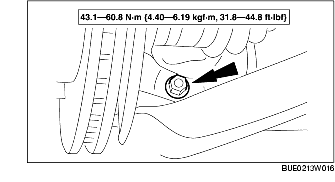
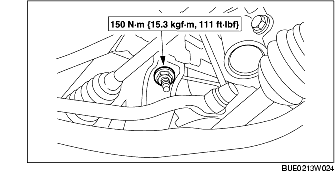
2. Remove the nuts and bolts of the No. 1 engine mount.
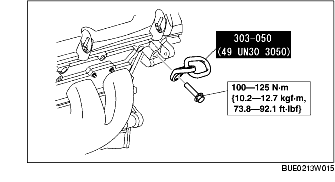
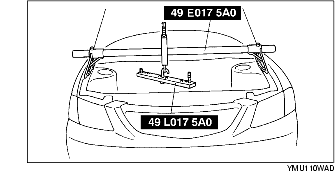
3. Support the engine using the SSTs.
4. Remove the front wheels and tires. (See WHEEL AND TIRE REMOVAL/INSTALLATION.)
5. Remove the under cover.
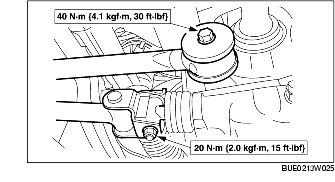
6. Remove the pitch bolt and nut of the front lower arm ball joint (one each side).
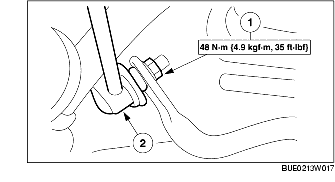
7. Disconnect the stabilizer control link.
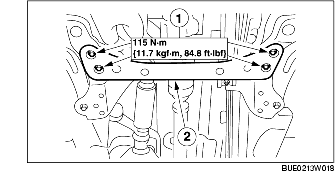
8. Remove the transverse member.
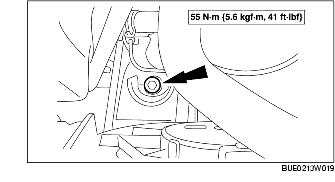
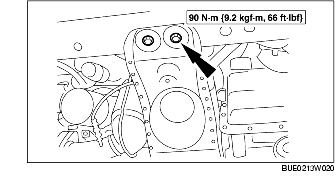
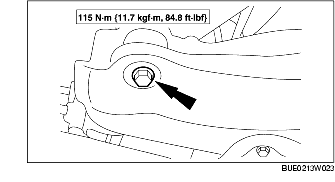
9. Remove the No. 2 engine mount bolt.
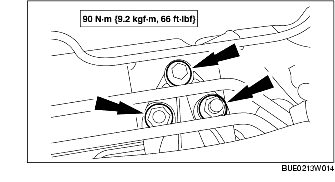
10. Remove the engine mount member bolts.
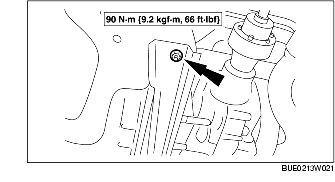
11. Remove the nut, then remove the engine mount member.
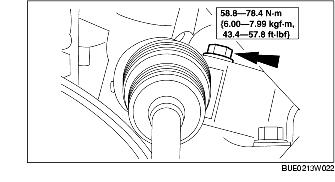
12. Remove the two steering gear bolts.
13. Disconnect the steering gear and linkage from the crossmember.
14. Remove the front pipe (AJ (3.0L Duratec)) or the catalytic converter (L3). (See FRONT PIPE REMOVAL/INSTALLATION [AJ (3.0L Duratec)].) (See. EXHAUST SYSTEM REMOVAL/INSTALLATION [L3].)
15. Remove the two bolts and disconnect the manual transmission shift linkage. (MTX)
16. Remove the propeller shaft. (4WD) (See PROPELLER SHAFT REMOVAL/INSTALLATION.)
17. Lower the rear of the engine approx. 150 mm {5.91 in}.
18. Loosen the front two crossmember bolts but do not remove them.
19. With another person, remove the crossmember nuts and lower the crossmember from the vehicle.
20. Transfer necessary component parts.
21. Install in the reverse order of removal.