All vehicles
1. Remove the air cleaner. (See AIR CLEANER REMOVAL/INSTALLATION [YF (2.0L Zetec)].)(See AIR CLEANER REMOVAL/INSTALLATION [AJ (3.0L Duratec)].)
2. Remove the battery. (See BATTERY REMOVAL/INSTALLATION [YF (2.0L Zetec)].)(See BATTERY REMOVAL/INSTALLATION [L3, AJ (3.0L Duratec)].)
3. Remove the No.1 engine mount rubber.
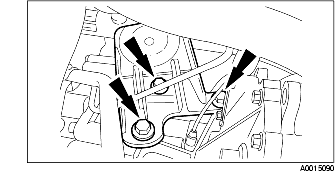
4. Remove the No.1 engine bracket.
5. Remove the front wheels.
6. Remove the tie-rod end.
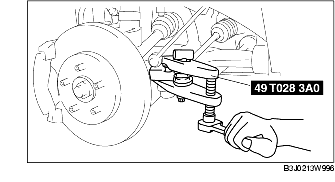
7. Disconnect the tie-rod end from the knuckle using the SST.
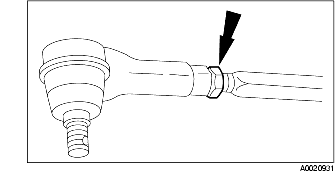
8. Remove the nuts of the tie-rod end and tie rod.
9. Remove the boot installation nut.
10. Remove the bolt between the intermediate shaft and steering gear.
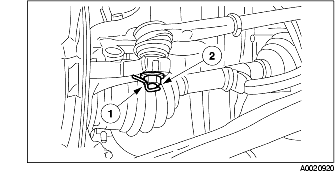
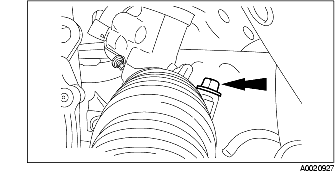
11. Disconnect the power steering pressure line and return line.
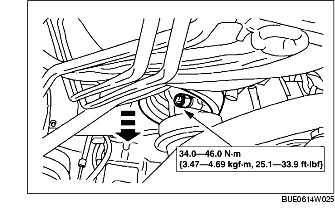
12. Remove the two steering gear mount bolts.
13. Remove the steering gear from RH side.
1. Install the steering gear from RH side.
2. Install the two steering gear mount bolts.
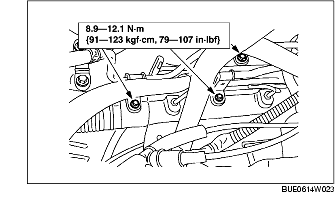
3. Connect the power steering pressure line and return line bracket bolts.
4. Connect the power steering pressure line and return line to the steering gear.
5. Install the bolt between the steering shaft and steering gear.
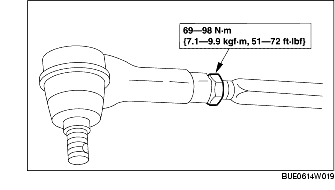
6. Install the tie-rod end to the tie rod.
7. Tighten the tie rod locknut.
8. Install the tie-rod end to the knuckle.
9. Install the front wheels.
10. Install the No.1 engine bracket. (Vehicle with manual transmission)
11. Install the No.1 engine bracket. (Vehicle with automatic transmission)
12. Install the No.1 engine mount, bolt, and nut.
13. Add the power steering fluid, bleed the system, and then inspect the system for leakage.
14. Adjust the front wheel alignment to the specification. (See FRONT WHEEL ALIGNMENT.)