Removal And Installation
REAR SUSPENSION MEMBER
Removal and Installation
REMOVAL
1. Remove tires with power tool.
2. Remove torque member mounting bolts. Hang torque member where it dose not interfere with work. Refer to Exploded View.
CAUTION:
Never depressing brake pedal while brake caliper is removed.
3. Remove disc rotor. Refer to Removal And Installation.
CAUTION:
- Put matching marks on the wheel hub and bearing assembly and the disc rotor before removing the disc rotor.
- Never drop disc rotor.
4. Remove wheel sensor and sensor harness from axle housing and lower link. Refer to Exploded View Removal And Installation (without VDC), Exploded View (with VDC).
CAUTION:
Never pull on wheel sensor harness.
5. Remove parking brake cable mounting bolts and separate parking brake cable from suspension arm.
Refer to Exploded View.
6. Remove main muffler. Refer to Exploded View.
7. Remove stabilizer bar.
8. Remove drive shaft (AWD). Refer to .
9. Remove propeller shaft (AWD). Refer to Exploded View.
10. Remove rear final drive (AWD). Refer to .
11. Remove shock absorber.
12. Remove coil spring.
13. Set suitable jack under rear suspension member.
14. Remove mounting nuts and bolts from rear suspension member.
15. Slowly lower jack, then remove rear suspension member, lower link and upper link from vehicle as a unit.
CAUTION:
Secure suspension assembly to a suitable jack while removing it.
16. Remove mounting bolts and nuts, then remove lower link, upper link and suspension member protector (2WD) from rear suspension member.
INSTALLATION
Note the following, and install in the reverse order of the removal.
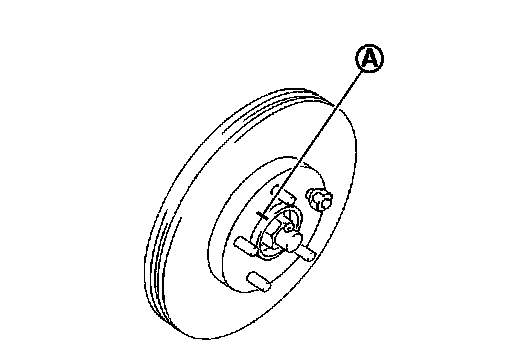
- Align the matching marks (A) made during removal when reusing the disc rotor.
- Perform the final tightening of each parts removed when removing rear suspension assembly under unladen conditions.
- Check wheel sensor harness for proper connection. Refer to Exploded View (without VDC), Exploded View (with VDC).