Front Suspension
Removal Procedure- Tools Required
- J 21474-4 1/2 inch Nut
- J 21474-18 3/8 inch Nut
- J 21474-19318 inch Bolt
- J 23444-A High Pressure Lubricant
- J 41211 Lower Front Control Arm Vertical Bushing Set
- J 41397Lower Control Arm Bushings Remover/Installer
1. Remove the lower control arm. Refer to Lower Control Arm Replacement.
2. Secure the lower control arm in a vice.
Important: Apply J 23444 A (or equivalent high pressure lubricant) to the threads of the J 21474-19
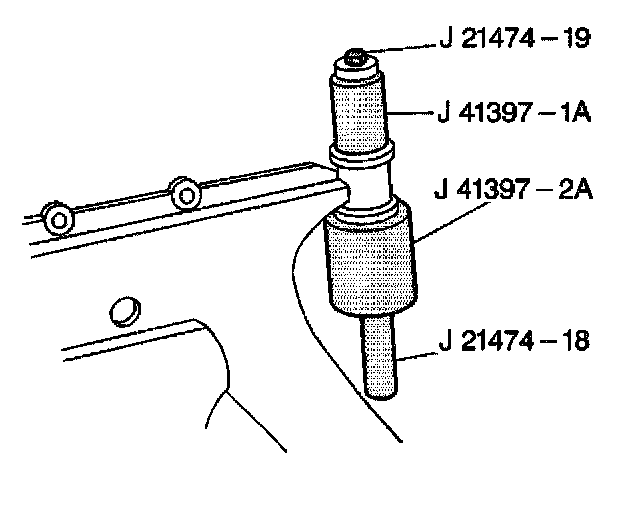
3. Assemble the following bushing removal tools as shown:
- J 21474-19
- The remover/installer from the J 41397
- The receiver from the J 41397
- J 21474-18
4. - Tighten the J 21474-18 until the front bushing is removed from the control arm.
5. Disassemble the bushing removal tools.
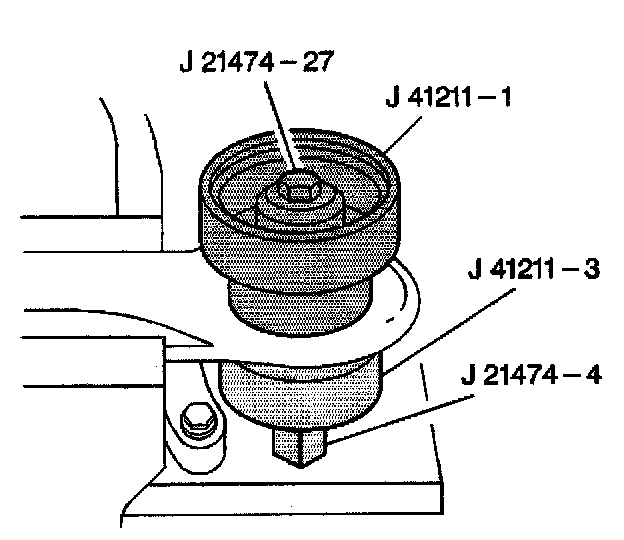
6. Assemble the following bushing removal tools as shown:
- J 21474-27
- The remover/installer from the J 41211
- The receiver from the J 41211
- J 21474-4
7. Tighten the J 21474-27 until the rear bushing is removed from the control arm.
8. Disassemble the bushing removal tools.
Installation Procedure

1. Insert the rear bushing into the control arm.
Important: Apply J 23444 A (or equivalent high pressure lubricant) to the threads of the J 21474-27.
2. Assemble the following bushing installation tools as shown:
- J 21474-27
- The receiver/installer from the J 41211
- The receiver from the J 41211
- J 21474-4
3. Tighten the J 21474-4 until the rear bushing is fully seated in the control arm.
4. Disassemble the bushing installation tools.
5. Lubricate the outer casing of the front bushing.
6. Insert the front bushing into the control arm.
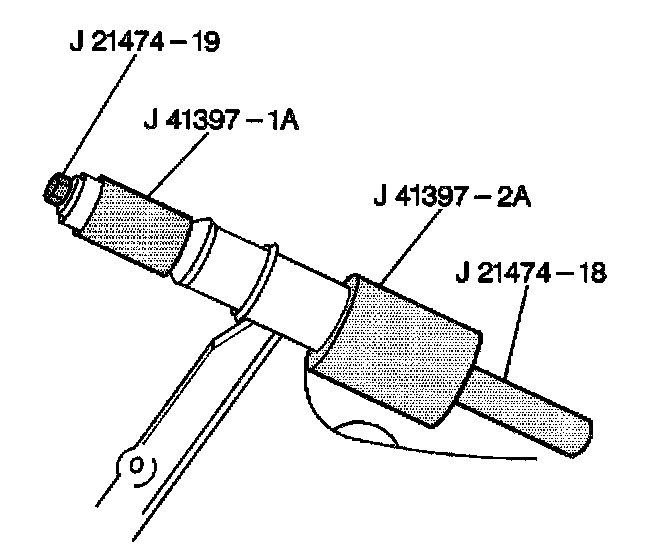
7. Assemble the following bushing installation tools as shown:
- J 21474-19
- The remover/installer from the J 41397
- The receiver from the J 41397
- J 21474-18
8. Tighten the J21474-19 until the front bushing is fully seated in the control arm.
9. Disassemble the bushing installation tools.
10. Install the lower control arm. Refer to Lower Control Arm Replacement.