Differential Carrier Assembly Mount Replacement
Differential Carrier Assembly Mount ReplacementRemoval Procedure
1. Raise and support the vehicle. Refer to Vehicle Lifting.
2. Support the front of the differential with a suitable stand.
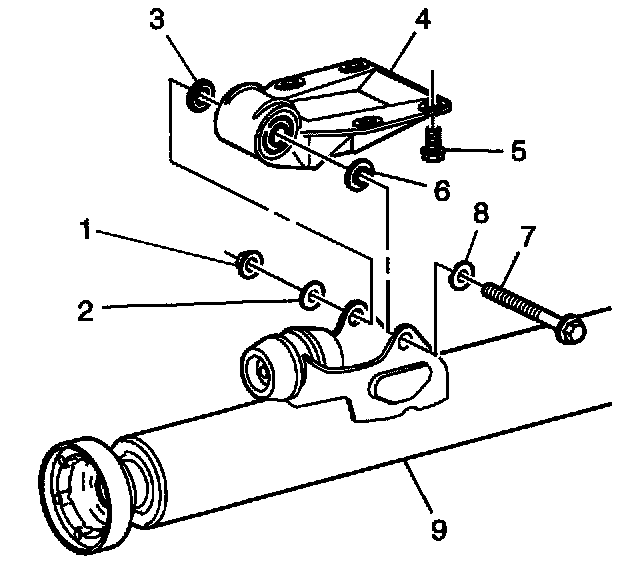
3. Loosen, but do not remove, the torque tube-to-bracket through bolt (7) and nut (1).
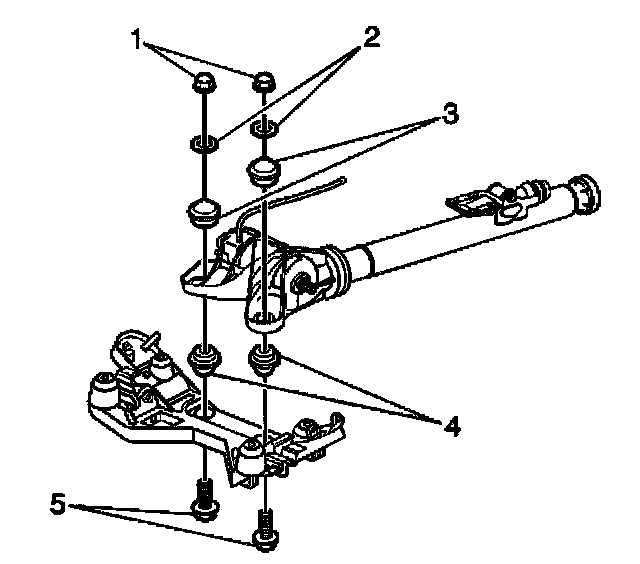
4. Remove the cradle-to-differential mounting bolts (5), nuts (1), washers (2), and bushings (3) from the differential.
5. Raise the stand slightly in order to gain access to the differential-to-cradle bushings.
6. Remove the differential-to-cradle bushings (4).
Installation Procedure
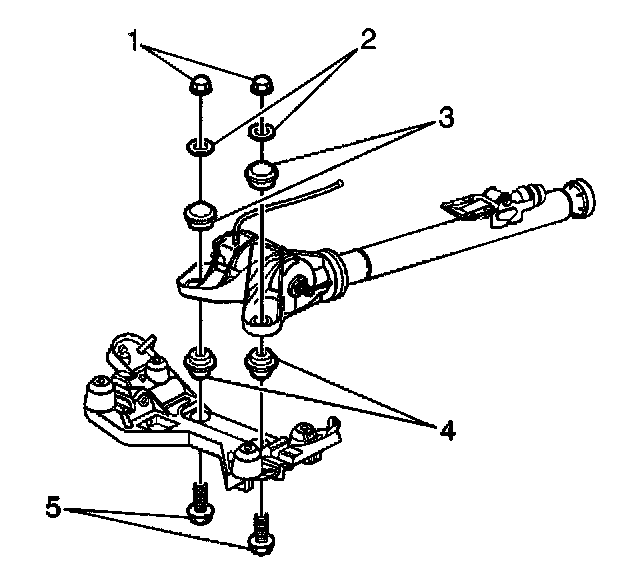
1. Install the differential-to-cradle bushings (4).
2. Lower and remove the jack stand.
Notice: Refer to Fastener Notice in Service Precautions.
3. Install the cradle-to-differential mounting bolts (5), bushings (3), washers (2), and nuts (1) to the differential.
^ Tighten the bolts and nuts to 50 Nm (37 ft. lbs.).
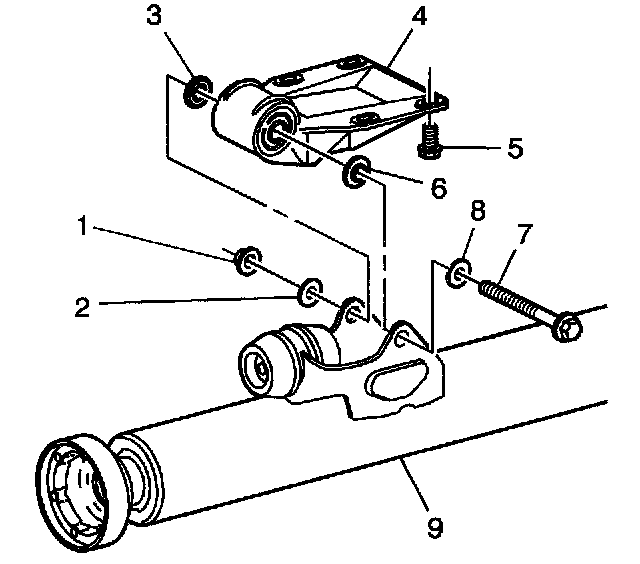
4. Secure the torque tube-to-bracket through bolt (7) and nut (1).
^ Tighten the bolt and nut to 64 Nm (47 ft. lbs.).
5. Lower the vehicle.